How to string a racquet
Published:
This page explains how to string a tennis racquet. When my kids started playing tennis competitively in 2020, it became expensive and inconvenient to frequently visit a racquet shop for stringing. For Christmas, we bought a string machine, and I learned to string by watching some YouTube videos and articles. Most of them don’t cover all the fine details, so here I try to be as comprehensive as possible.
Before getting started
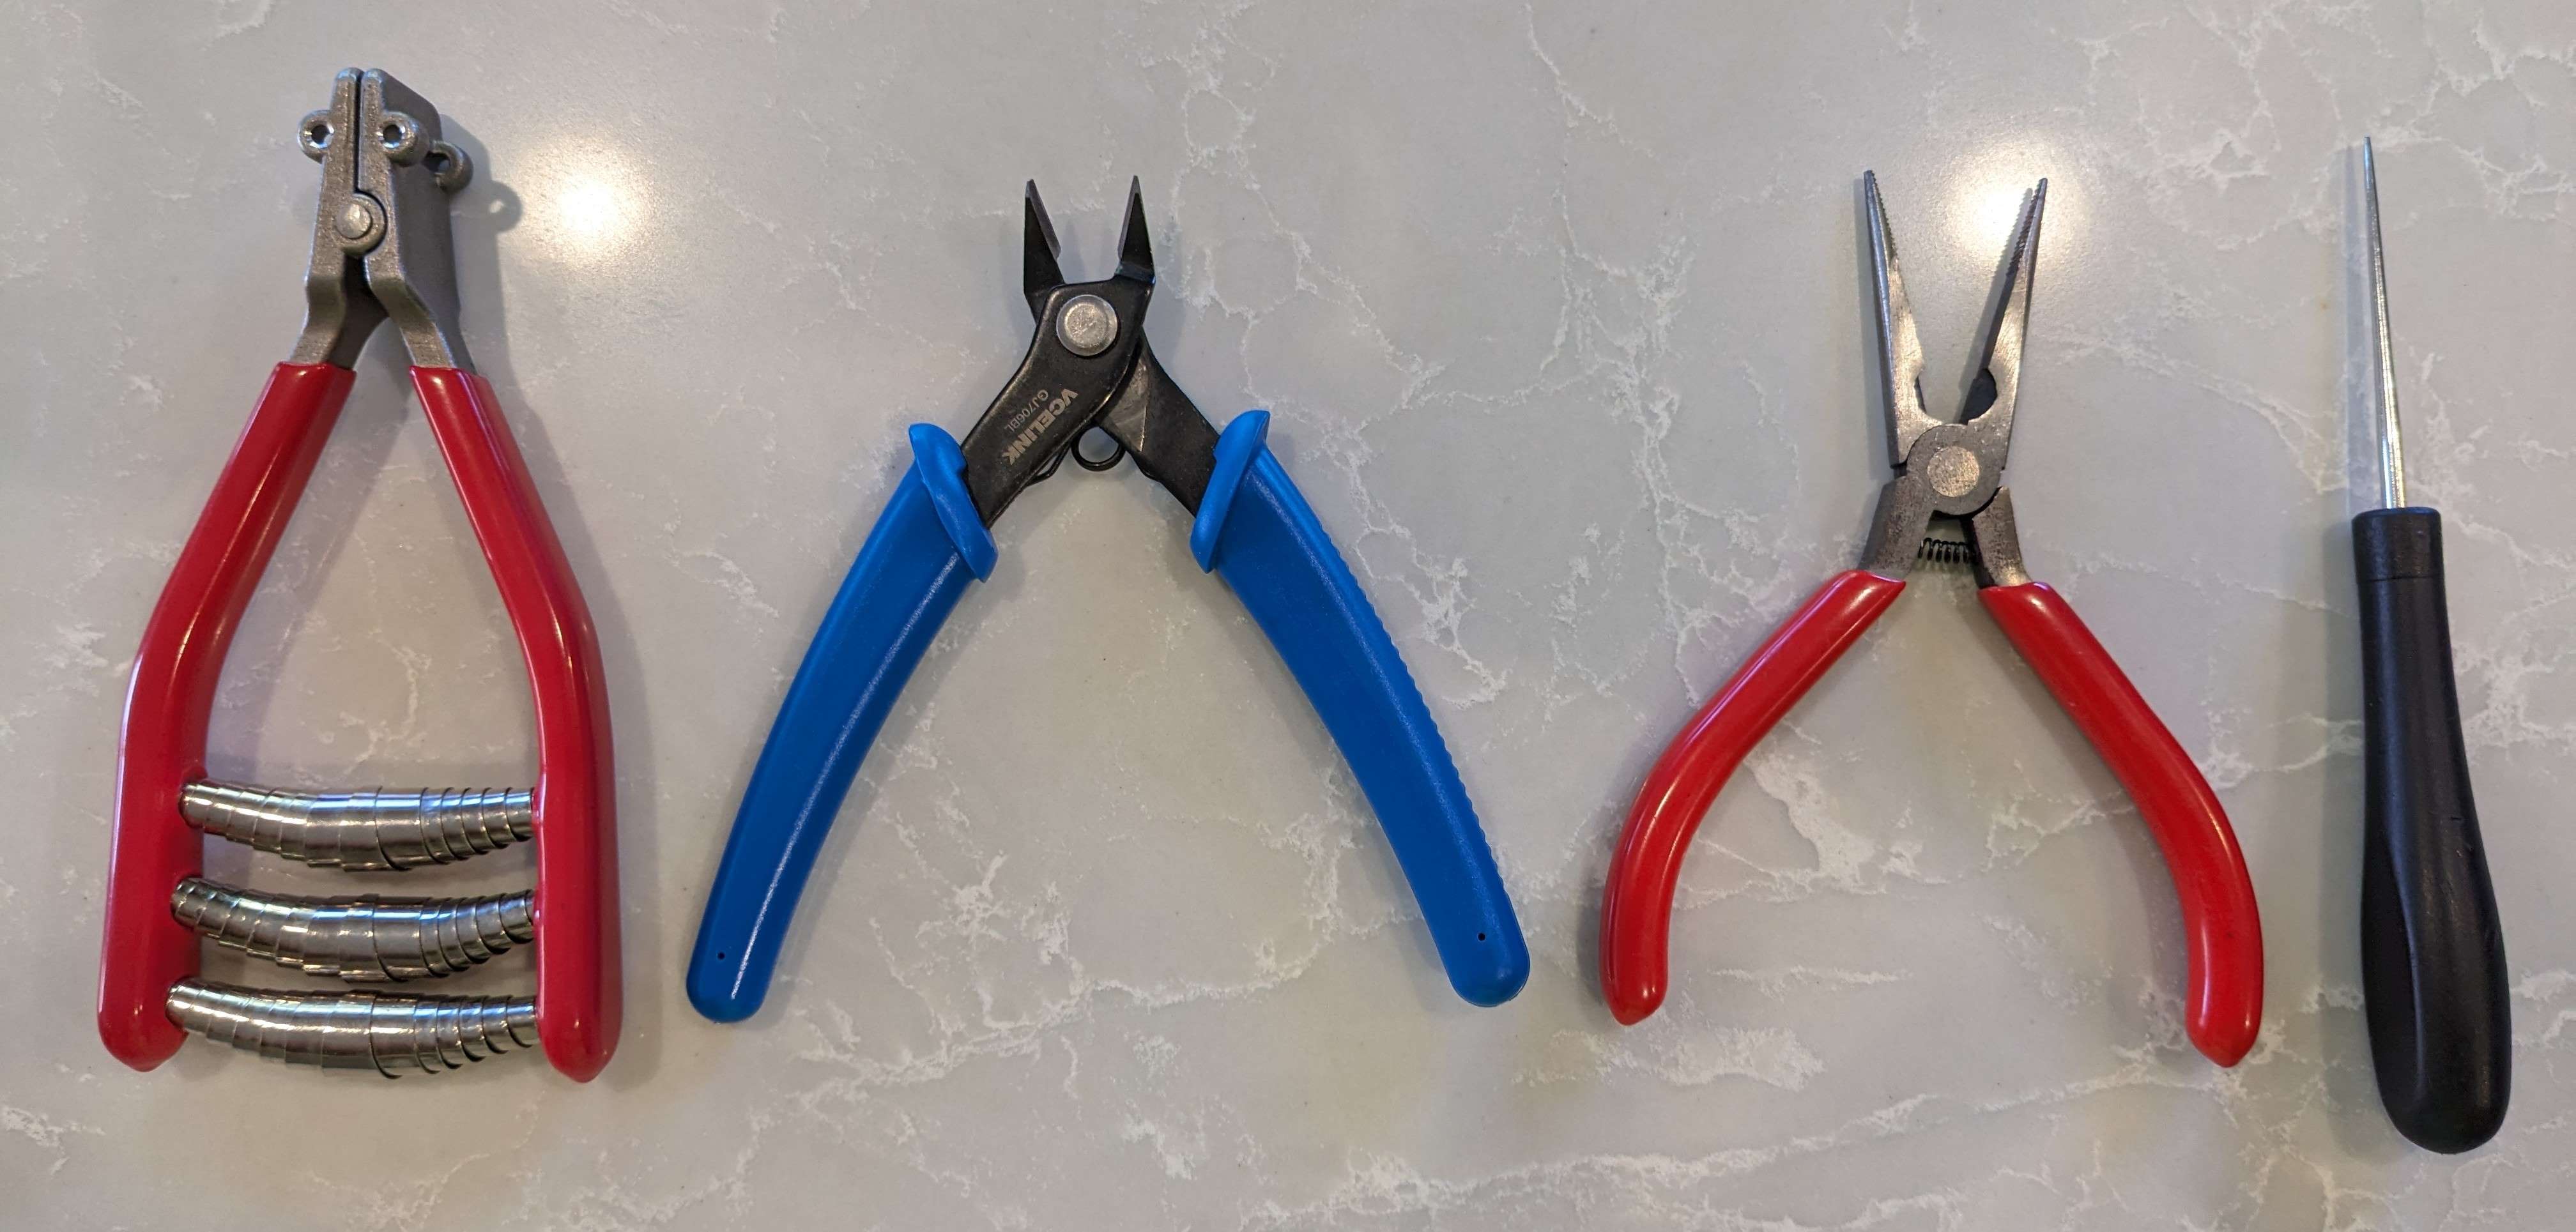
Before getting started, you need a string machine and tools. The tools you need are shown in the picture below. From left to right, the items are:
- stringing clamp (useful for starting the mains and tying knots)
- small wire cutter (necessary for cutting strings)
- needle-nose plier (useful for removing old strings)
- straight awl (useful for working in narrow area)
Place the racquet
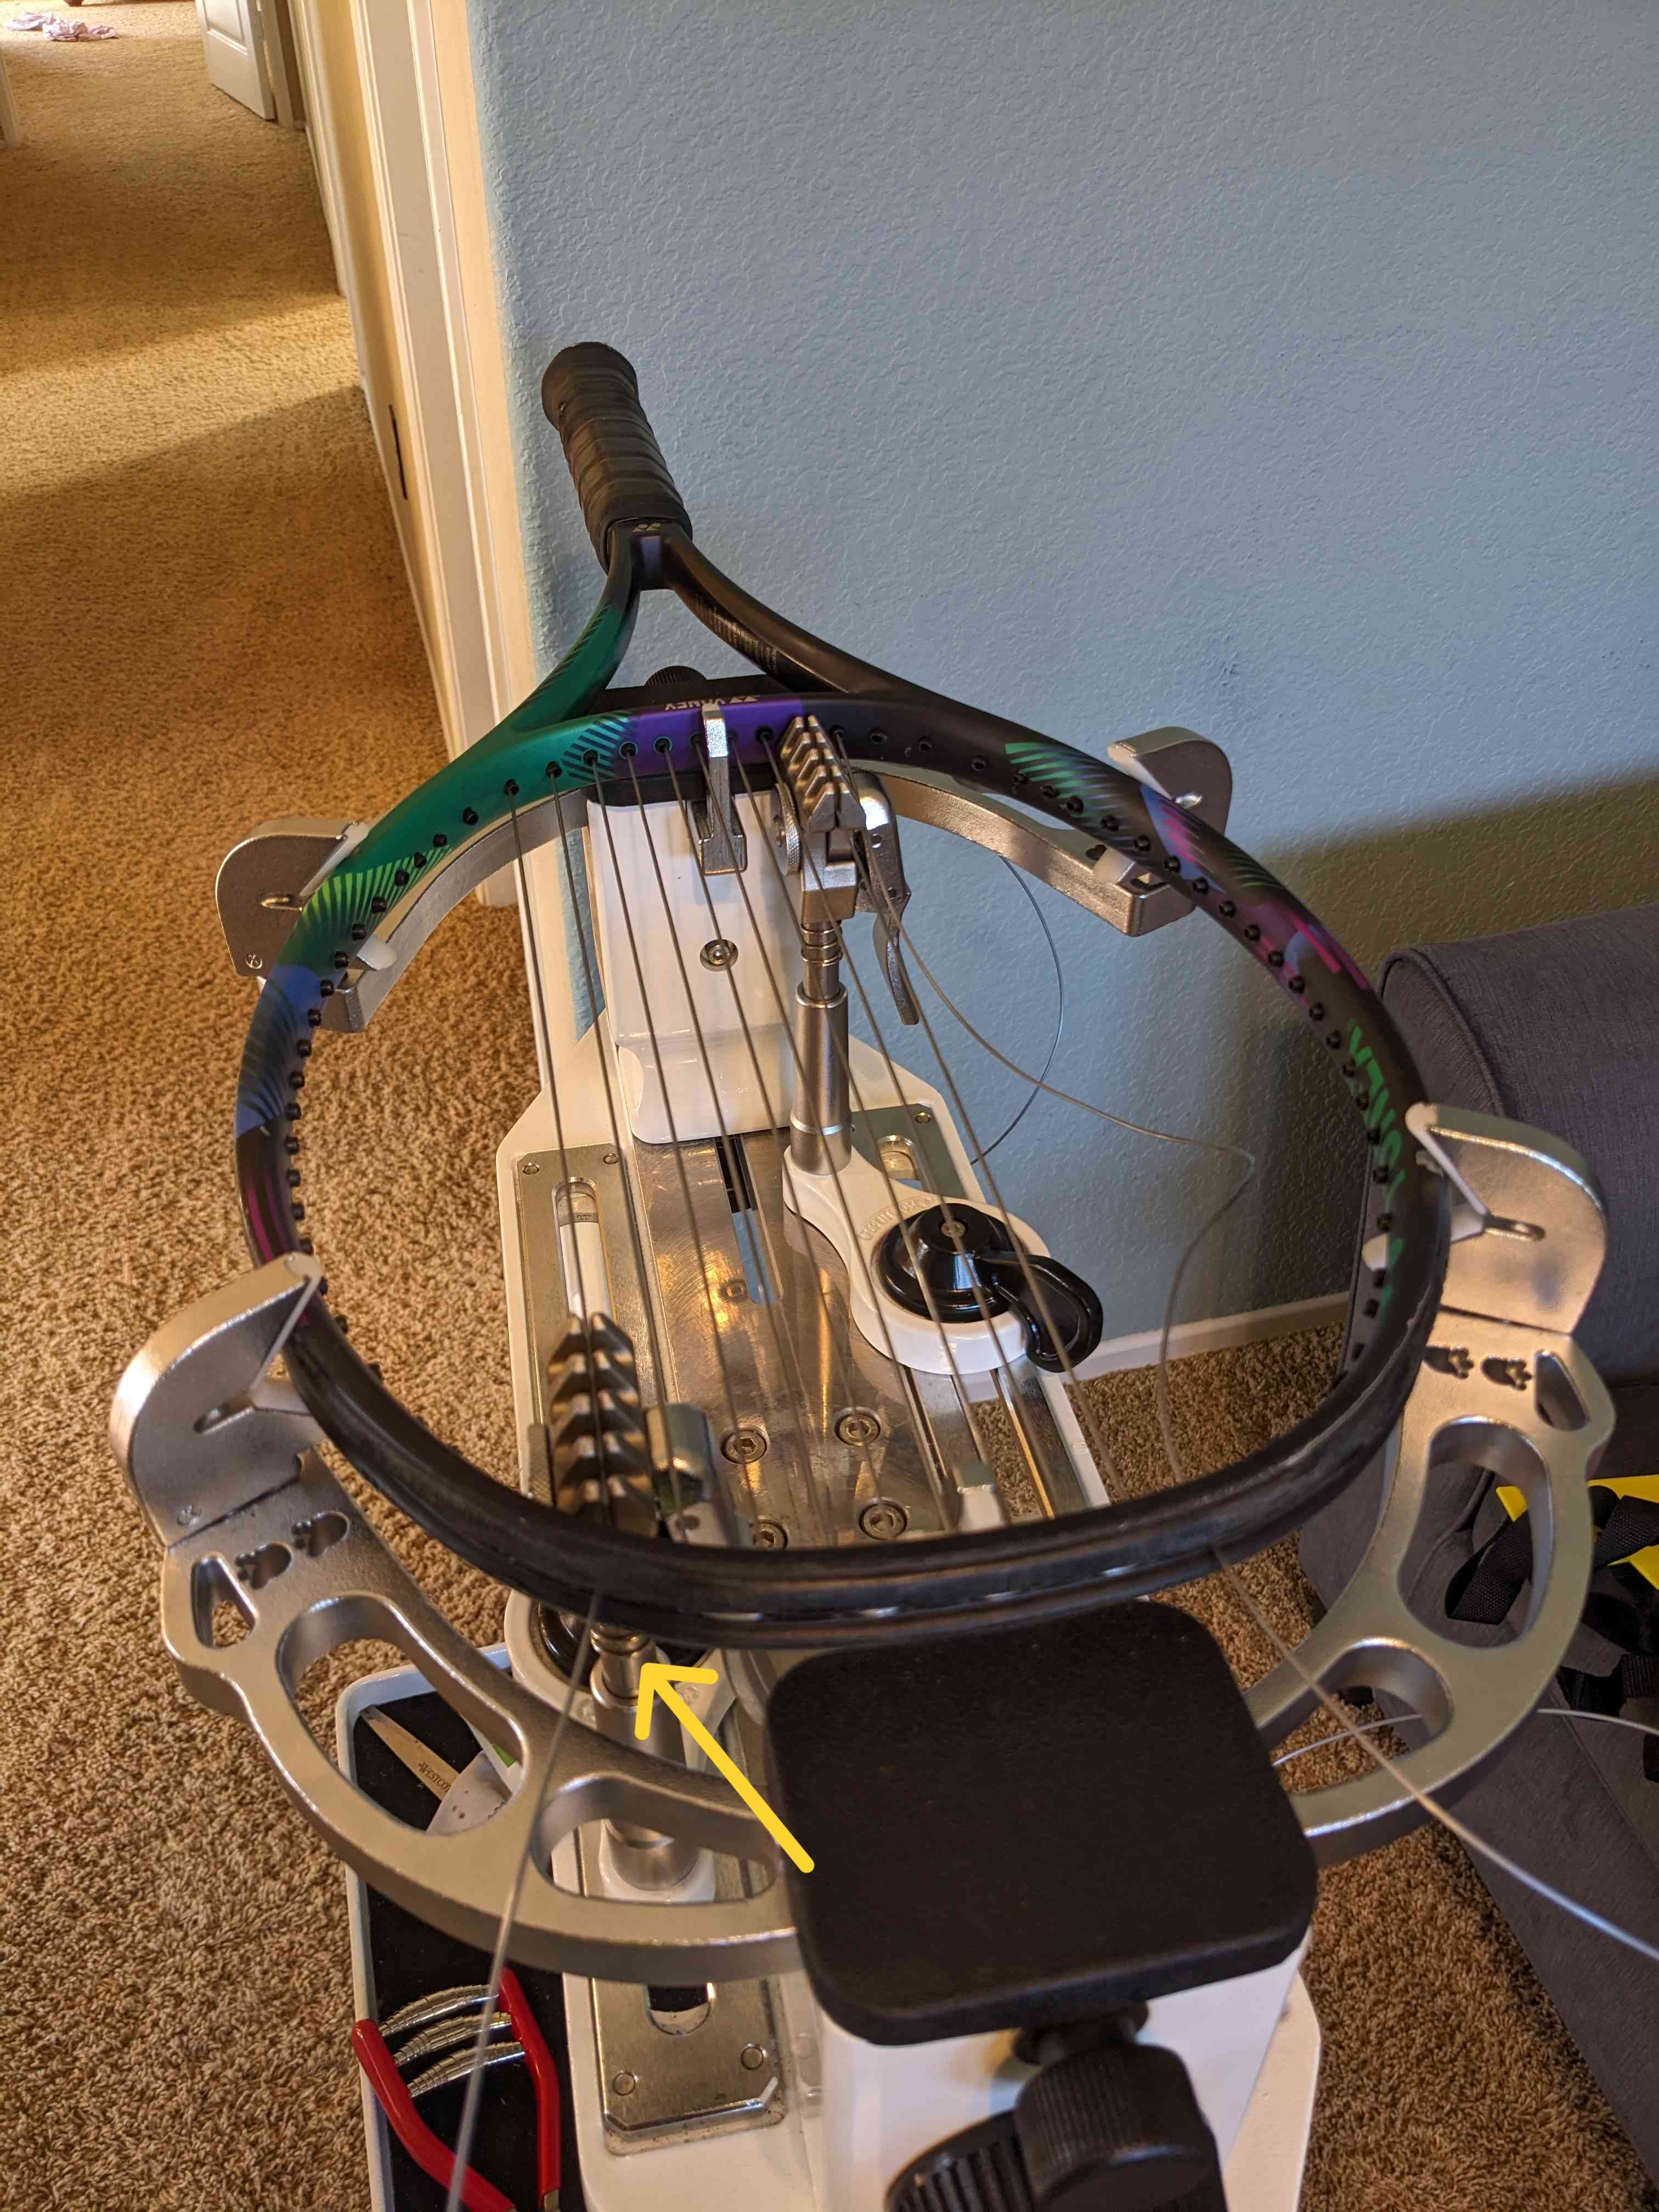
Place the racquet with the bevel in the “up” side as in the picture below, where you can read “JAPAN”. This step is not essential but is important for consistent results.

Prepare the main strings
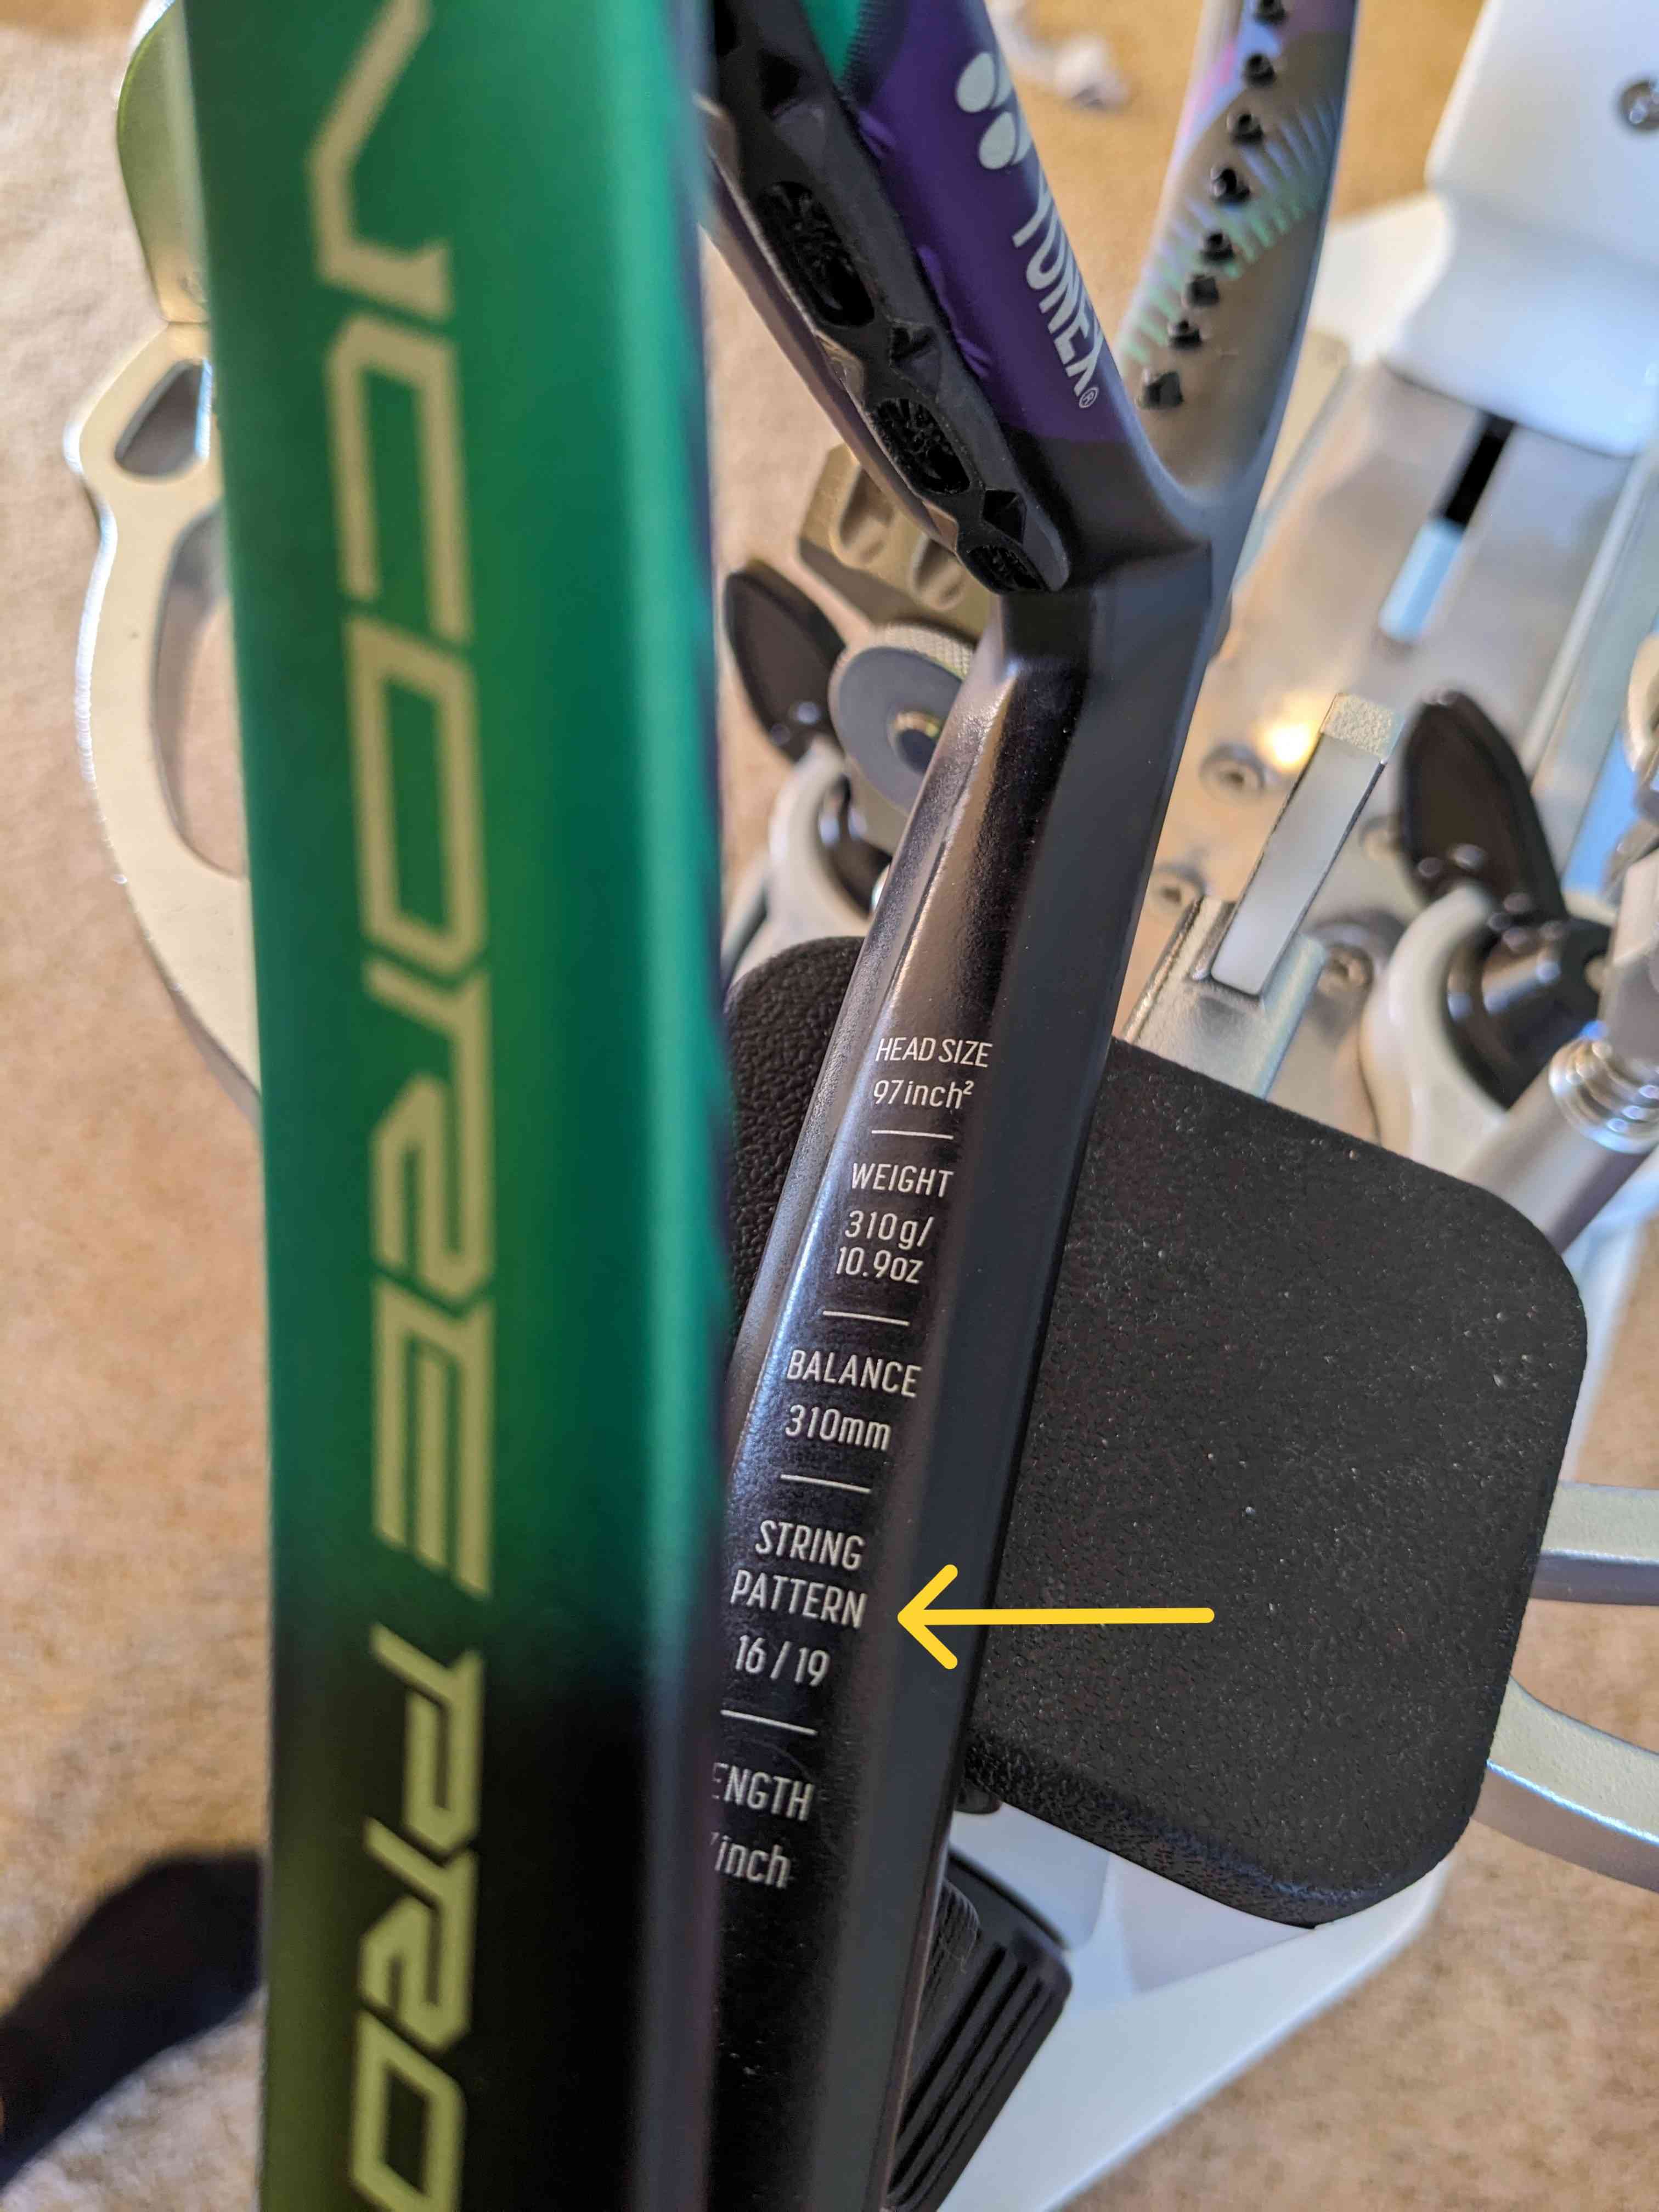
Identify the string pattern of the racquet from the information on the frame. Most racquets (like the picture below) have string patterns 16/19, meaning there are 16 mains and 19 crosses.
To determine the length of the string for the mains, count “main plus 1”. For instance, if the string pattern is 16/19, count 17 times from inside the frame to outside the frame. (“Inside-to-outside” is important; if you count “inside-to-inside”, the string may be too short. If you want to be safe, you may count “main plus 1.5”.)
After correctly counting, cut the string diagonally with the wire cutter. (“Diagonally” is important for reducing the friction when stringing.)
Start stringing the mains
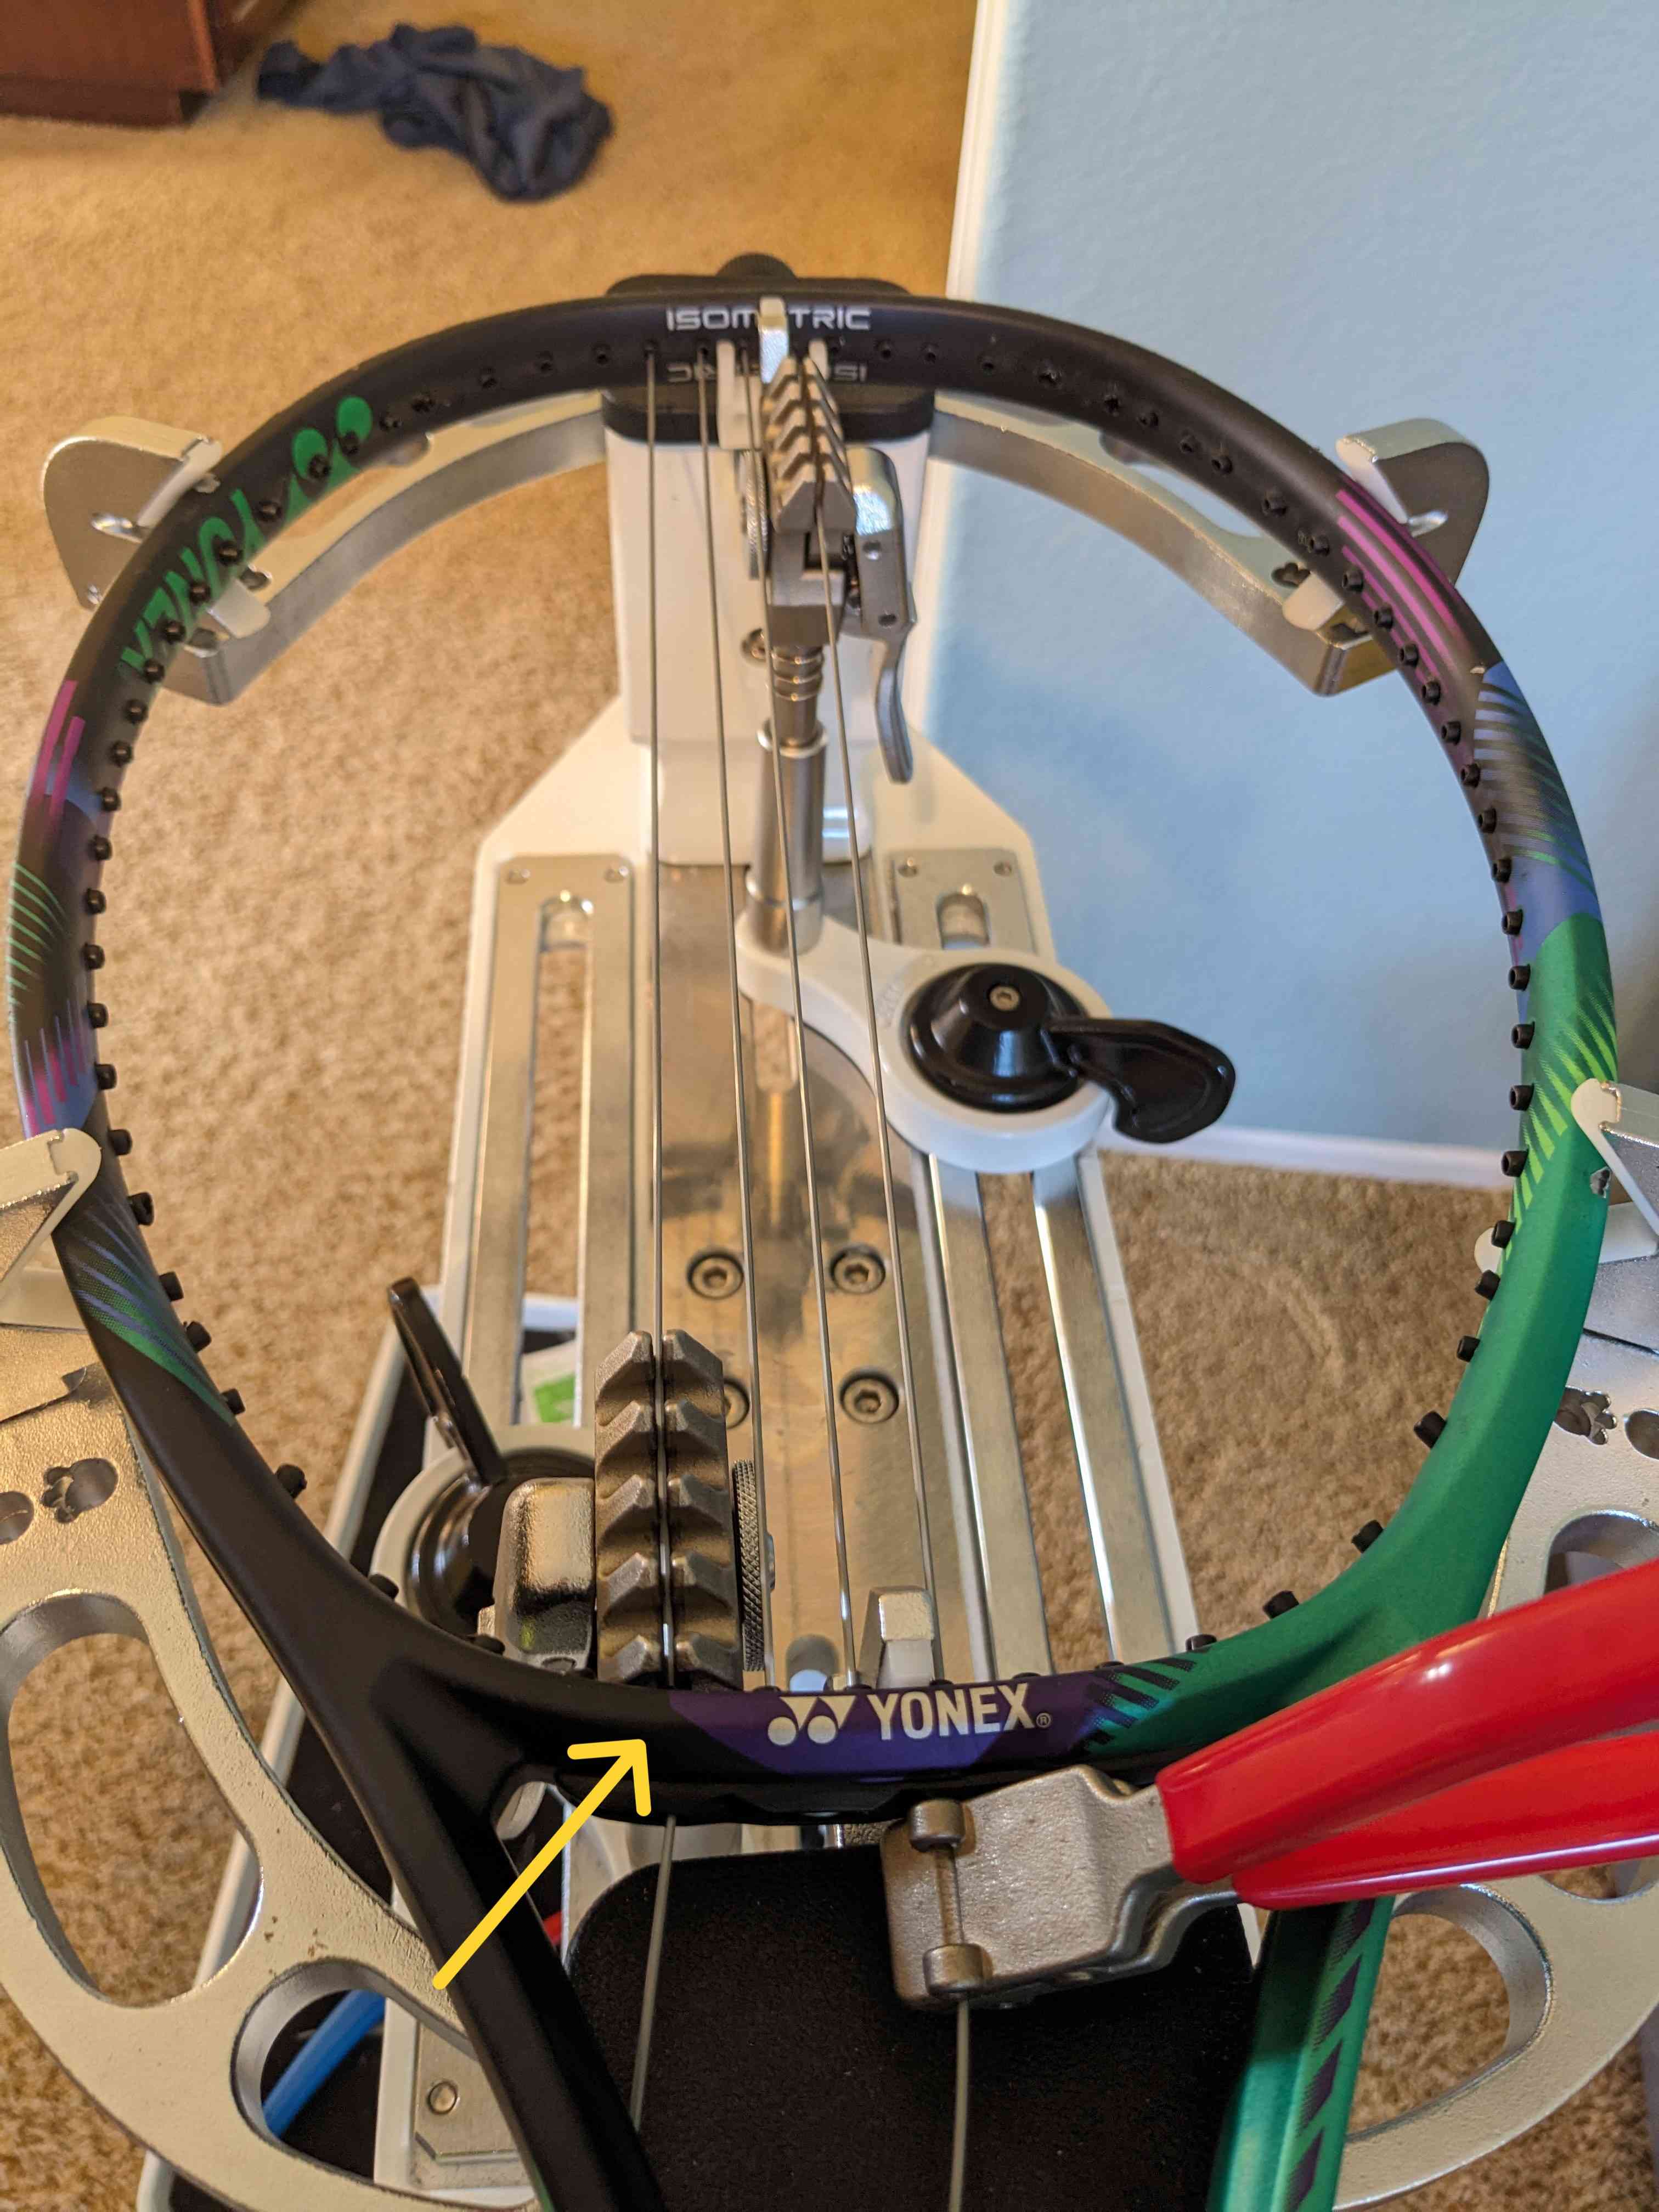
Look carefully at the bottom of the racquet head. Usually, there are either 6 or 8 holes at the bottom. If there are 6 holes, start stringing from the bottom. If there are 8 holes, start stringing from the top. (In the picture below, there are 8 holes, so I am starting from the top, and hence you see the ends of the main strings at the bottom.)
Using the string machine, pull both ends simultaneously. Clamp the far side (inside the frame) with the clamp of the string machine, and the near side (outside the frame) with the stringing clamp. Because you pulled both ends, the tension becomes 1/2 of the setting, but you don’t need to worry about that yet.
Release tension. Now pull only the end that you did not clamp in the previous step (which is the left end in the picture) and clamp the string with the clamp of the string machine (inside and as close as possible to the frame). This string has the desired tension.
Weave the mains
Keep weaving the same end of the main 3 times. Each time, lock the turntable, apply tension, clamp, release tension, and unlock the turntable.
After weaving one end of the main 3 times, weave the other end 6 times. In general, to maintain good balance, the difference in the number of weaved mains should not exceed 3. (In this example, \(3-0=3\) and \(6-3=3\).)
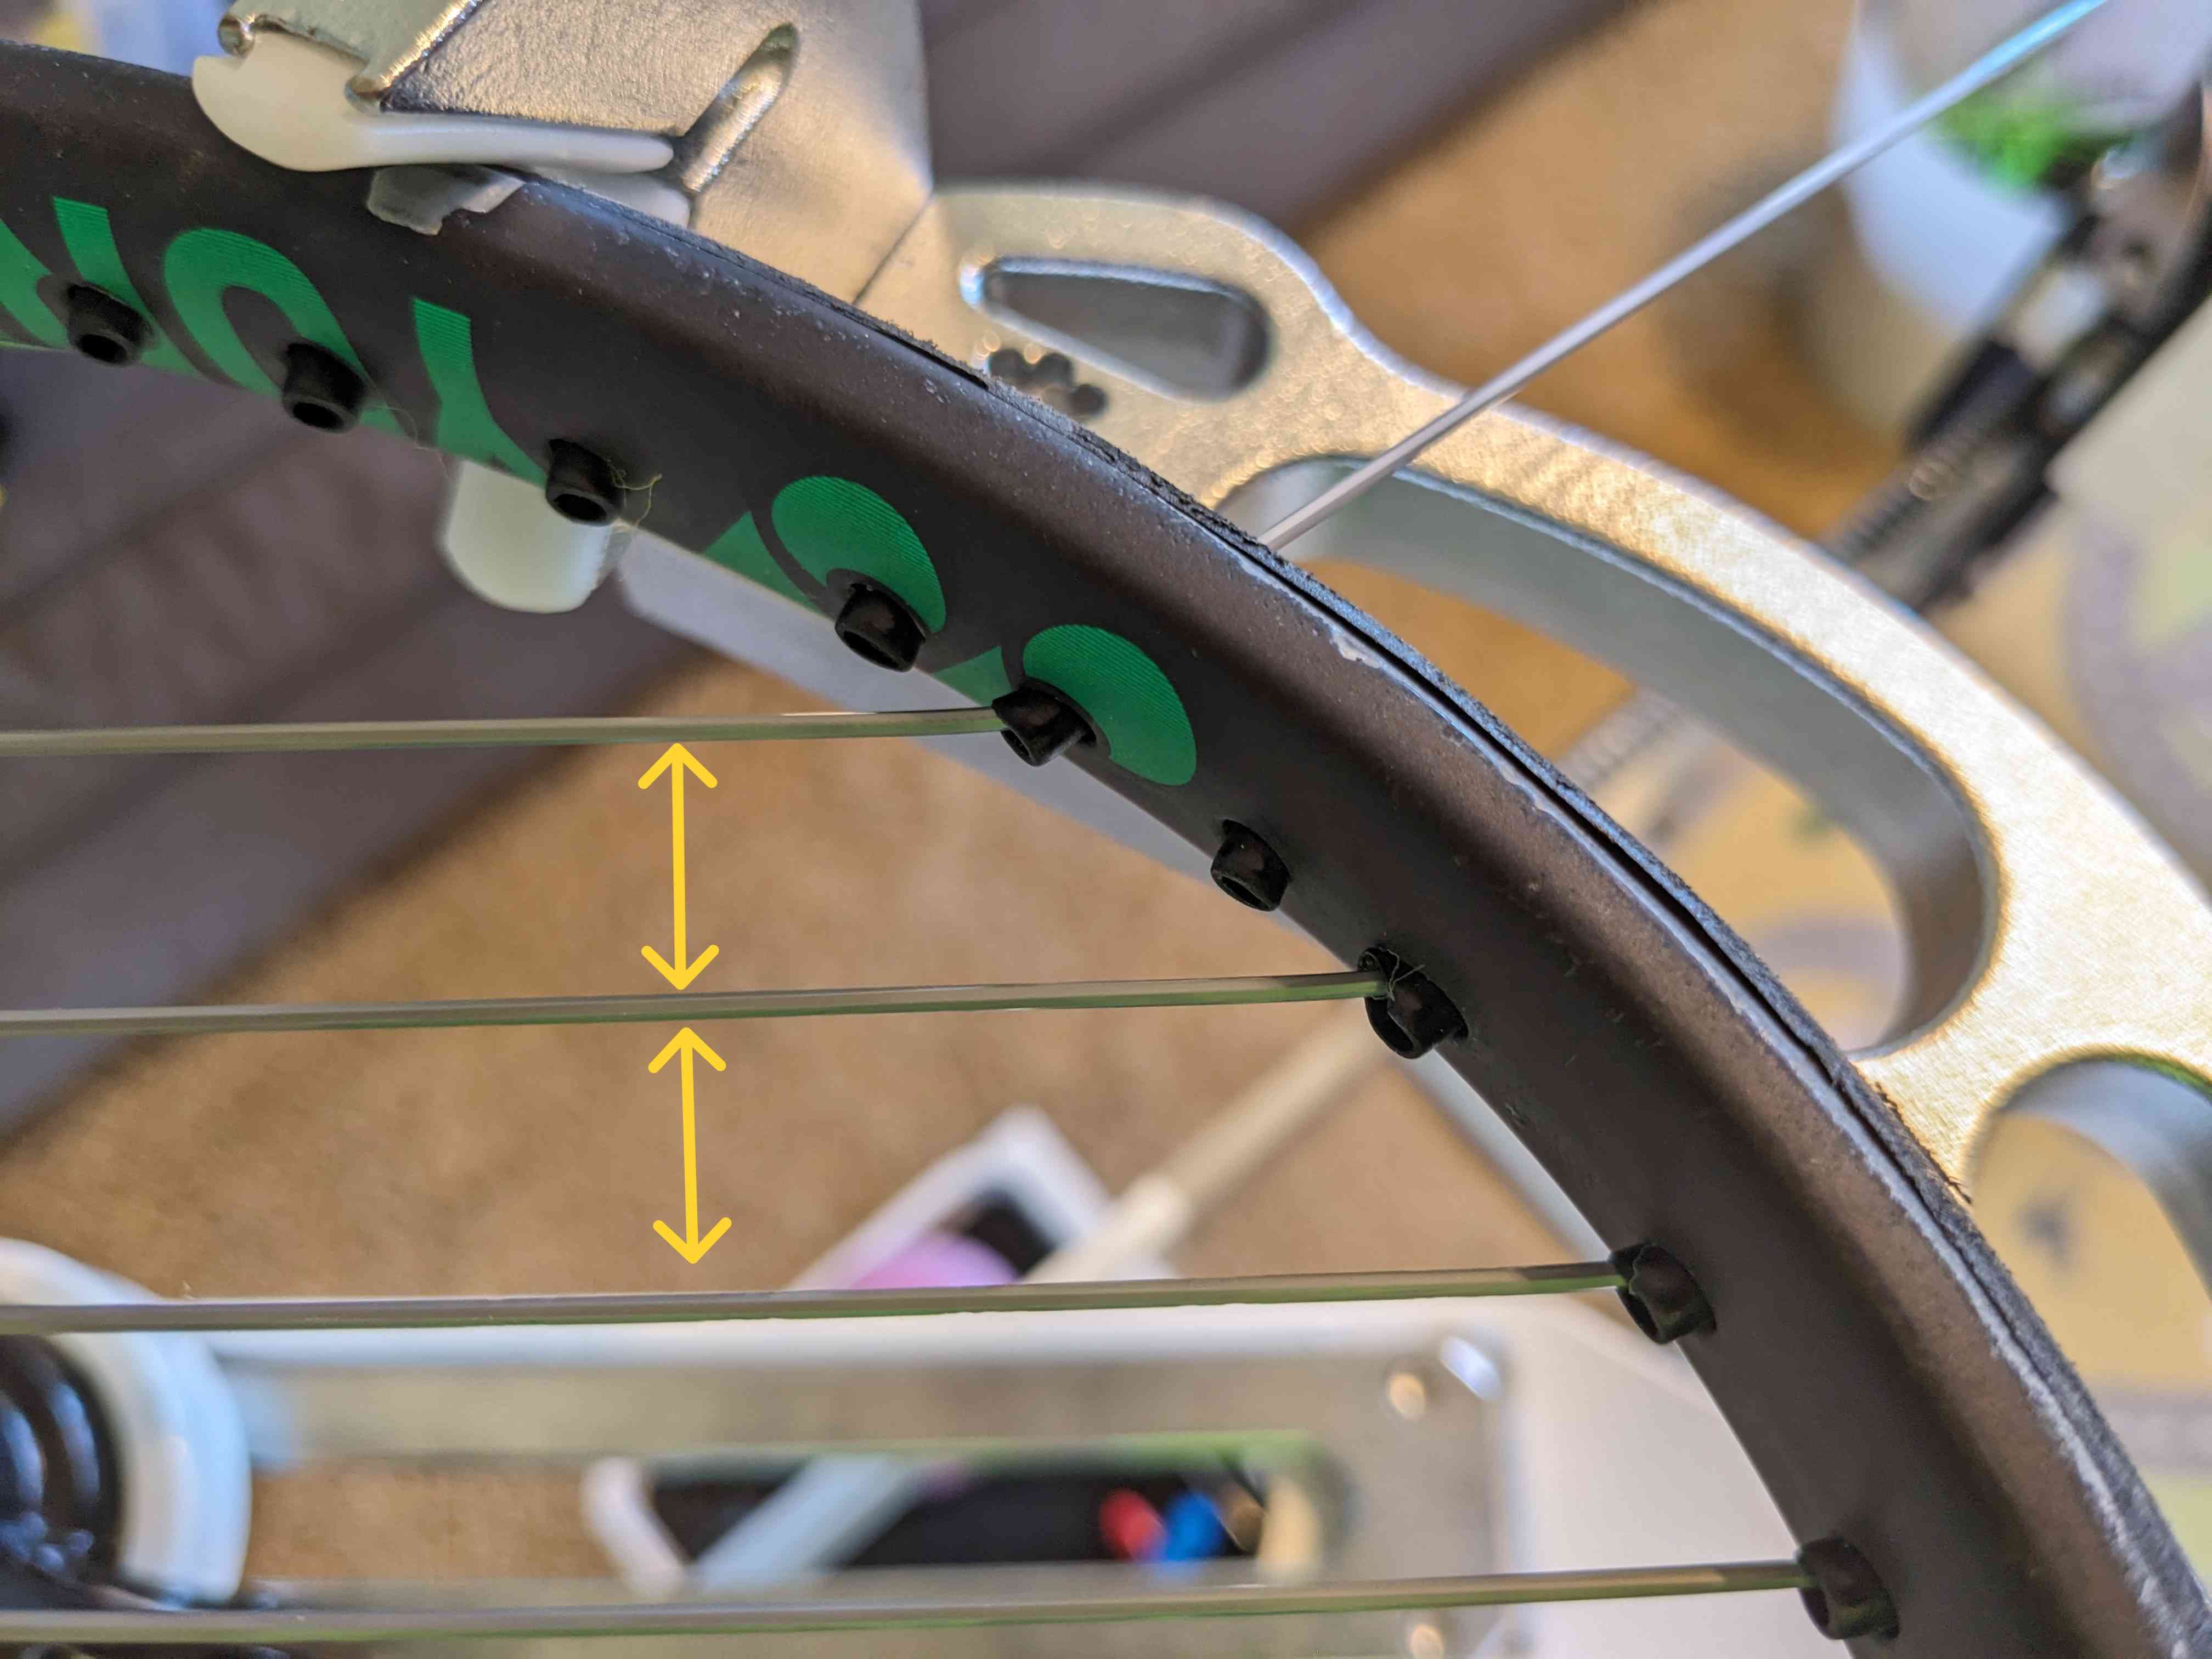
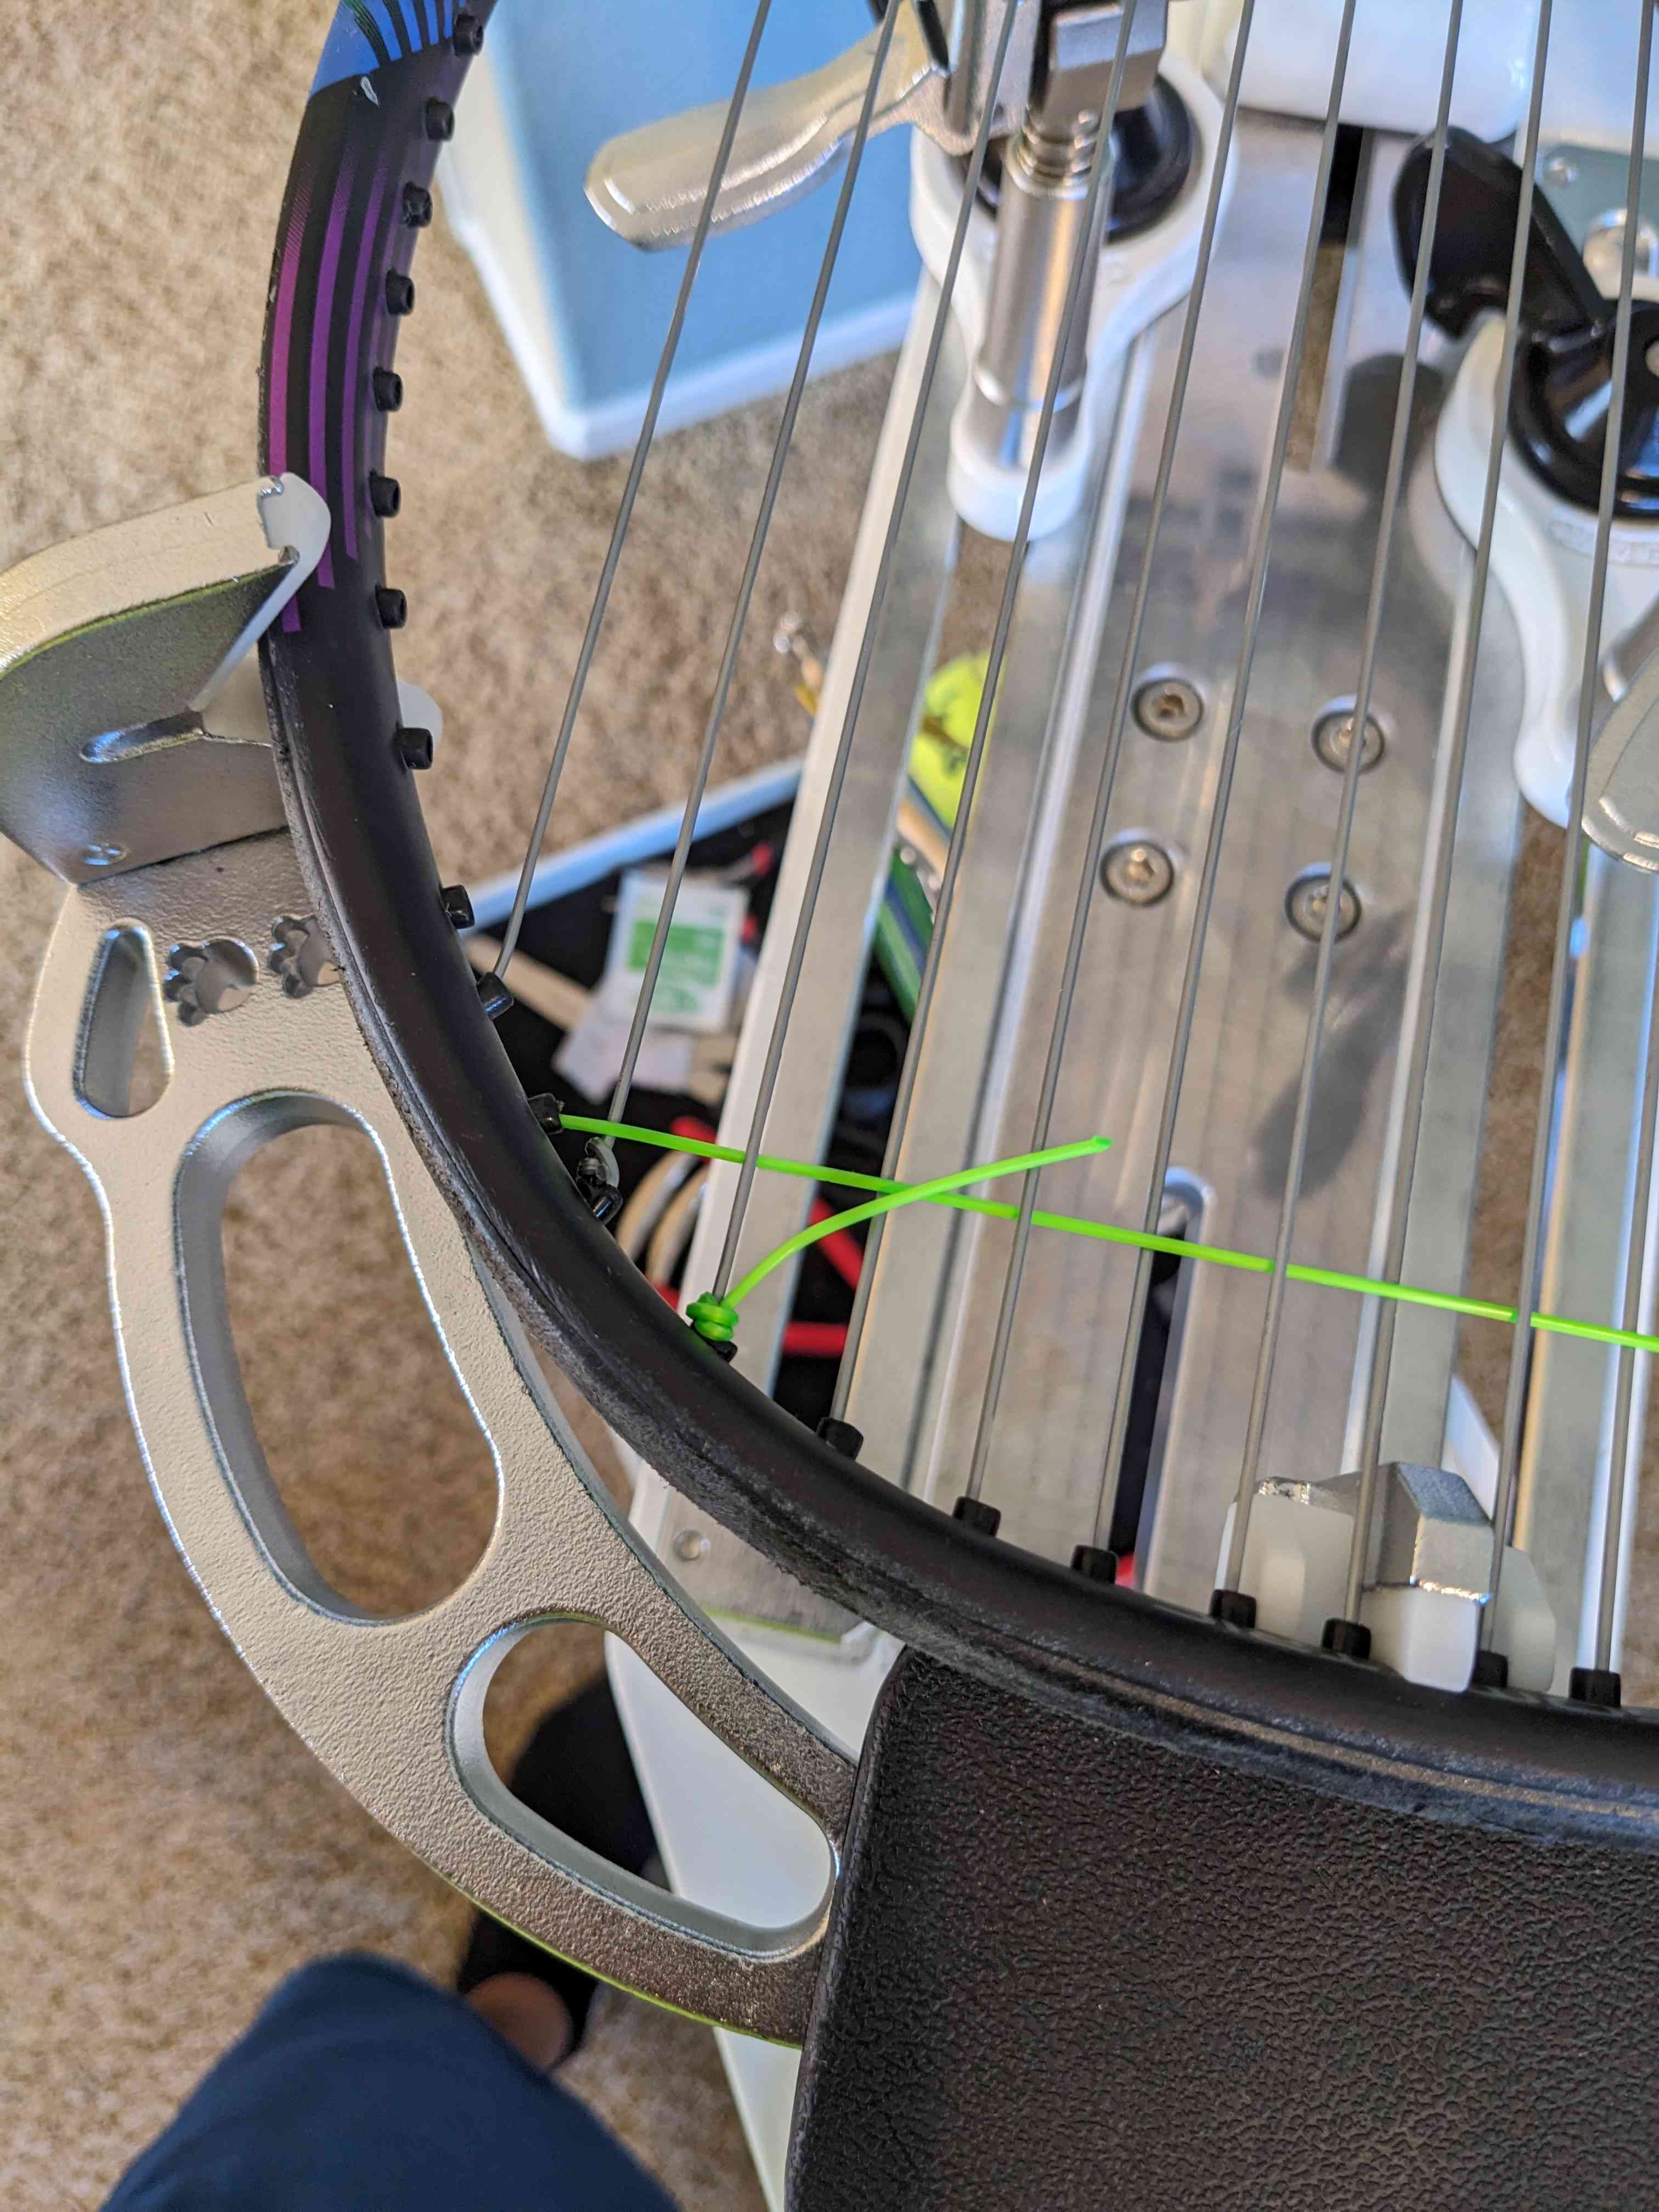
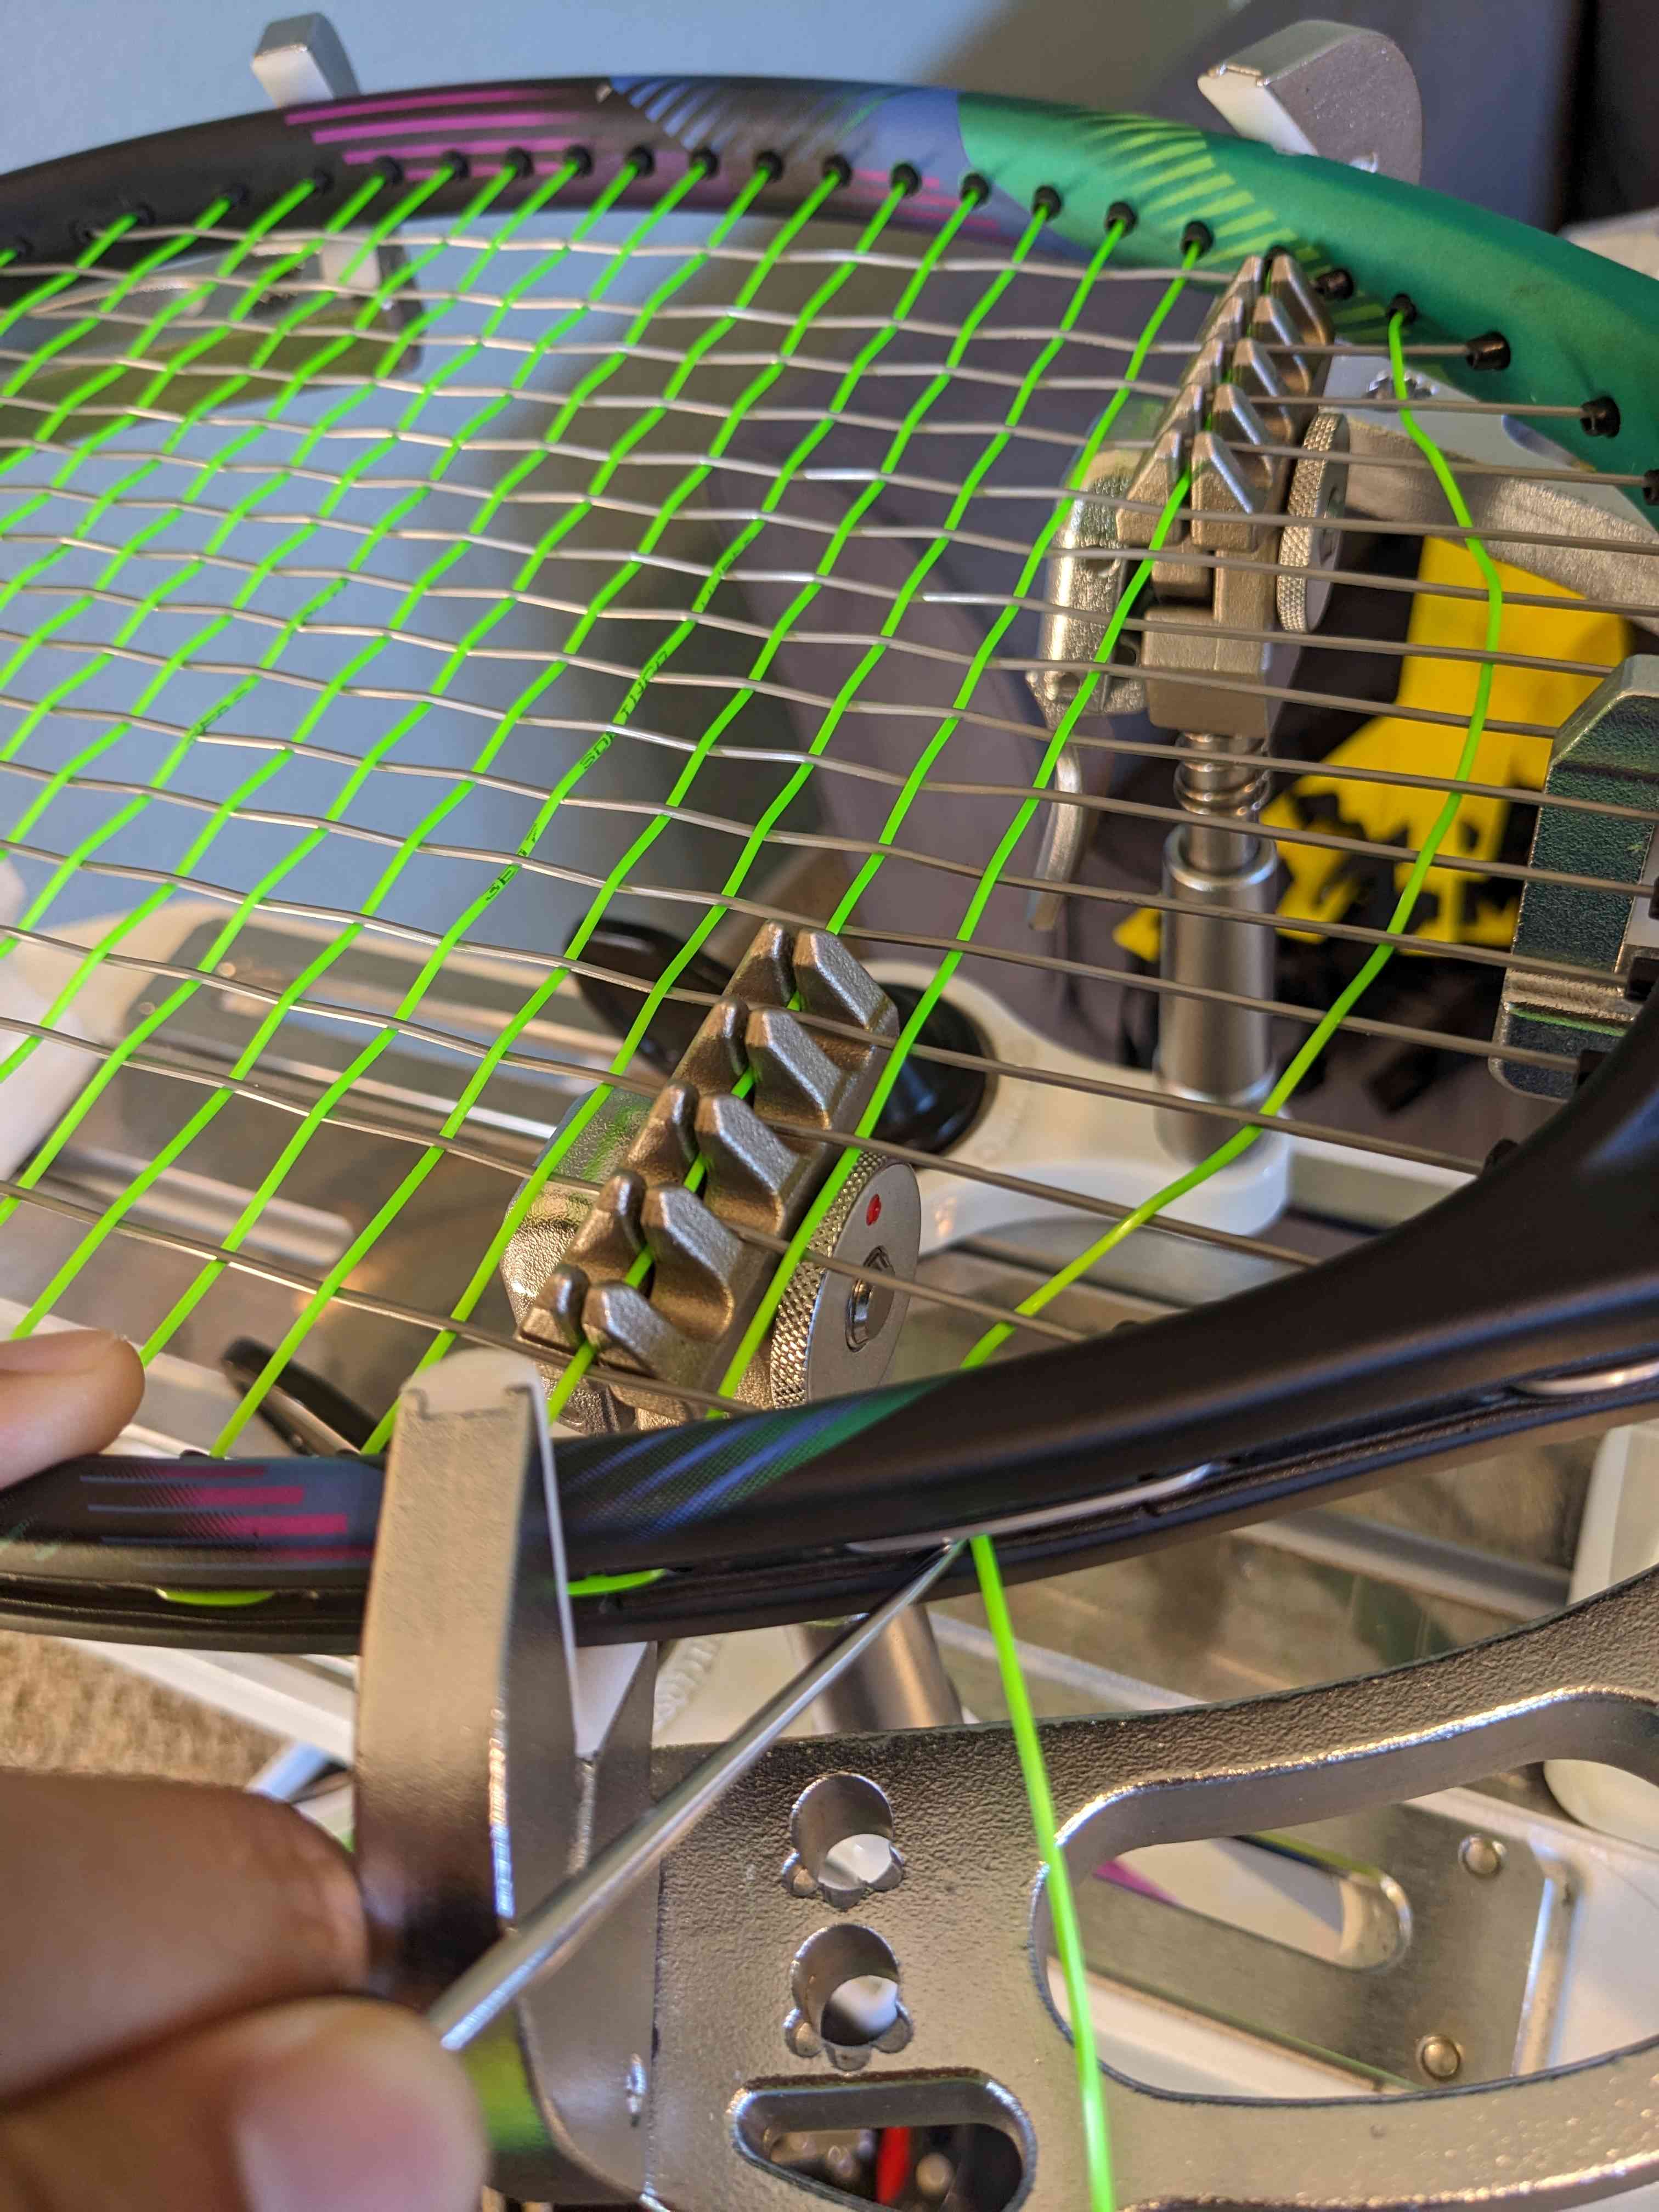
Towards the end, depending on the racquet’s specifications, you may need to skip a grommet, as shown in the picture below. Use common sense to judge, but the rule of thumb is that the distance between the mains needs to be the same.
Tie knots
Tying knots is the most challenging step for beginners. To finish weaving the mains, use the pro knot explained here. It is important to be able to tie knots in both directions (clockwise and counterclockwise). If the loose end exits the grommet from the right (like in the link above), tie the knot counterclockwise.
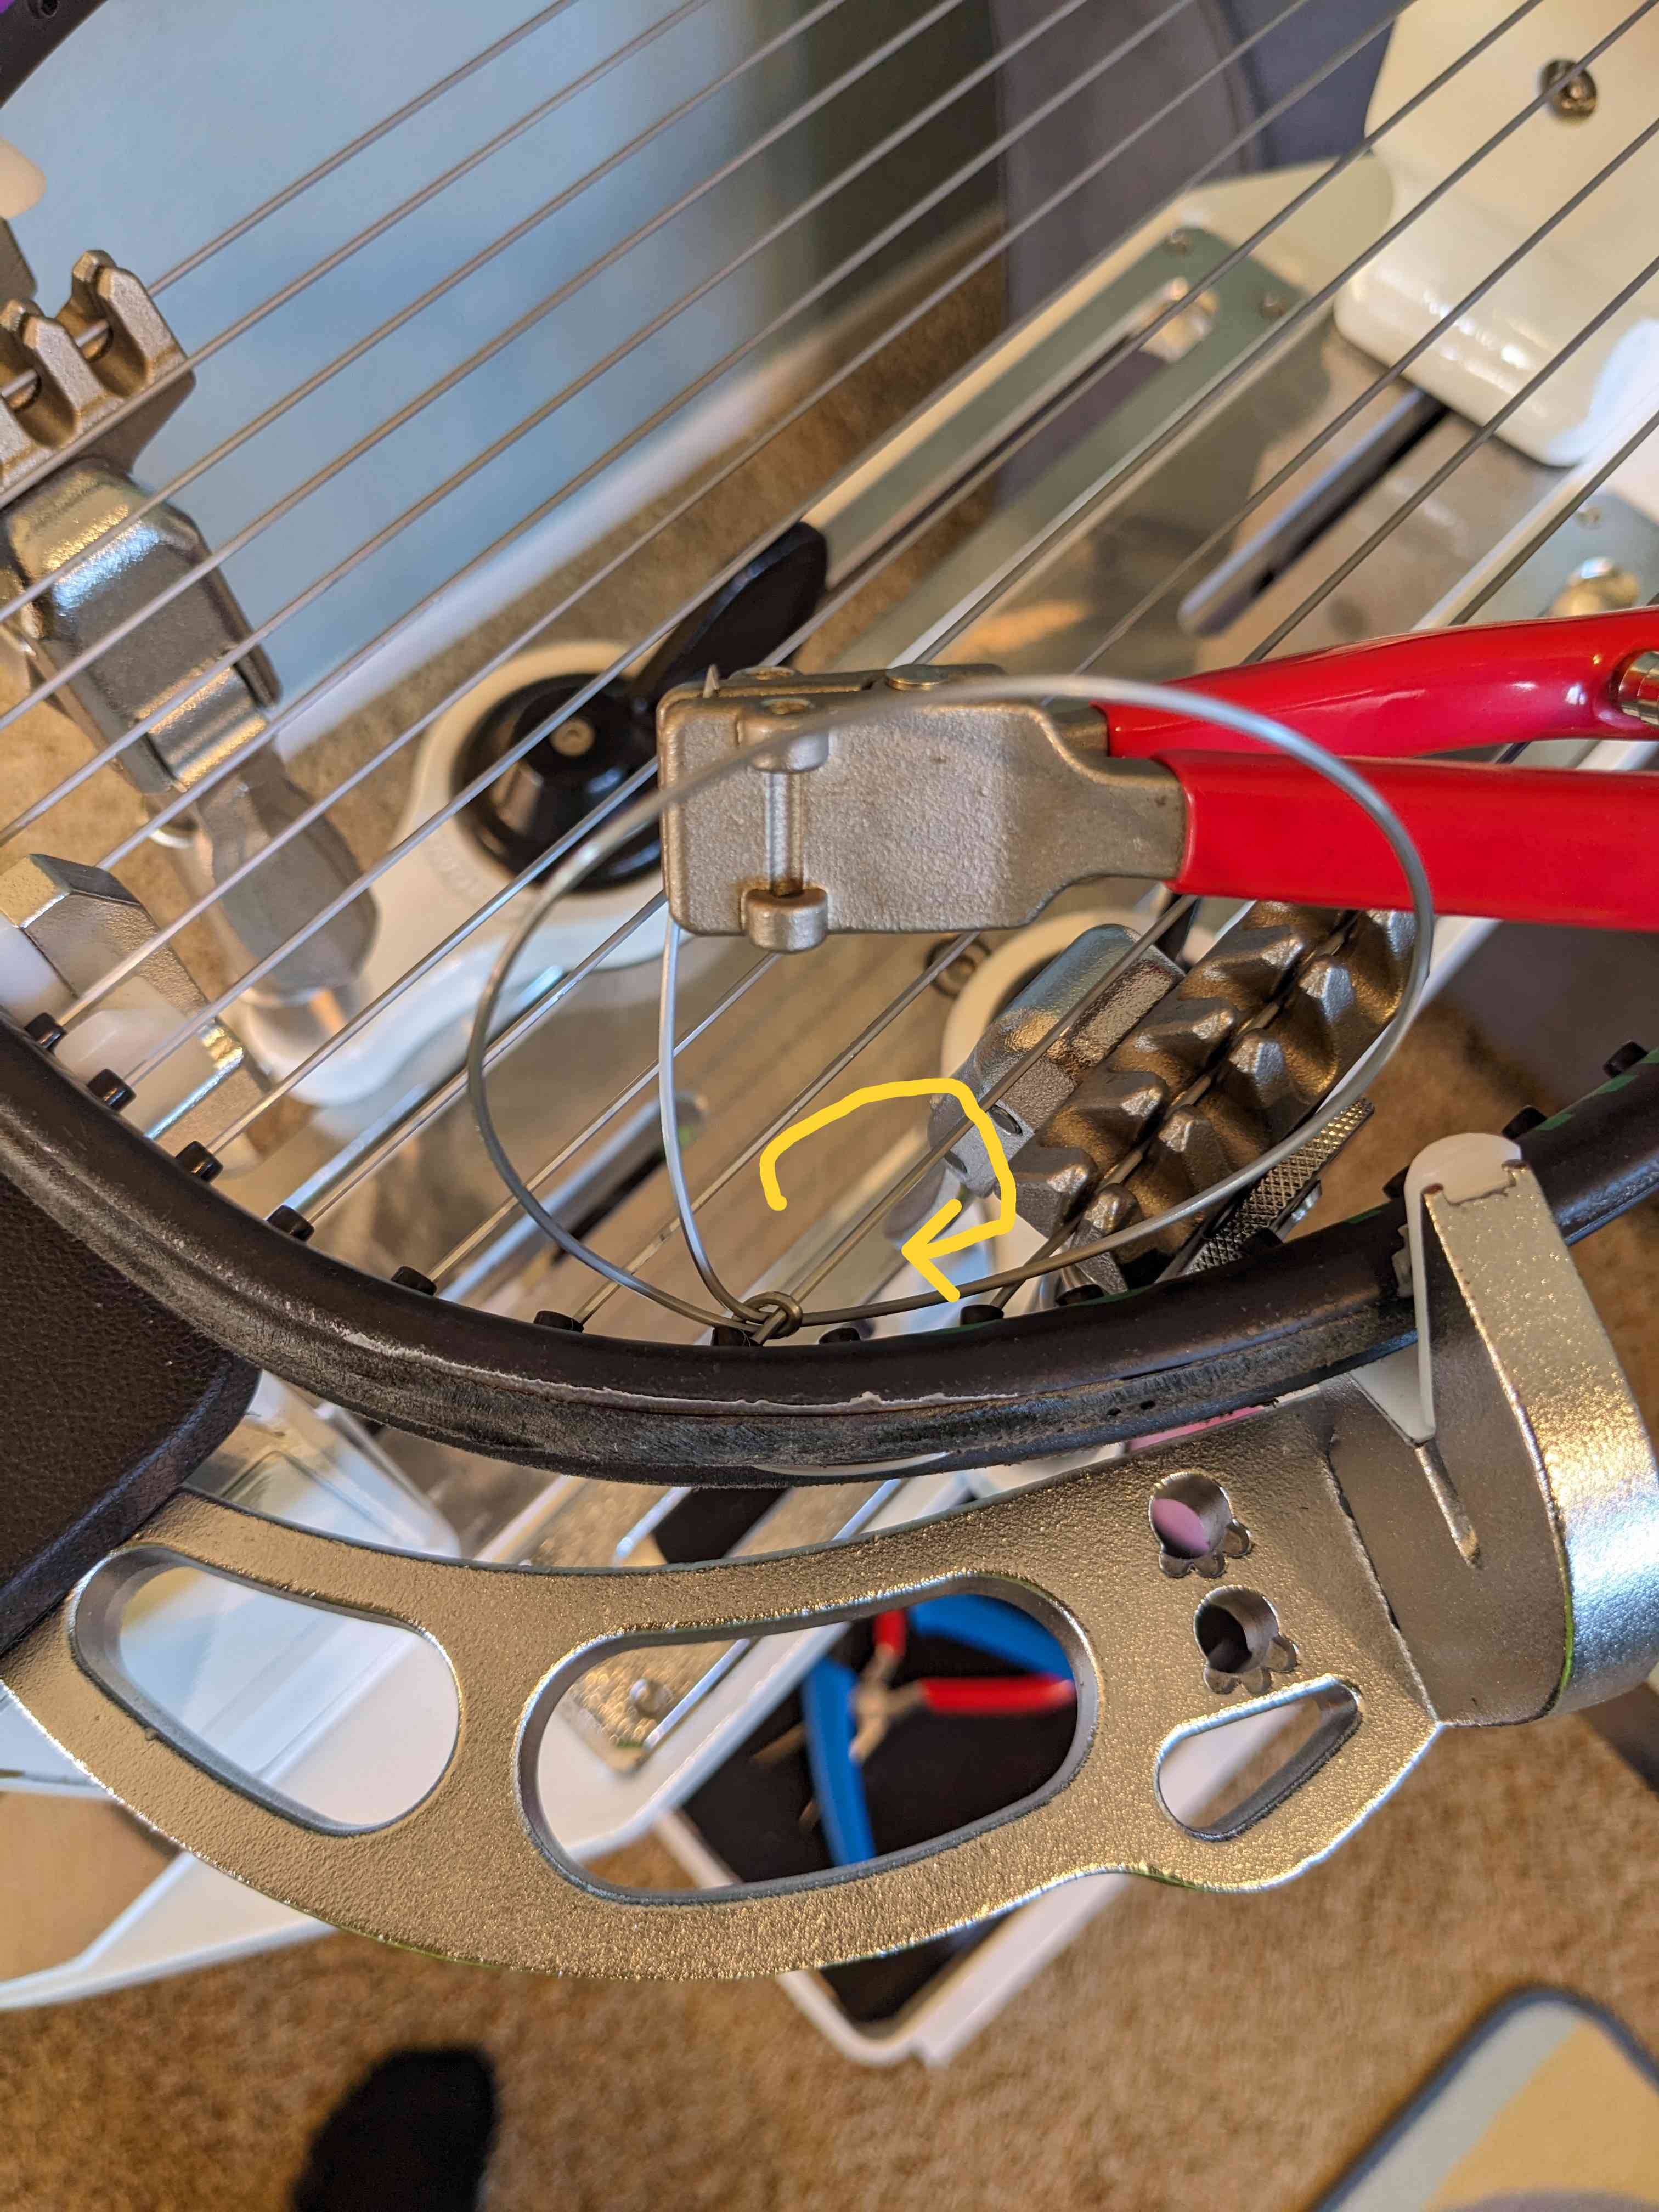
Here is a step-by-step example. In the picture below, the loose end exits the grommet from the left, so I go clockwise. Loop the loose end over the main and then under the main to make a single knot. Don’t tie it too tightly, or you won’t have enough space for the second knot. The inside diameter of the loop should be slightly larger than the string’s diameter.
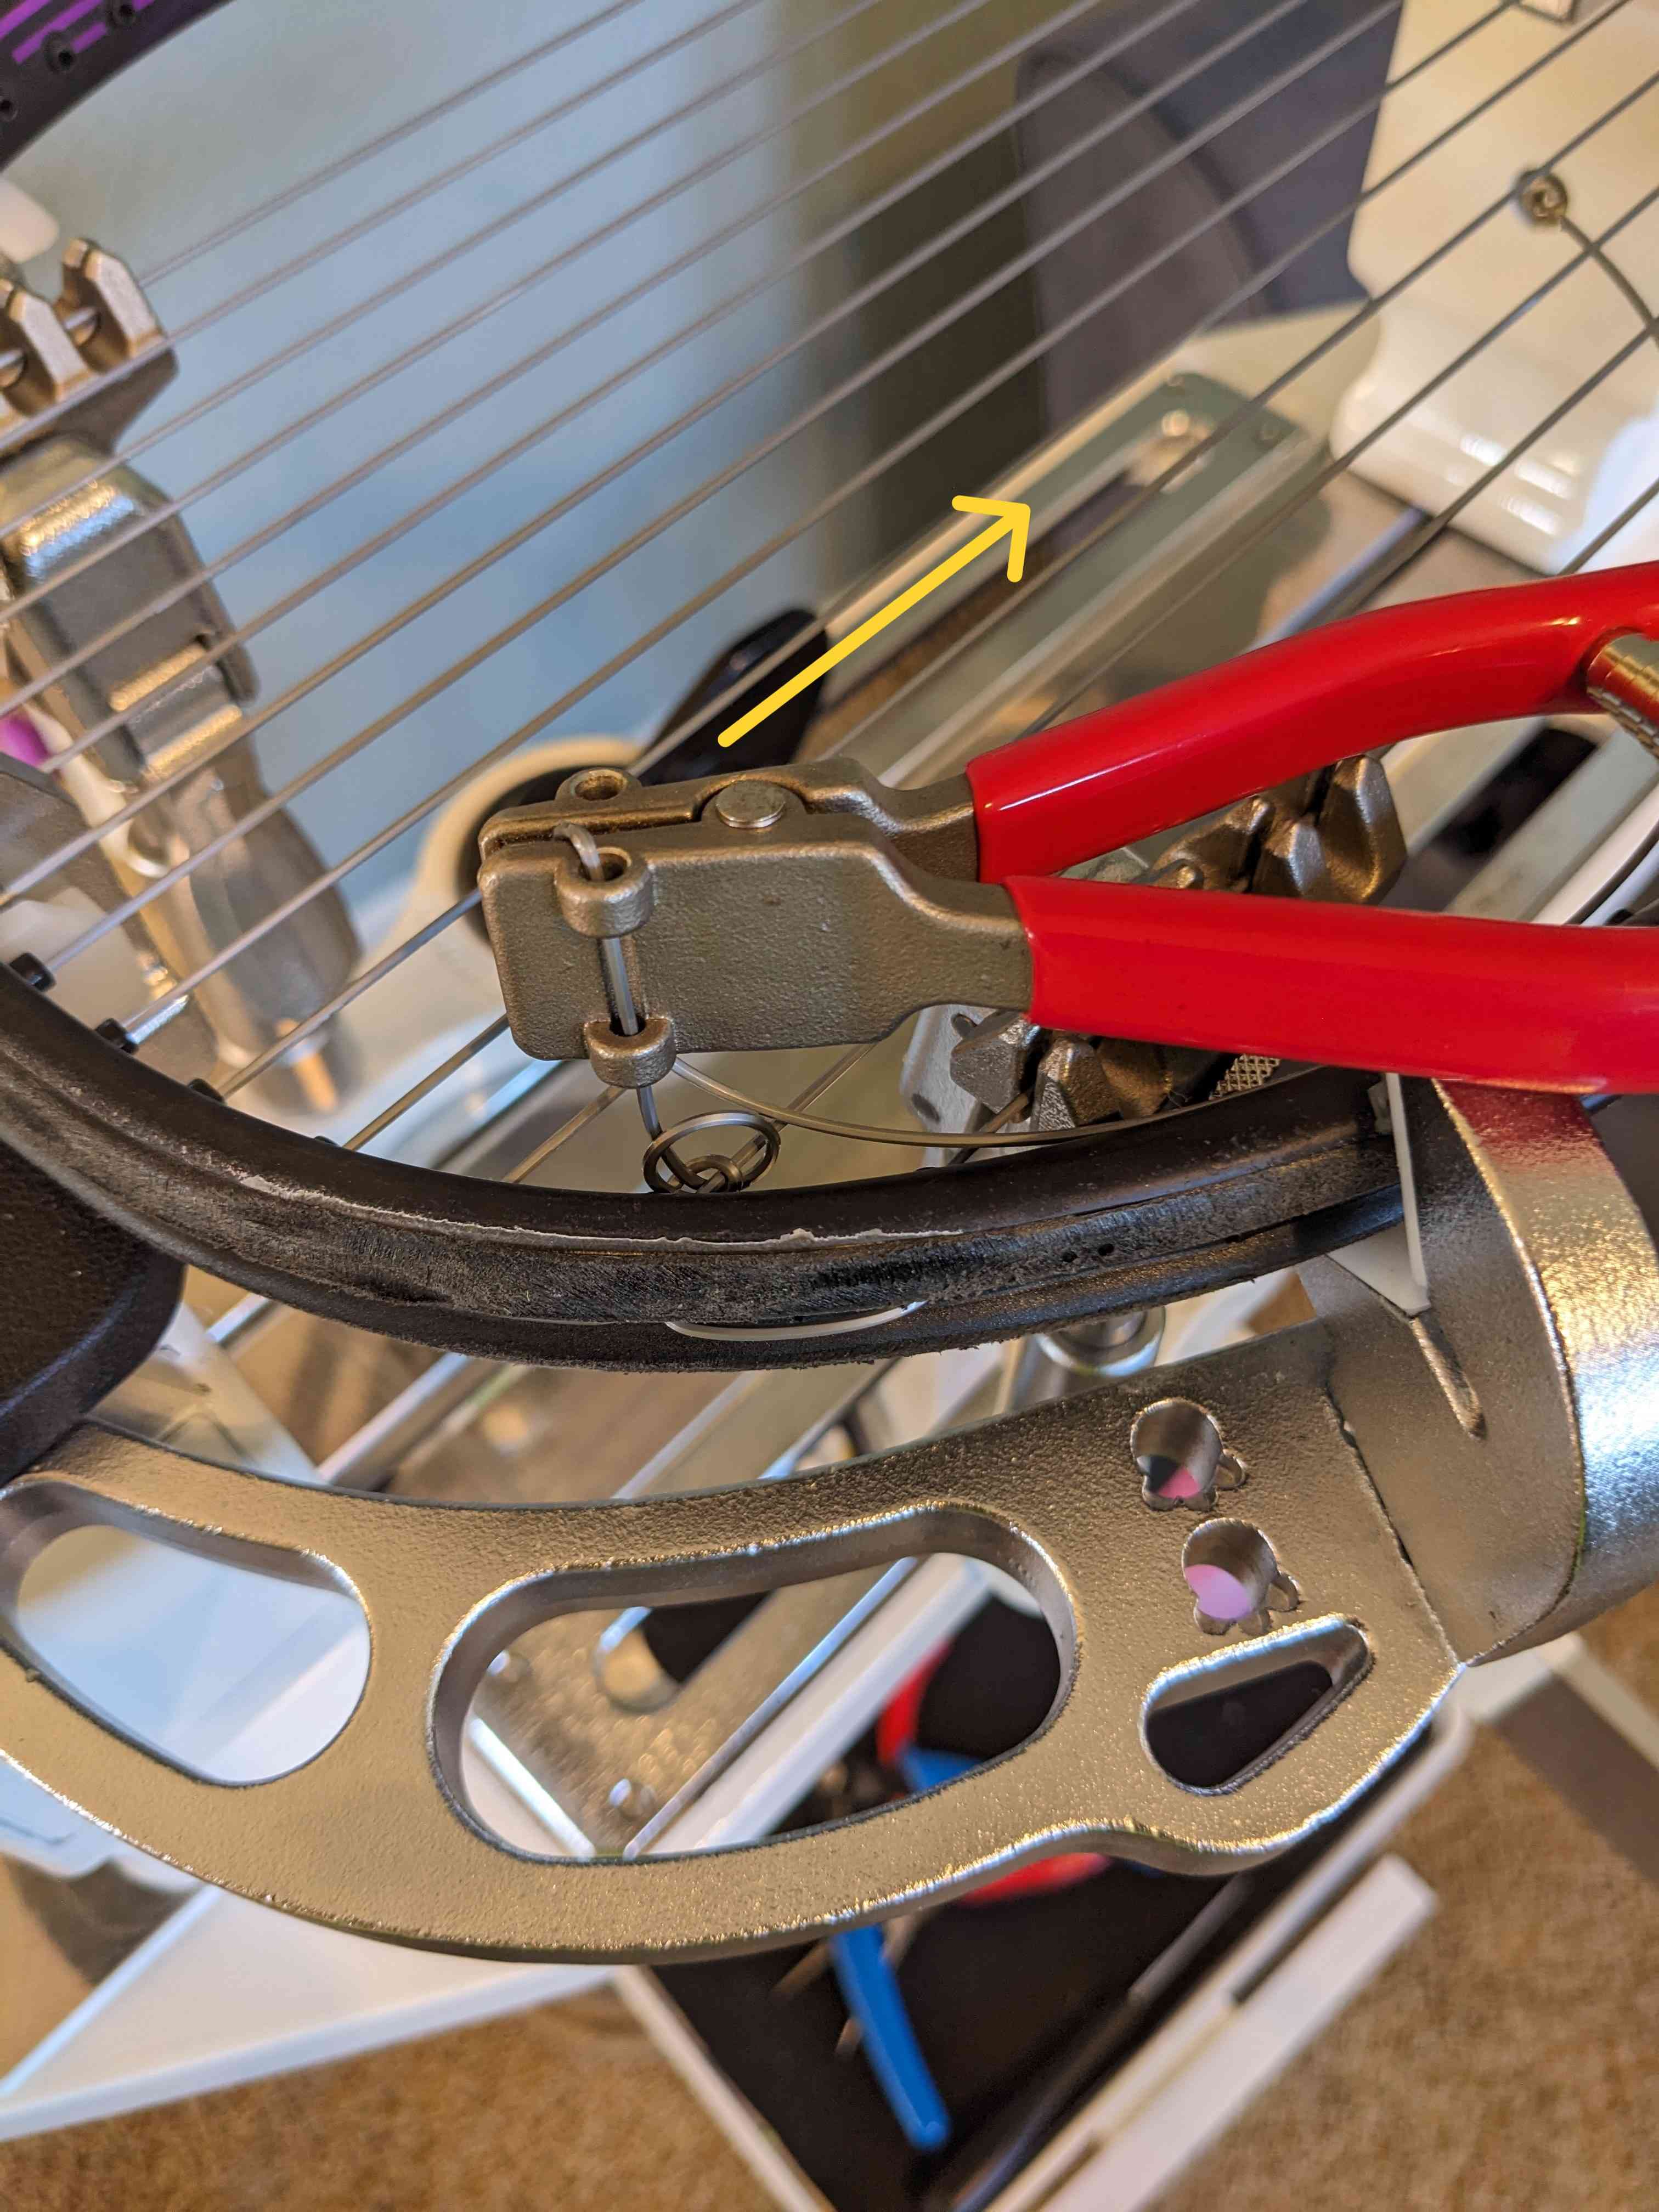
Again, loop the loose end over the main, then under the main, and insert it into the small loop you made in the previous step. As you can see in the picture below, at this point you see a big loop (generated by the second knot), but the loose end should go outside the big loop, not inside. Gently pull the loose end to make the second loop sufficiently small (say 5mm in diameter).
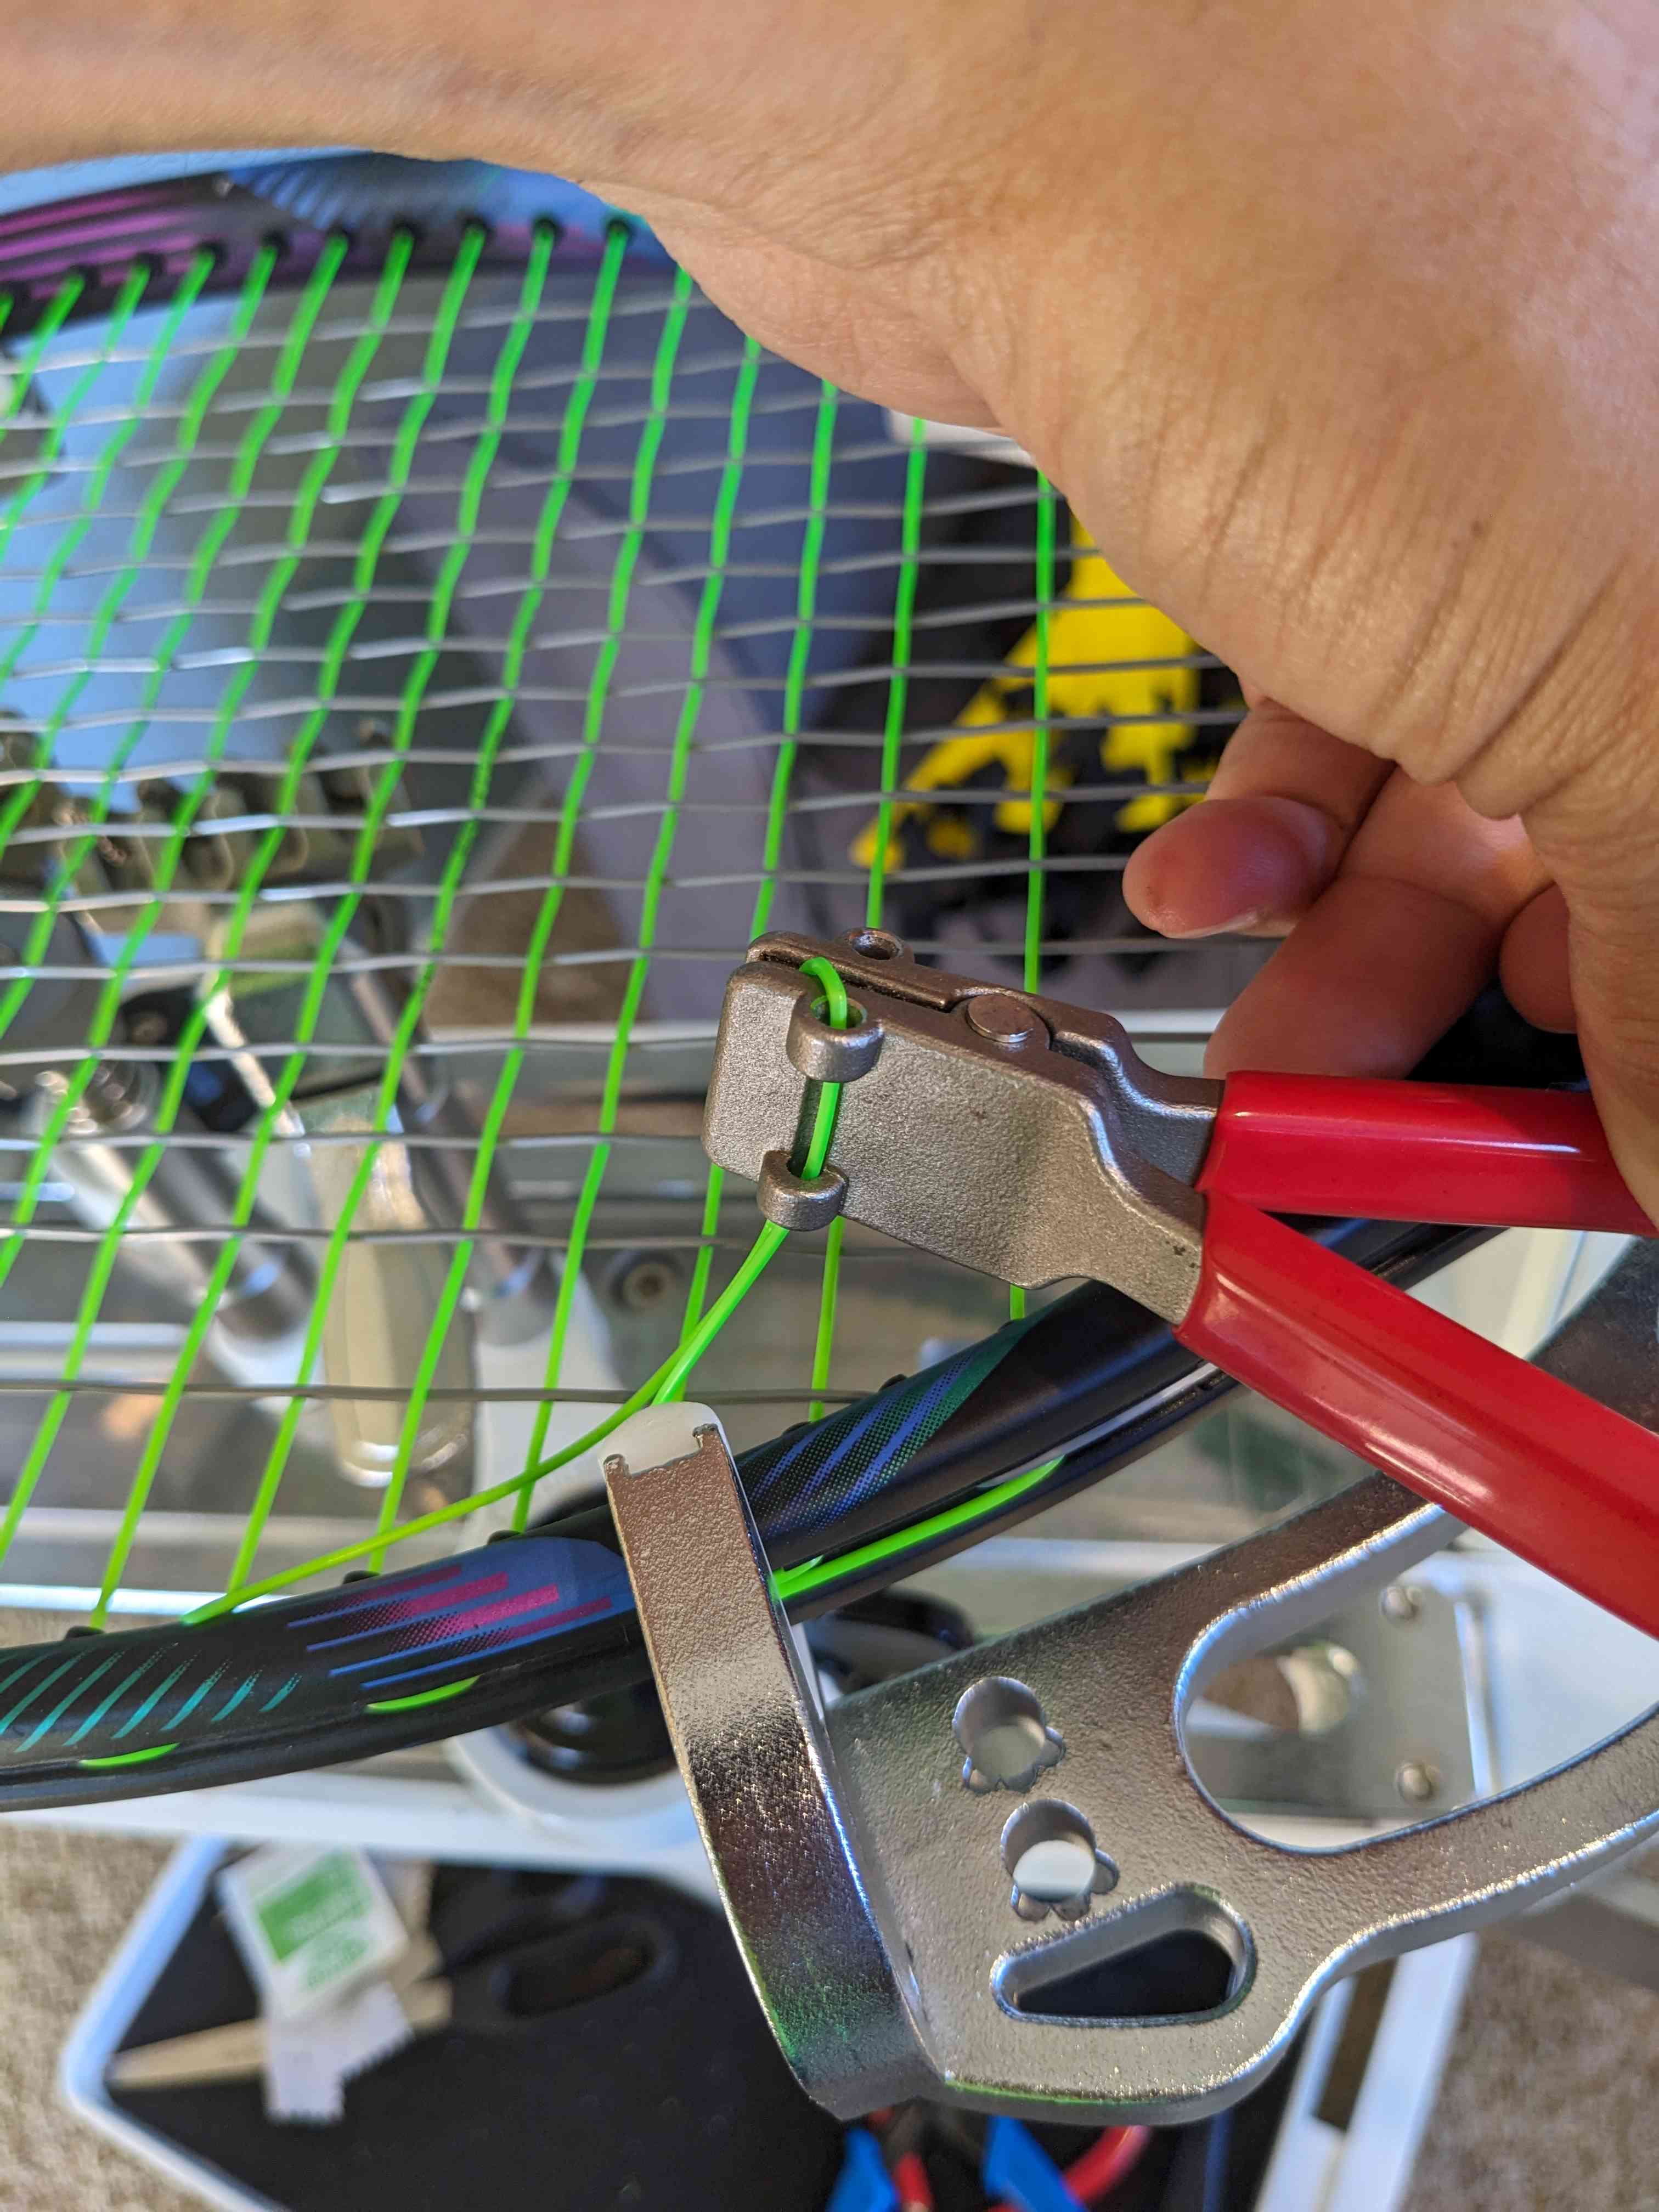
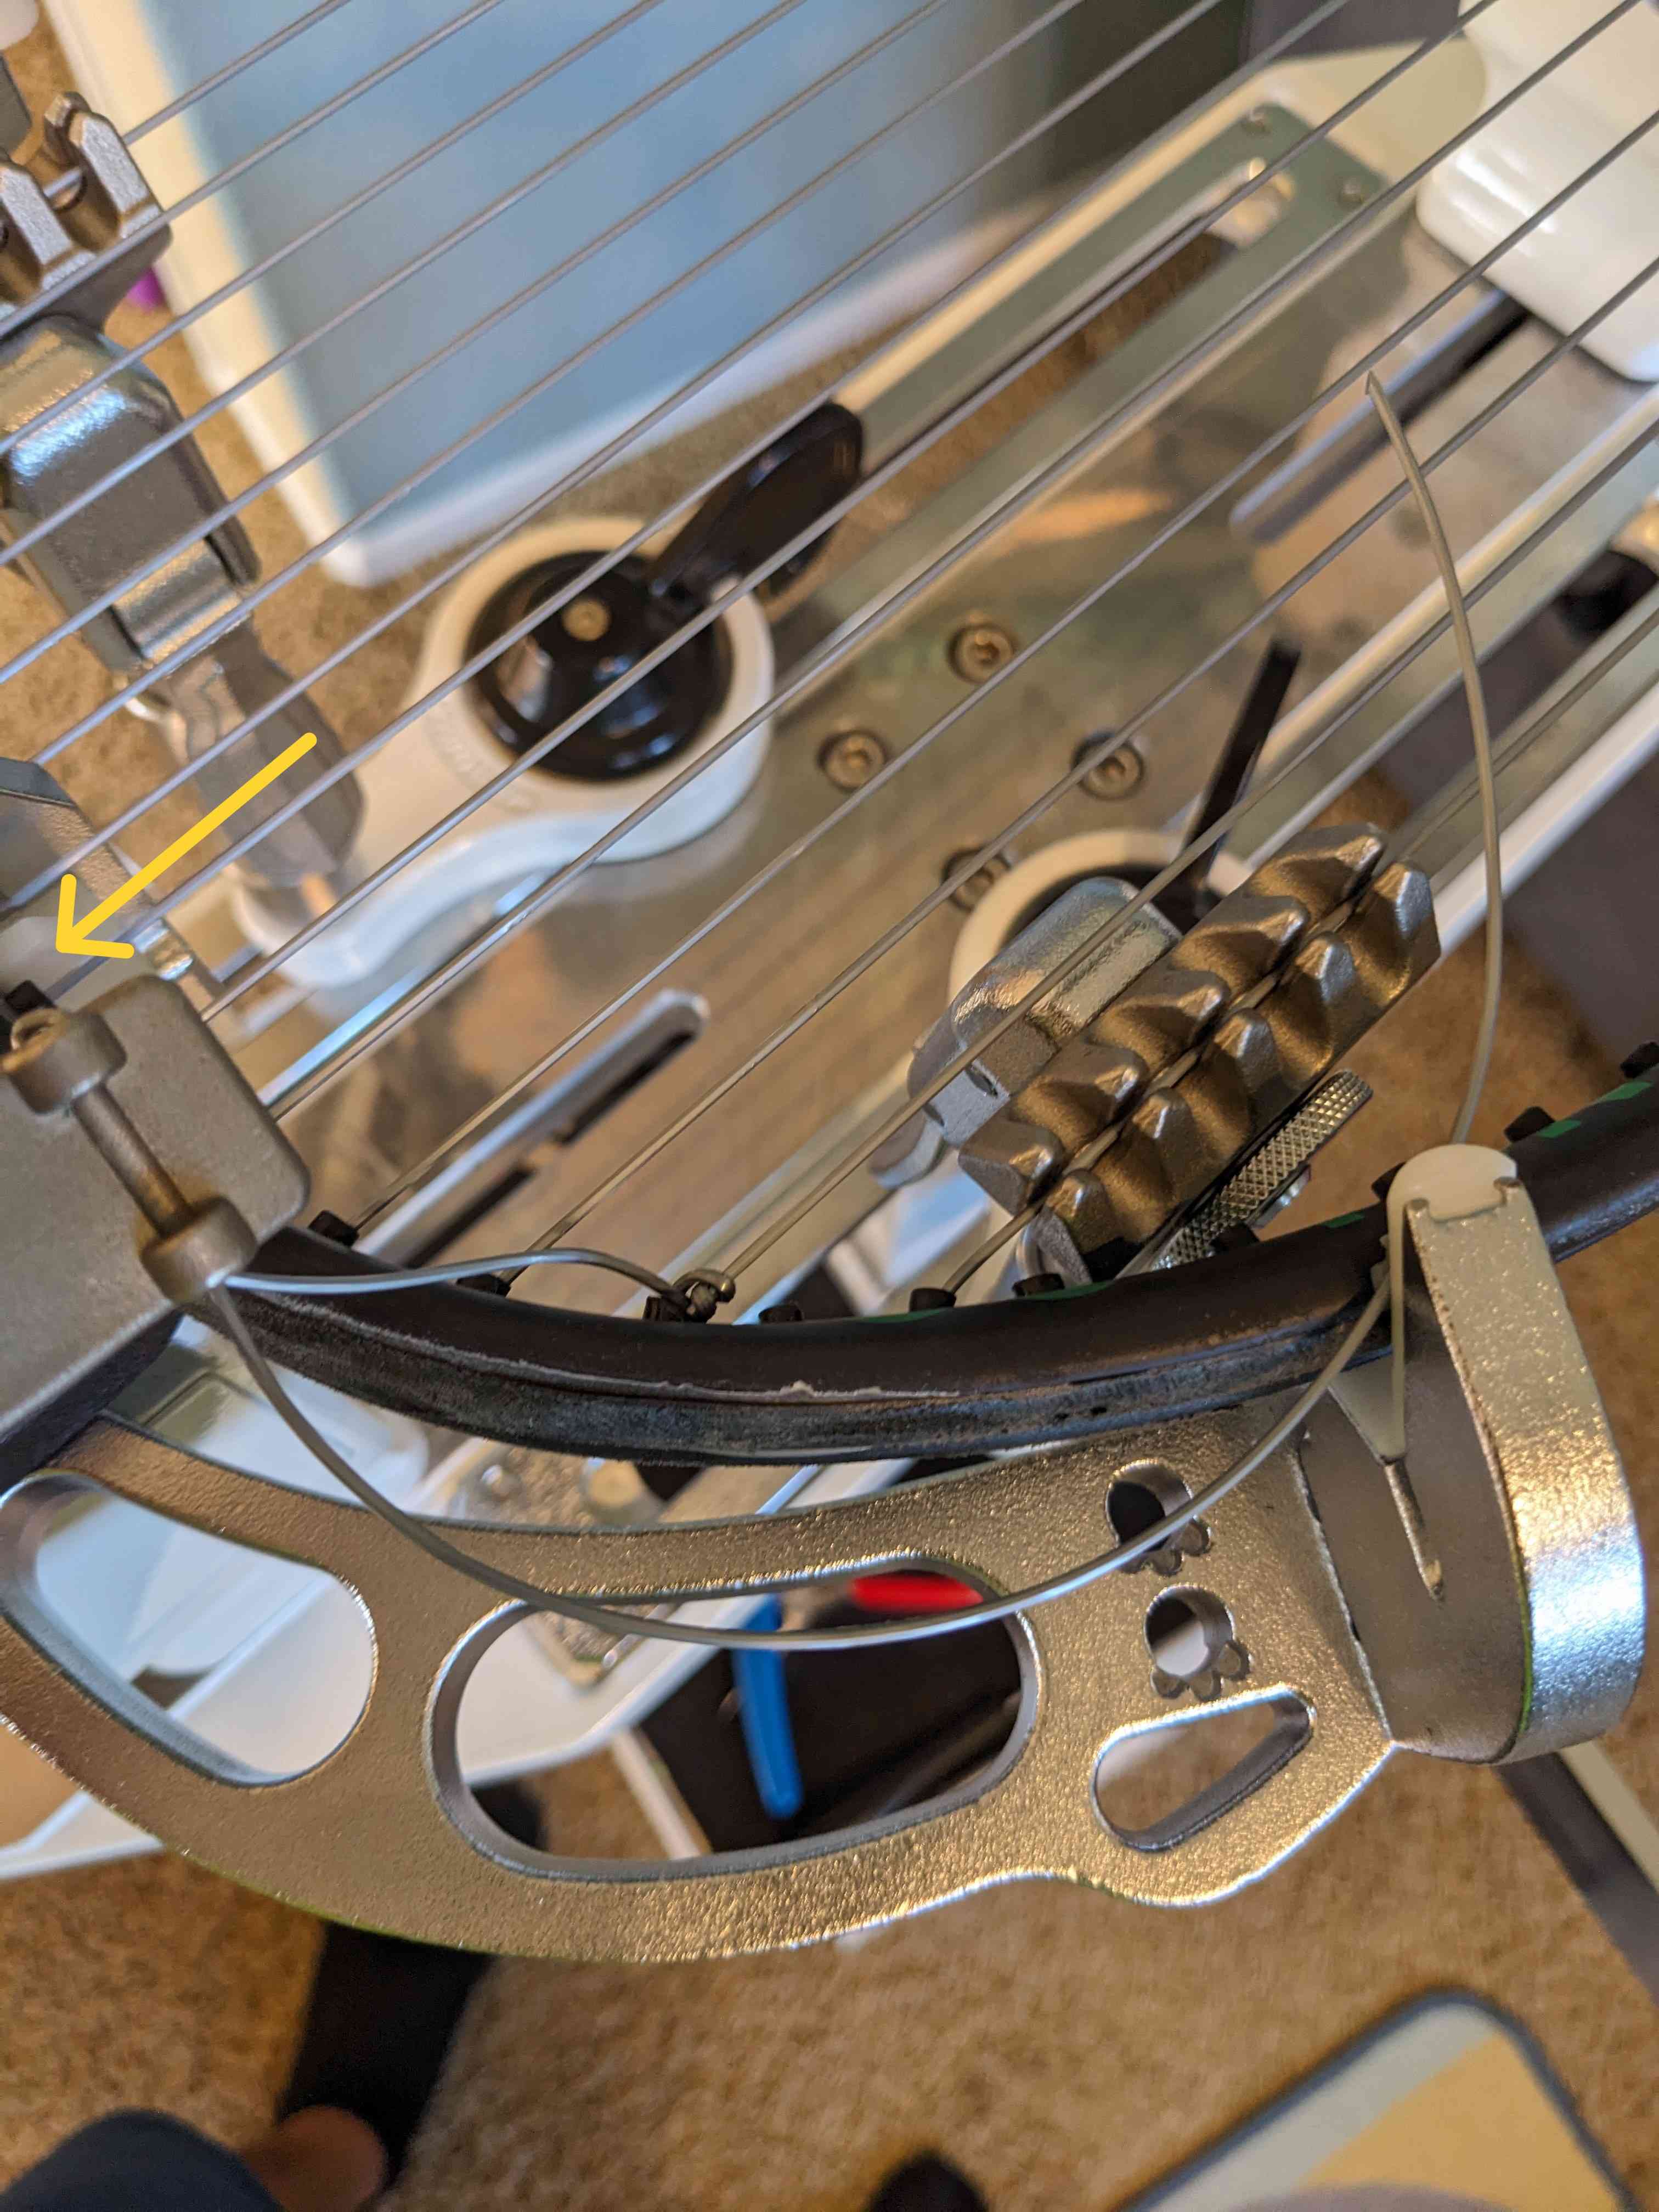
Using the stringing clamp, pull the loose end away from you to make the loops even smaller.
Finally, pull the loose end towards you to finish the knot. At this step, you should hear a “click” sound. After everything looks good, you can unclamp and cut the loose end.
Count the crosses
Just as you did for the mains, count the crosses. However, for the crosses count the same number as the string pattern. For instance, if the string pattern is 16/19, count 19. (If you want to be safe, you may count “cross plus 0.5”.)
Starting knot
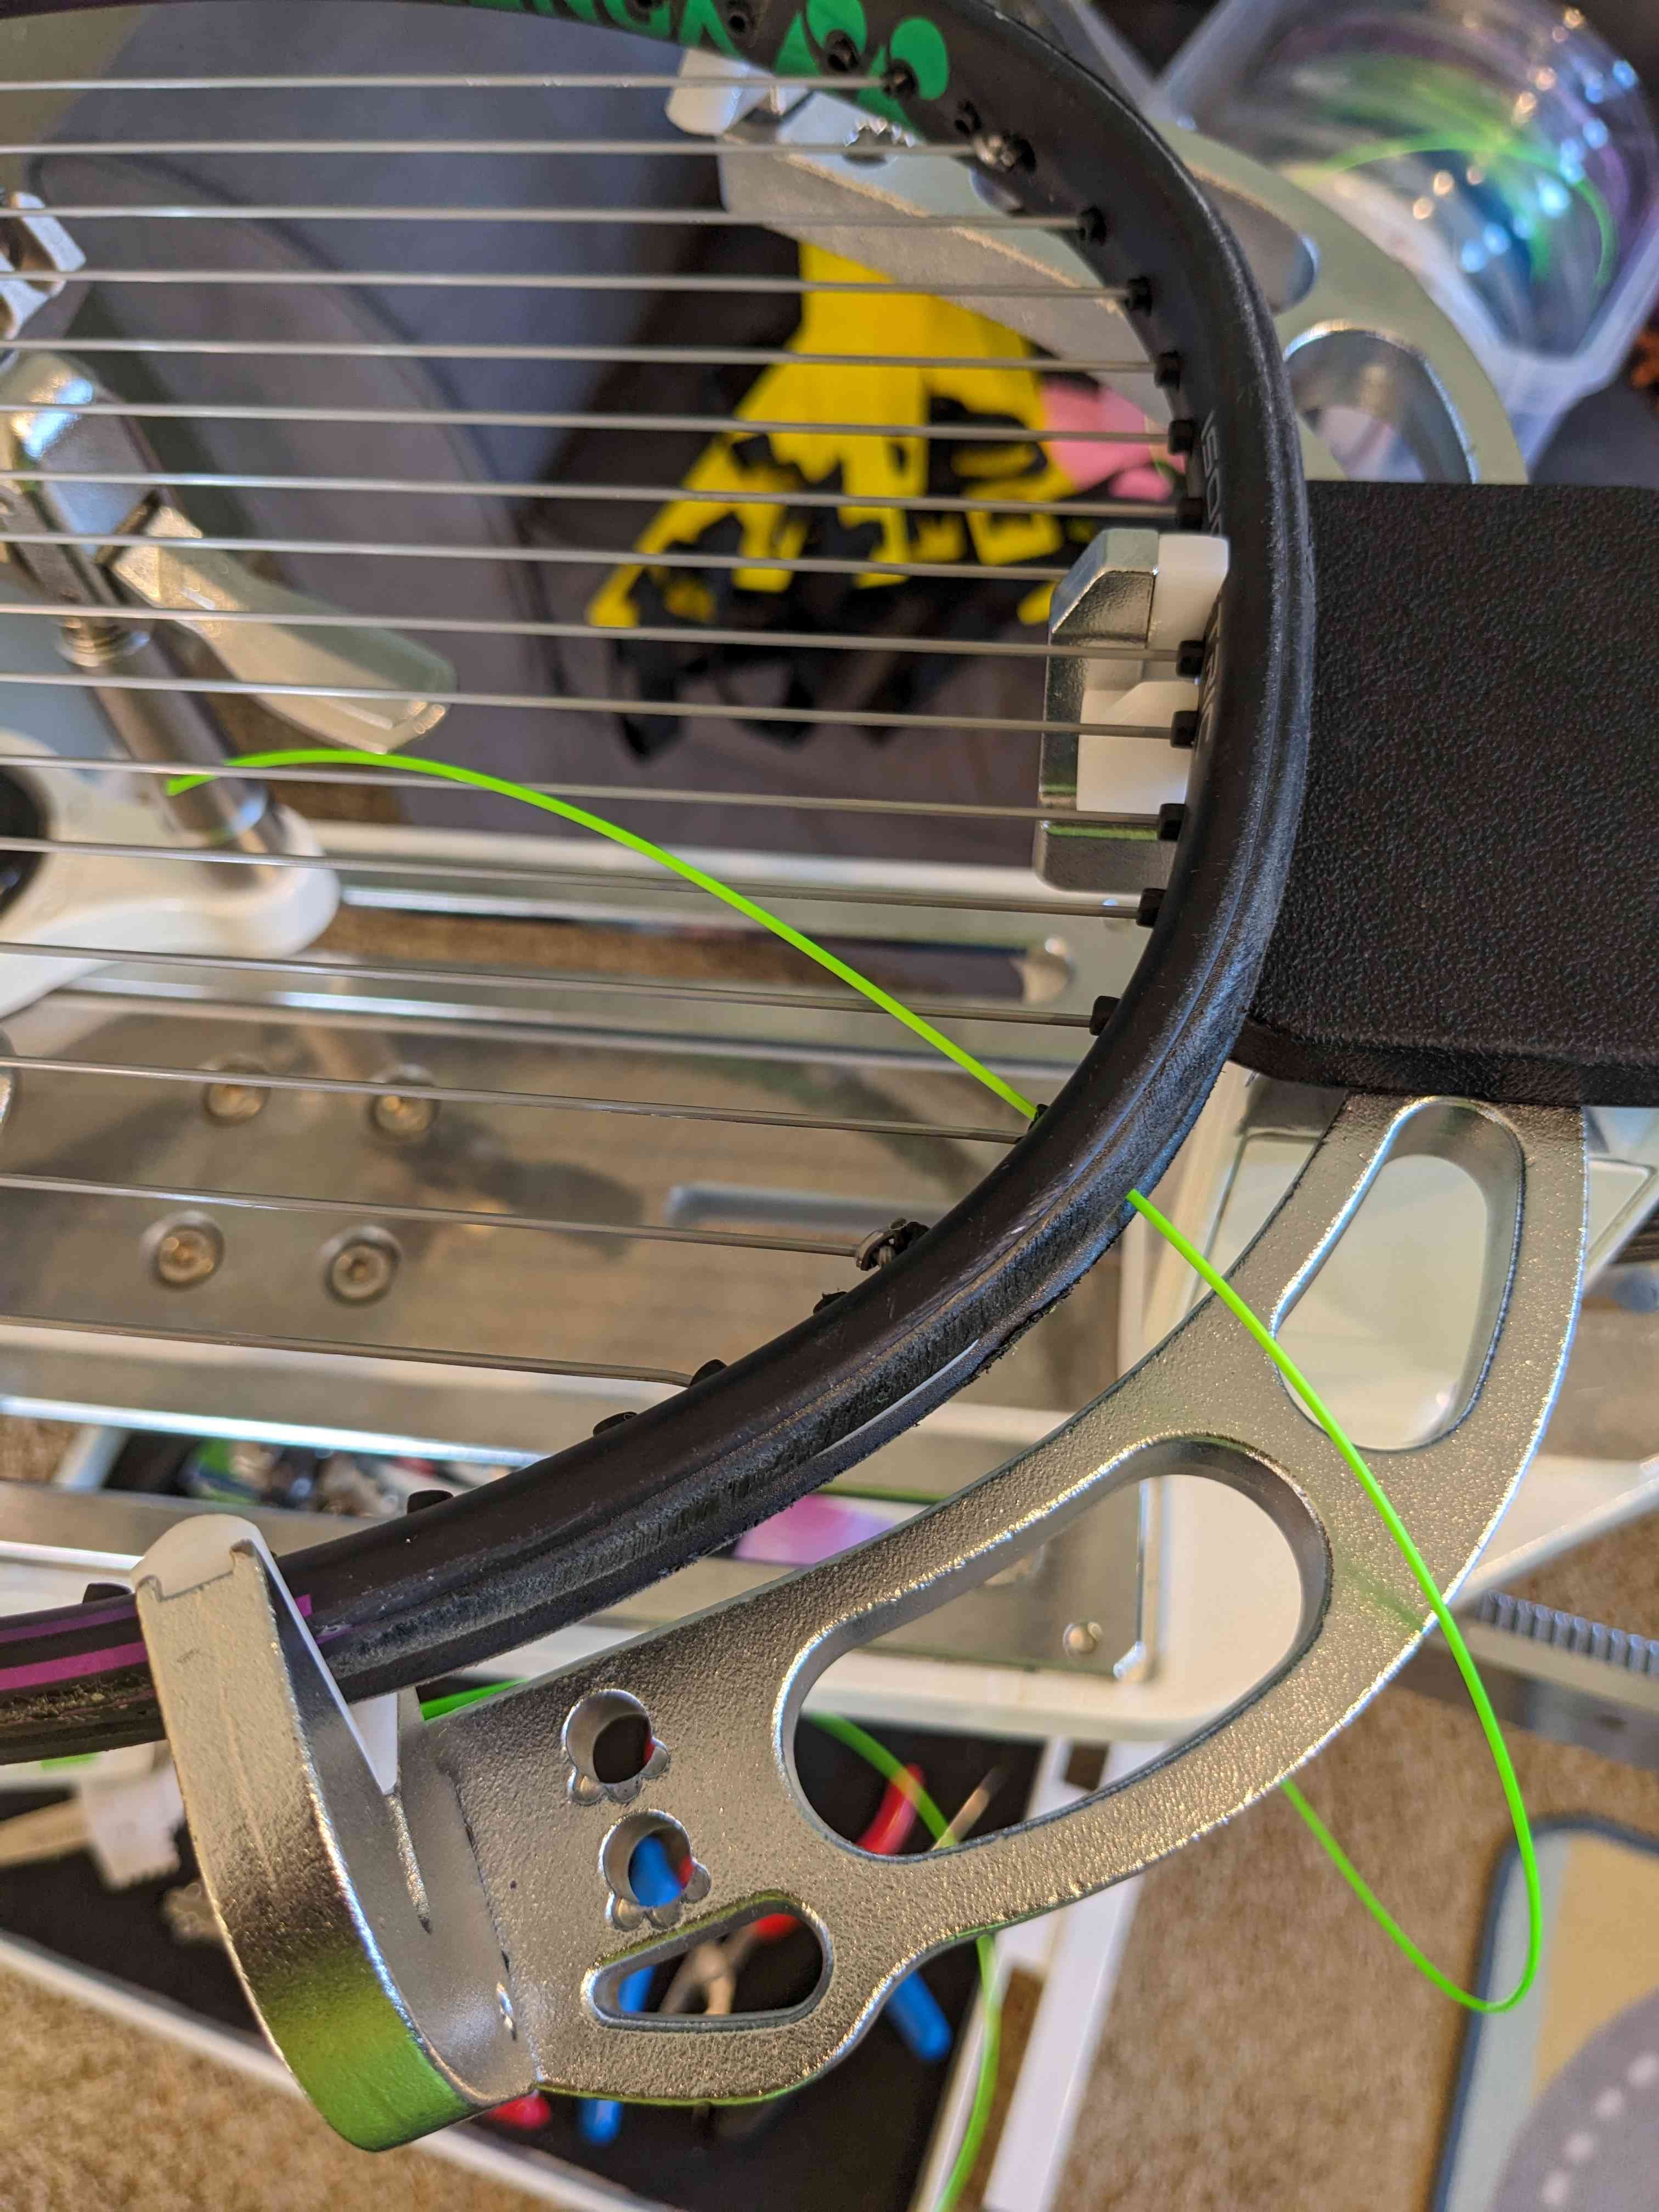
Identify the grommet to start the crosses at the top of the racquet head. In the picture below, it is the third main grommet, but it depends on the racquet. Sometimes it is explicitly indicated. If not, find a grommet where you can insert the cross string smoothly.
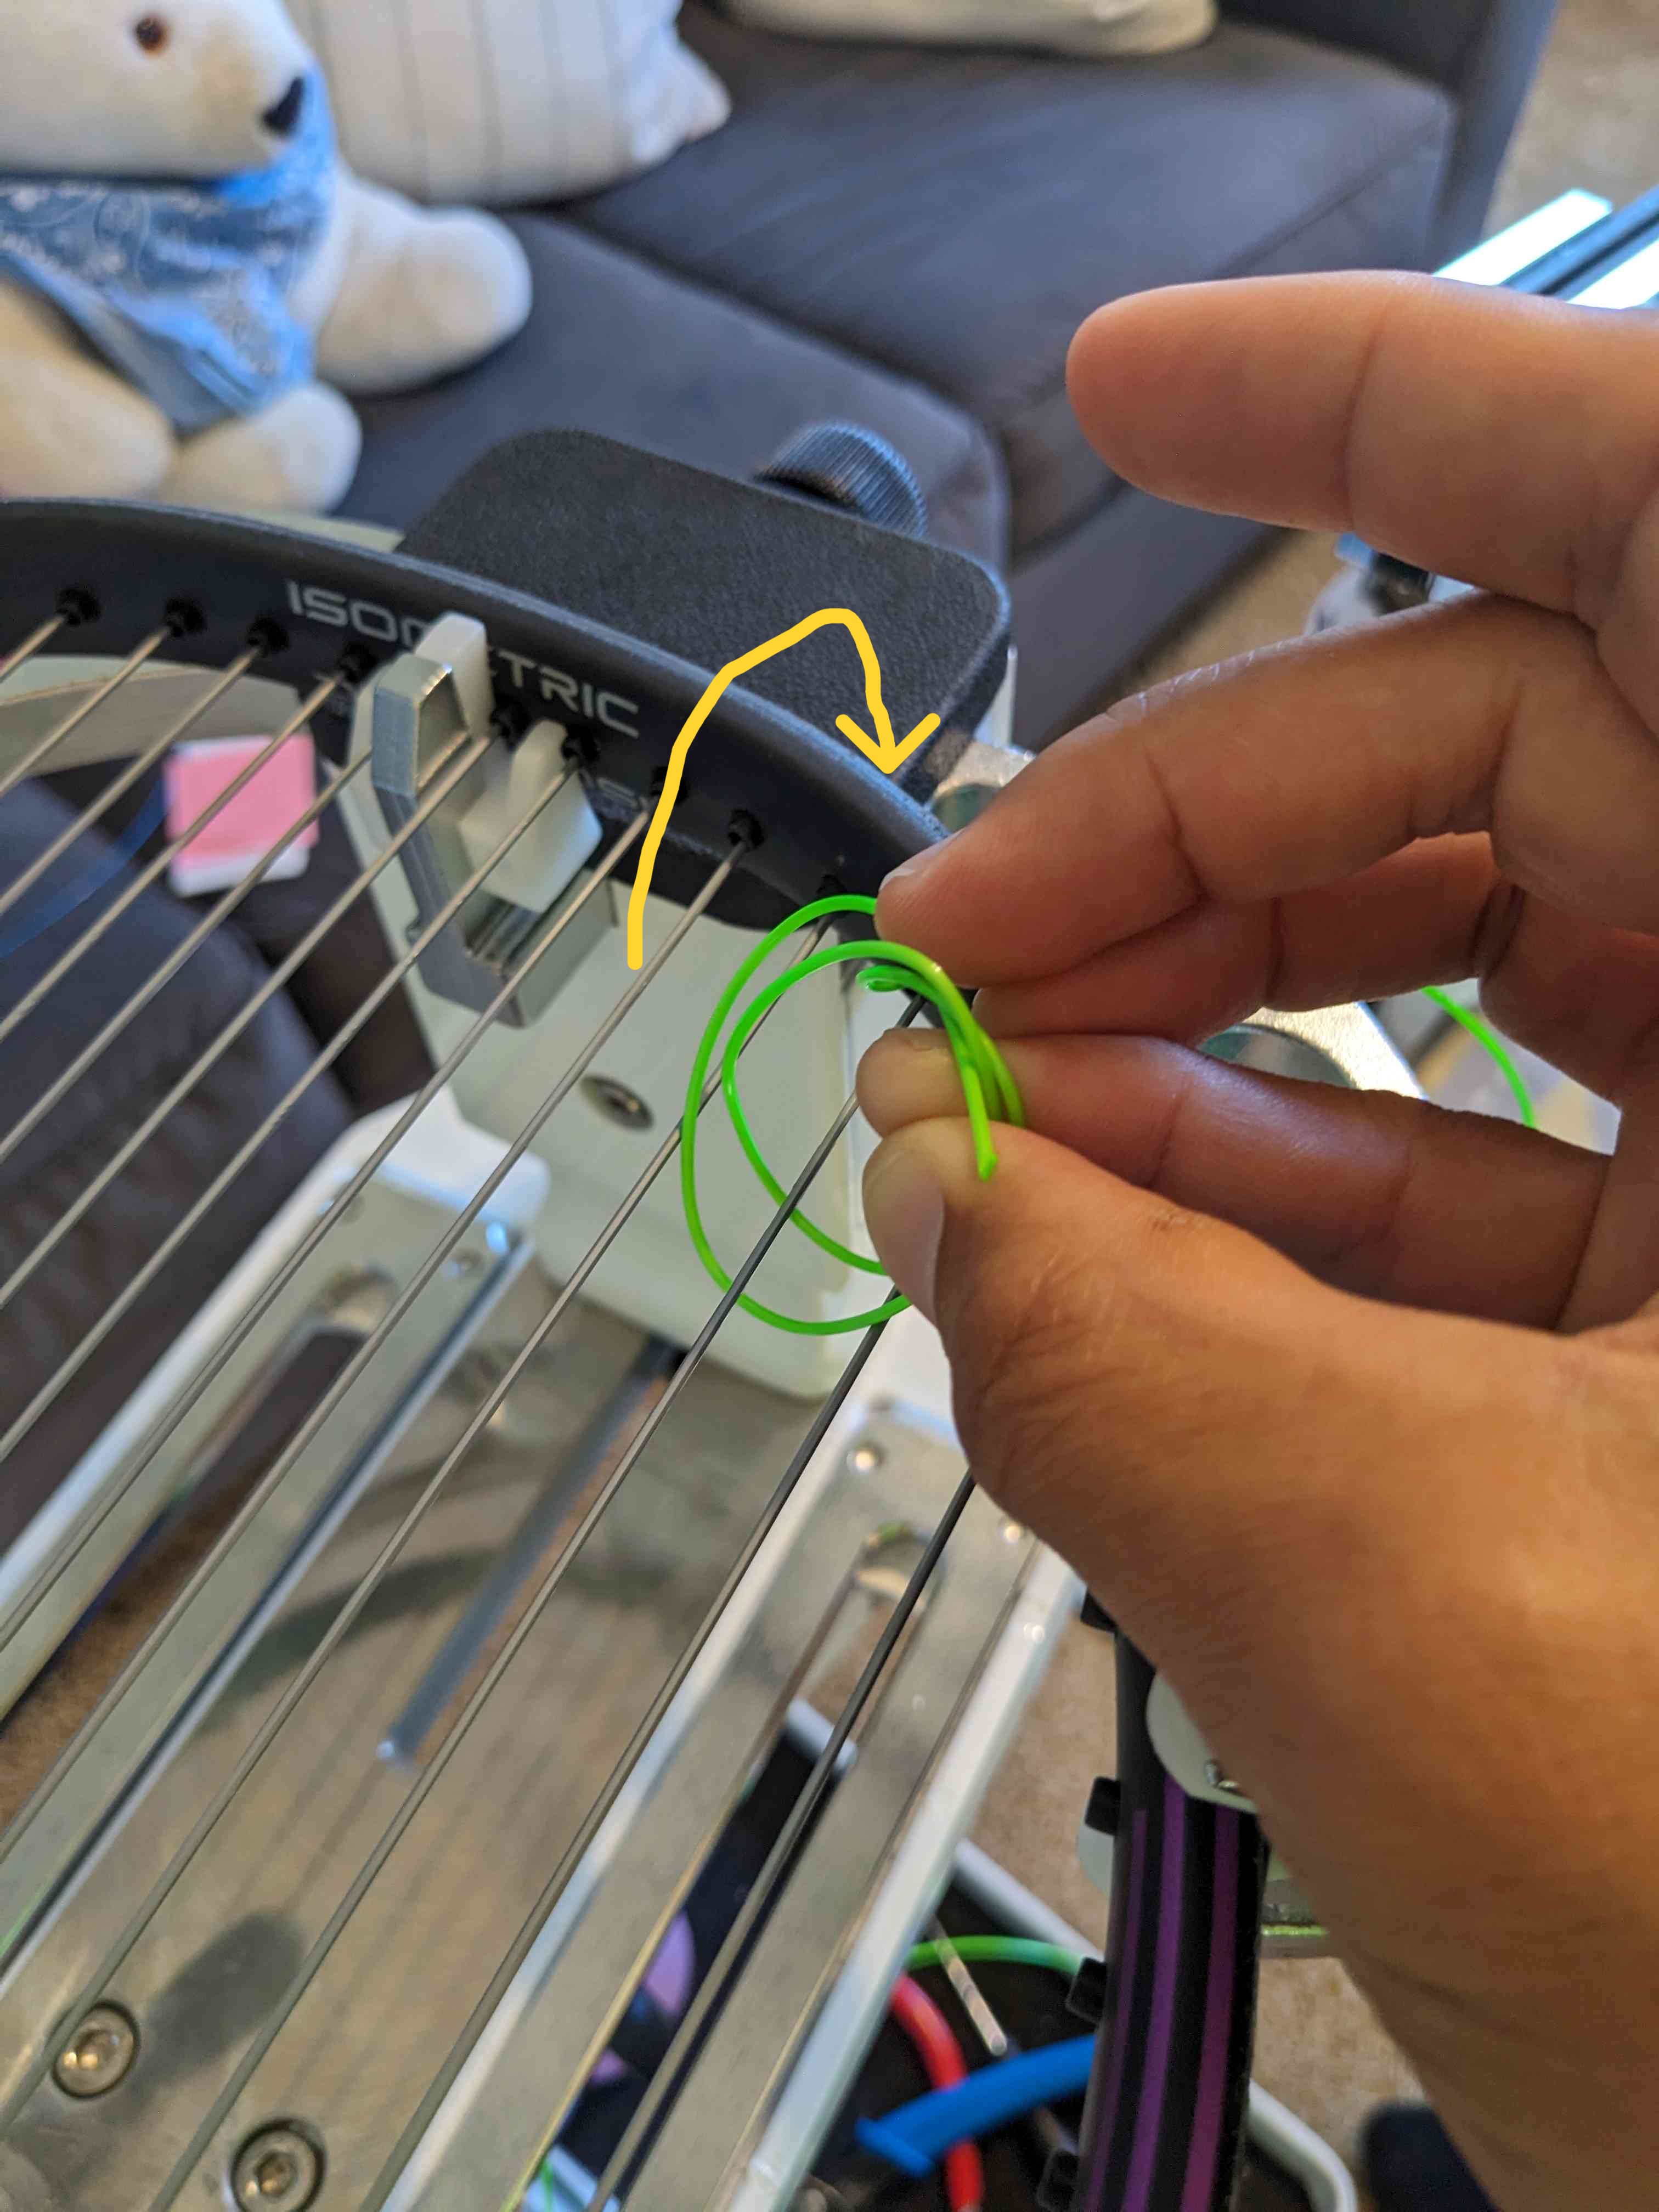
Tie a starting knot explained here. Here is a step-by-step example. First, align your right hand’s little finger with the main string. Second, loop the loose end of the cross twice around the main, using your little finger as a guide.

Third, using your left hand, insert the loose end into the double loop you have just made in the previous step, in the same direction as your little finger.
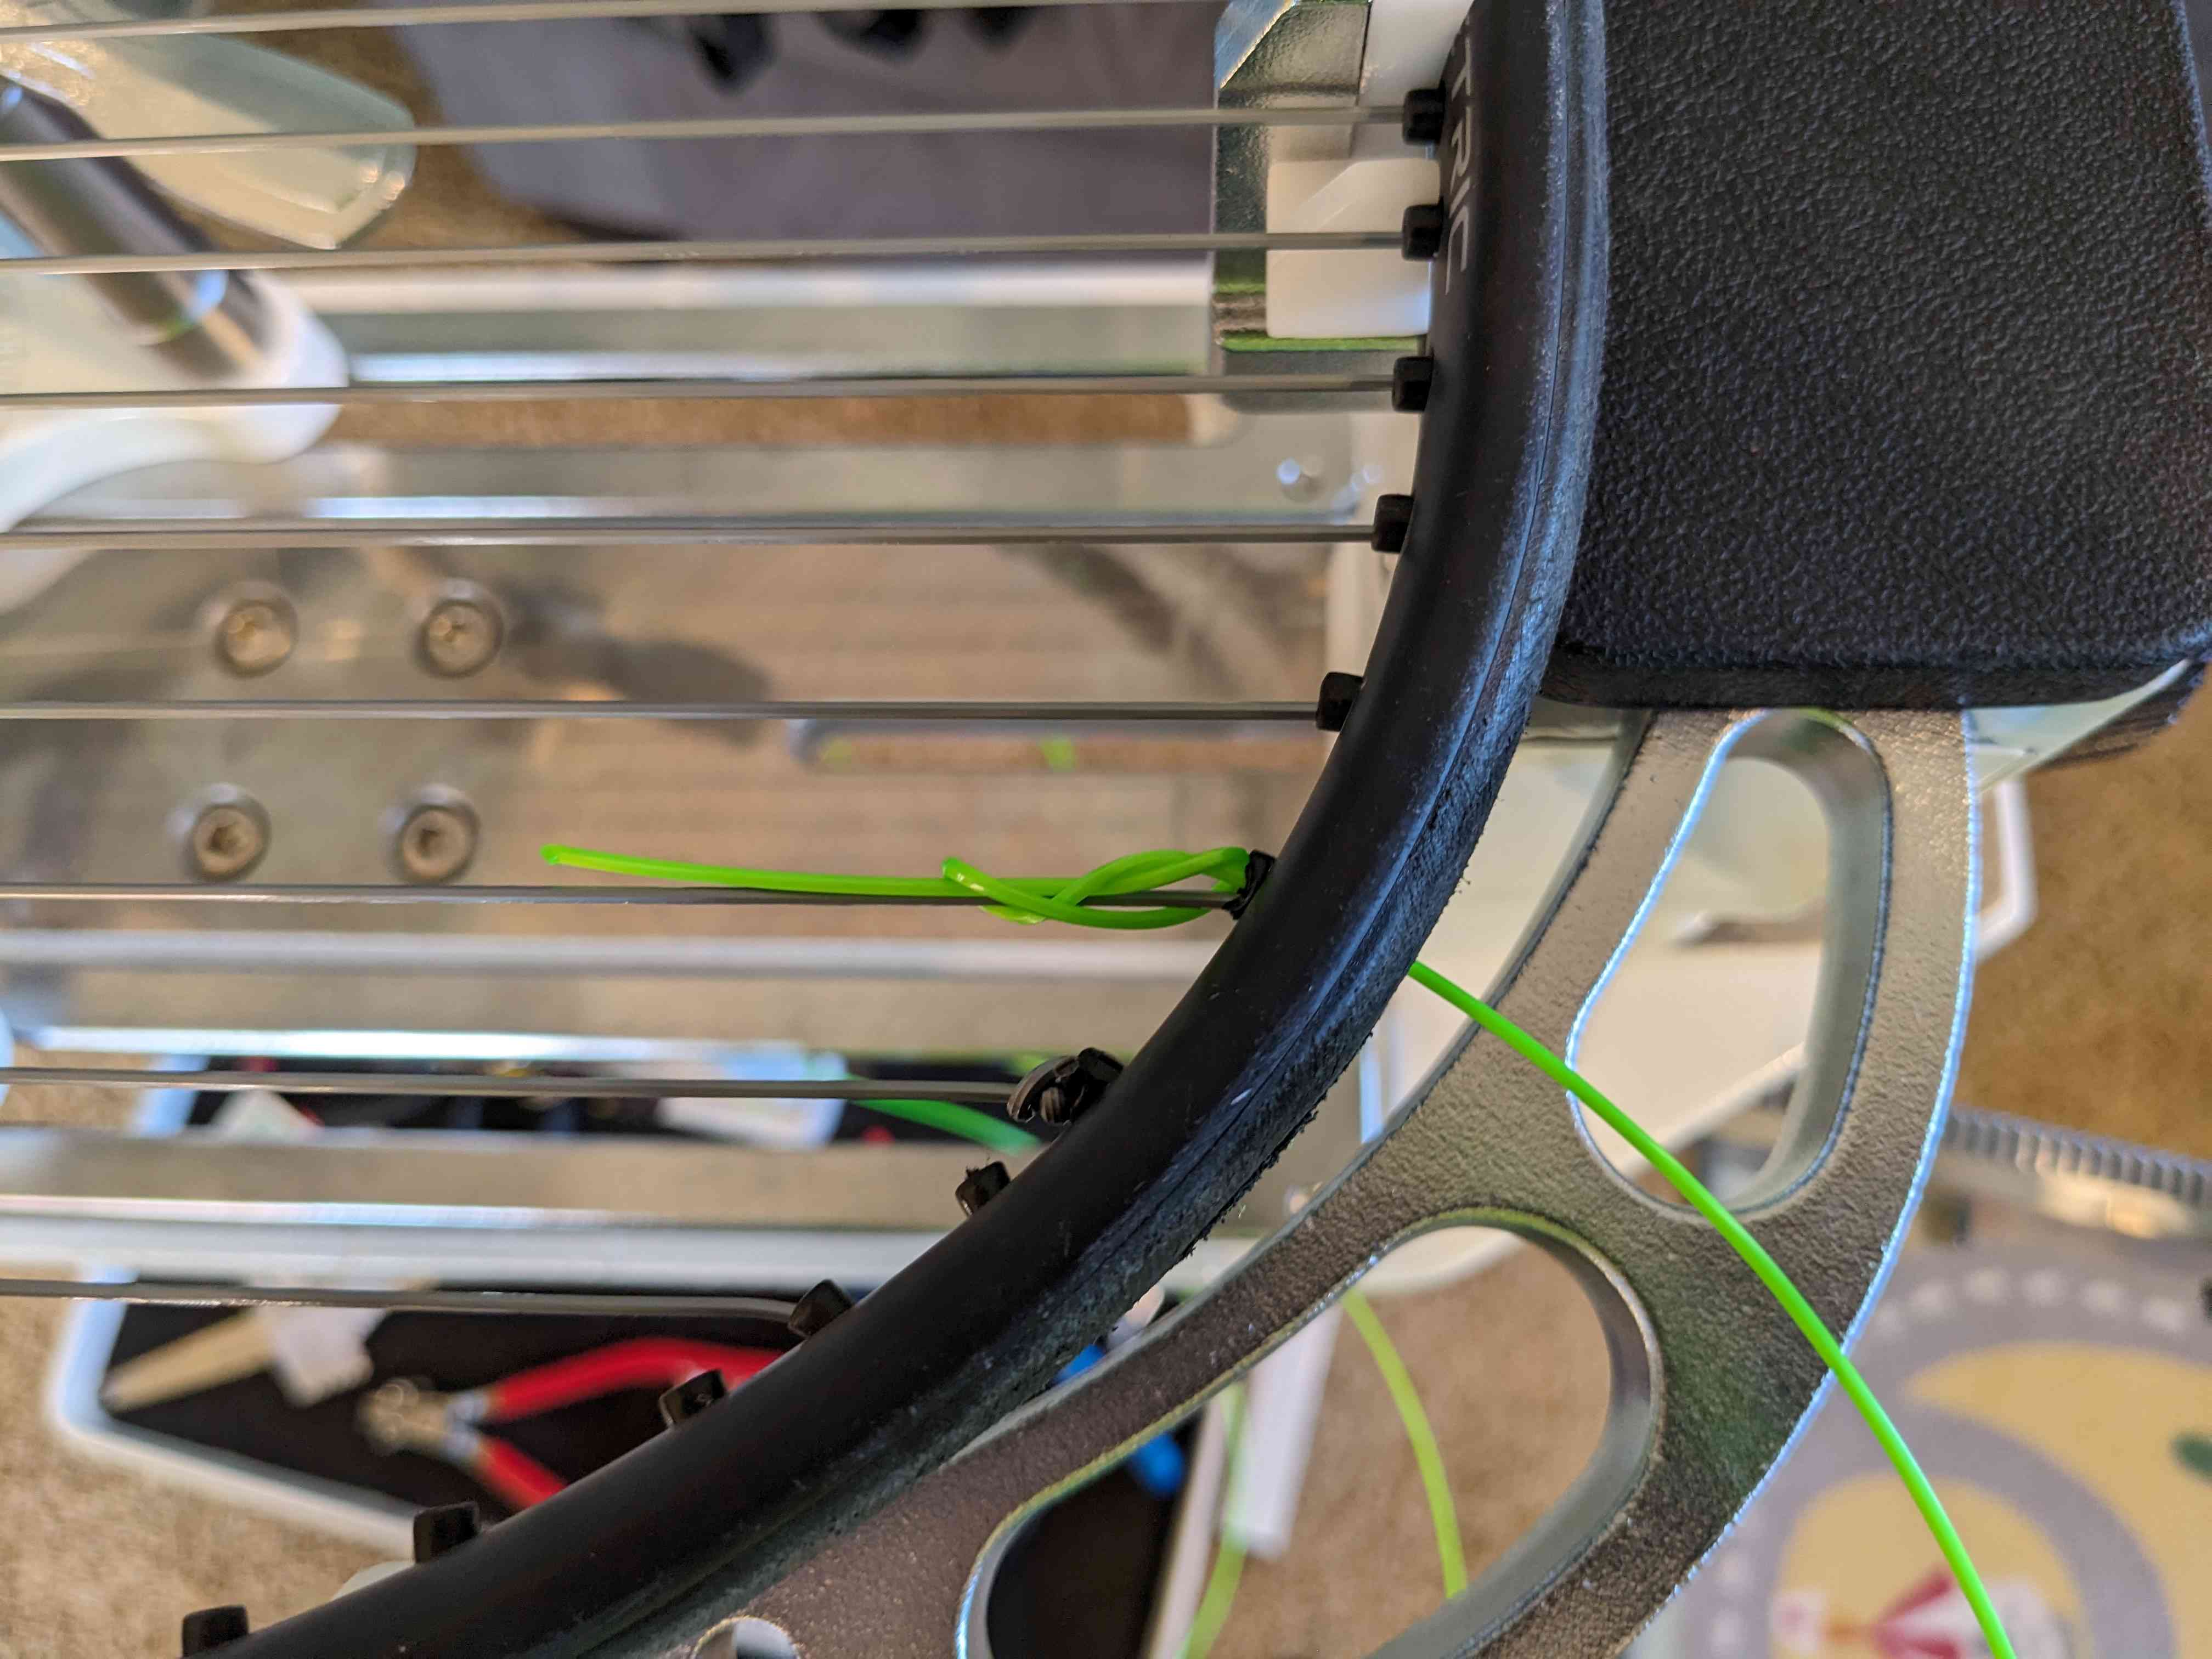
Finally, hold the loose end gently so you don’t lose it, and pull both ends to tie the knot. It should look like the picture below.
Weave the crosses
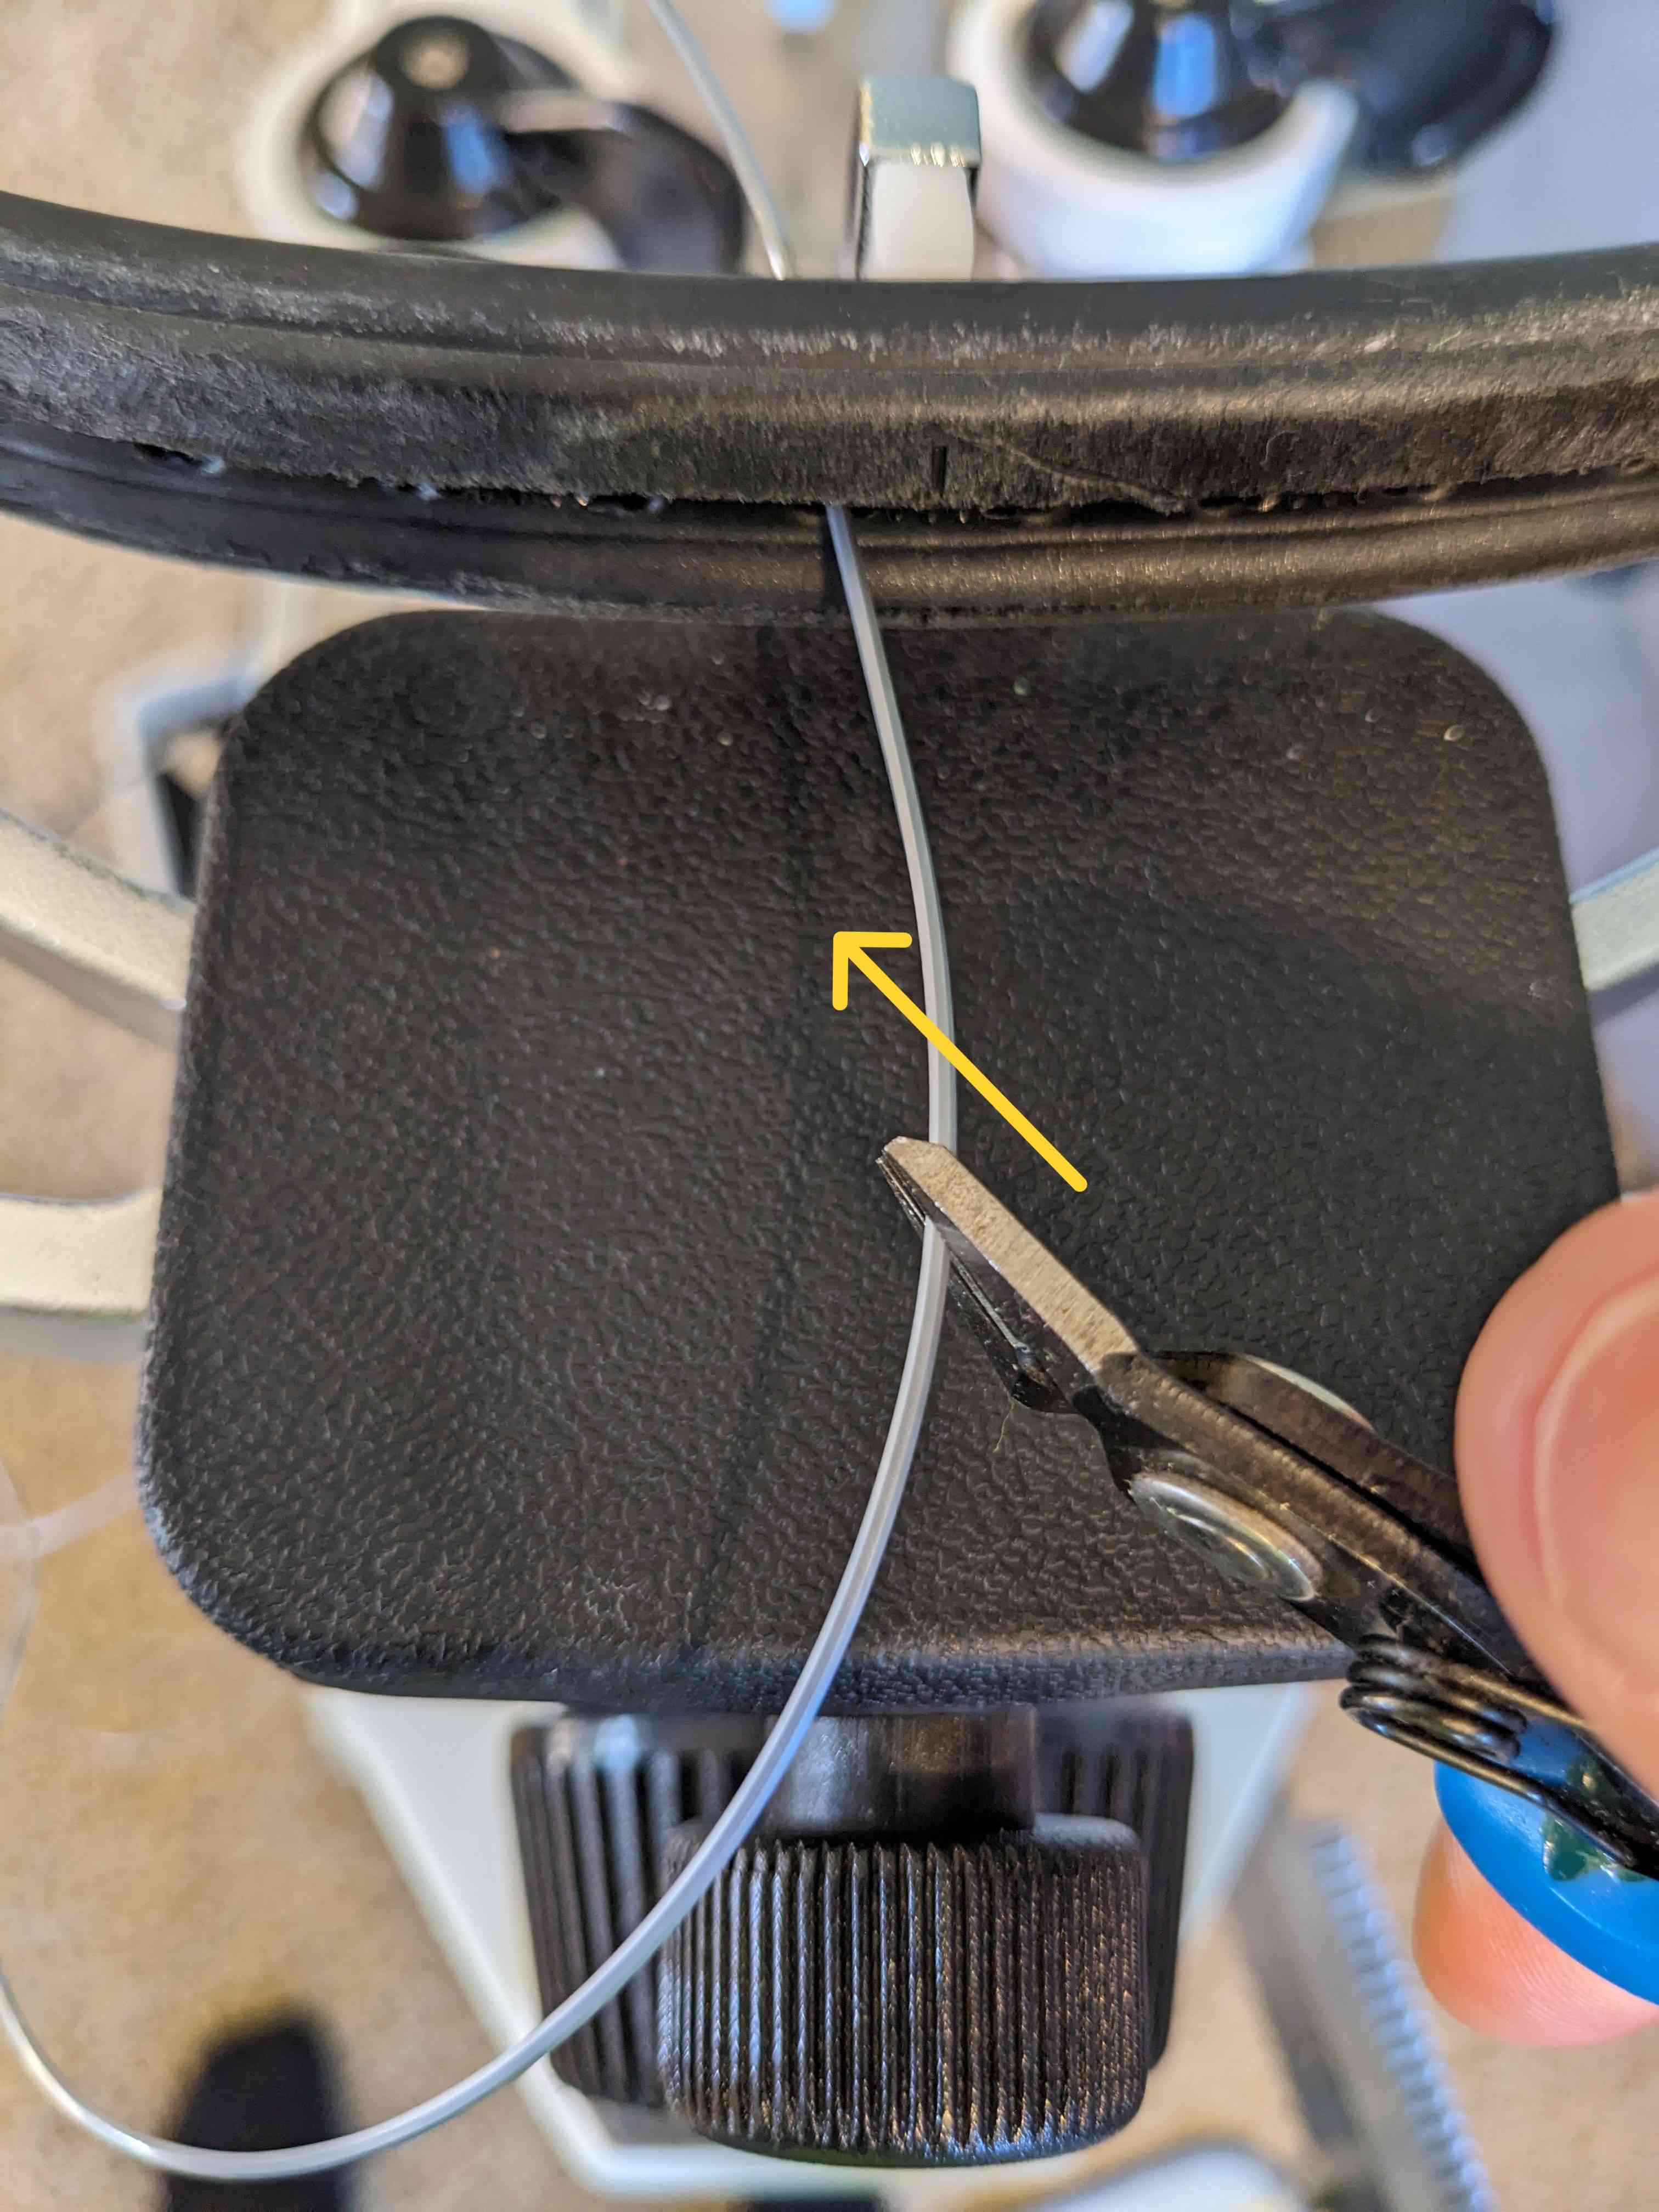
Weave the first cross. Whenever weaving the crosses, make sure to go under the third (or odd-numbered) main, as shown in the picture below.
Gently apply tension to the first cross. You will see that the starting knot becomes compact, as shown in the picture below. If necessary, use the awl to guide the starting knot.
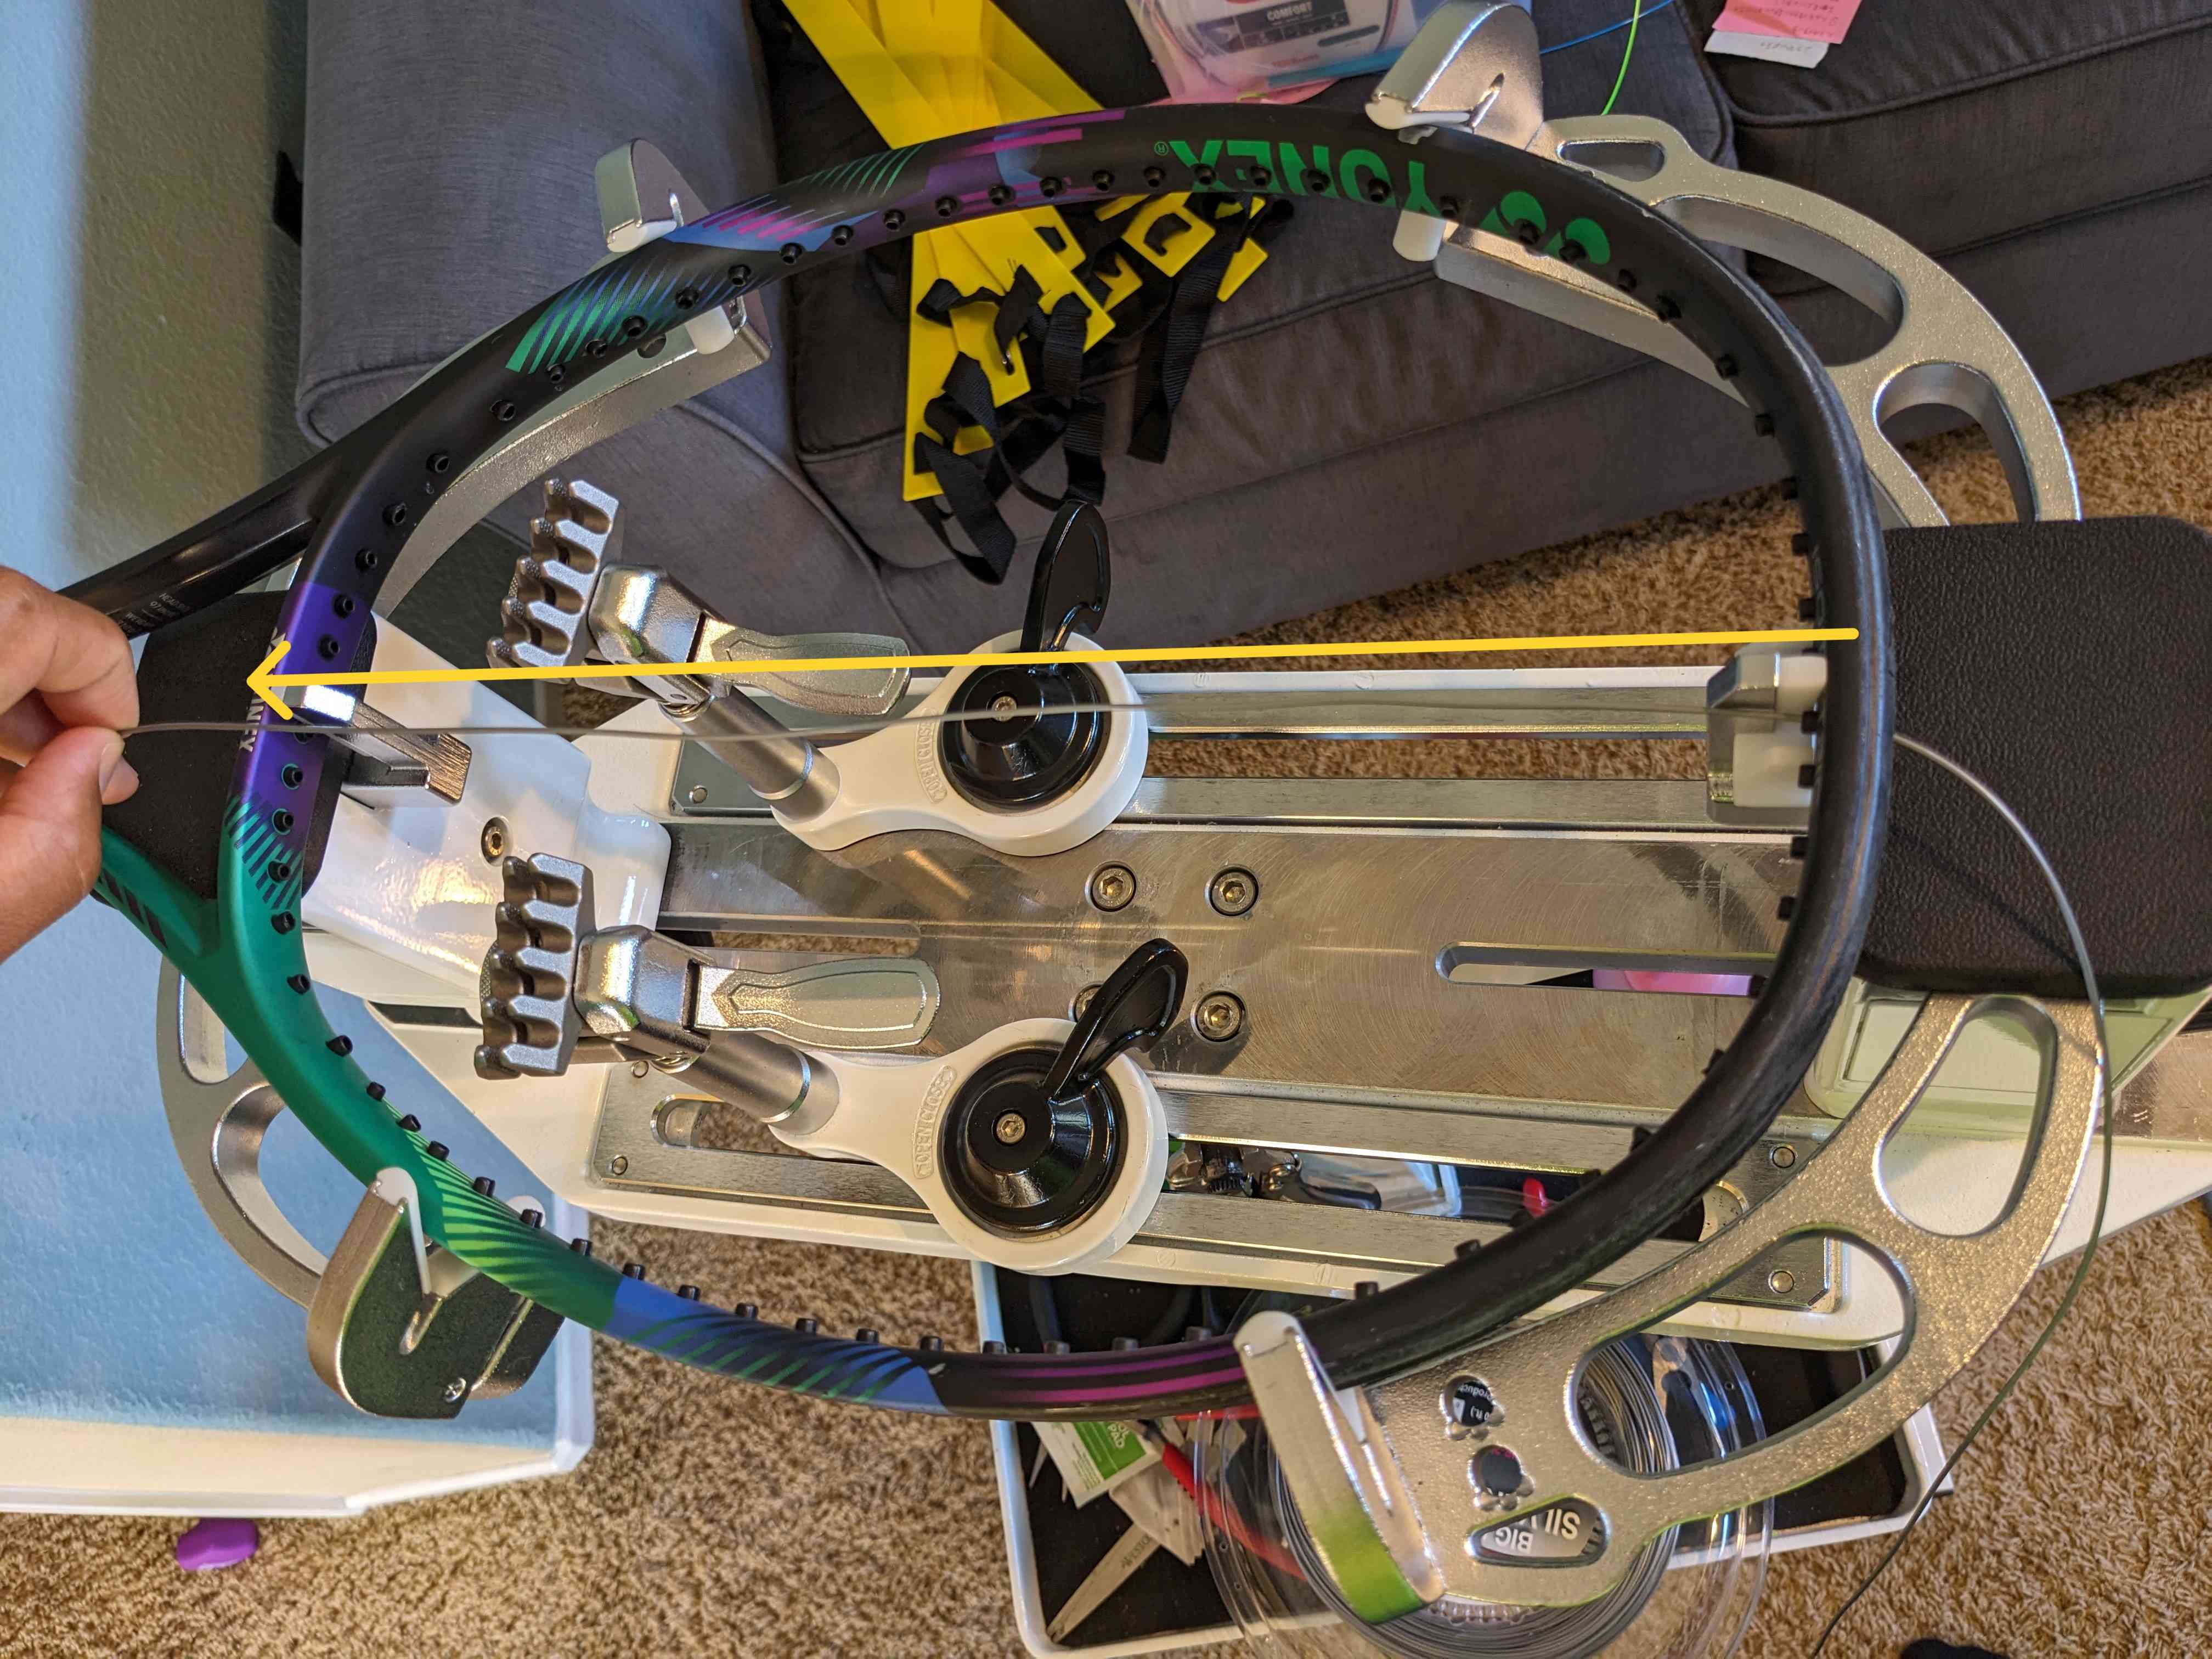
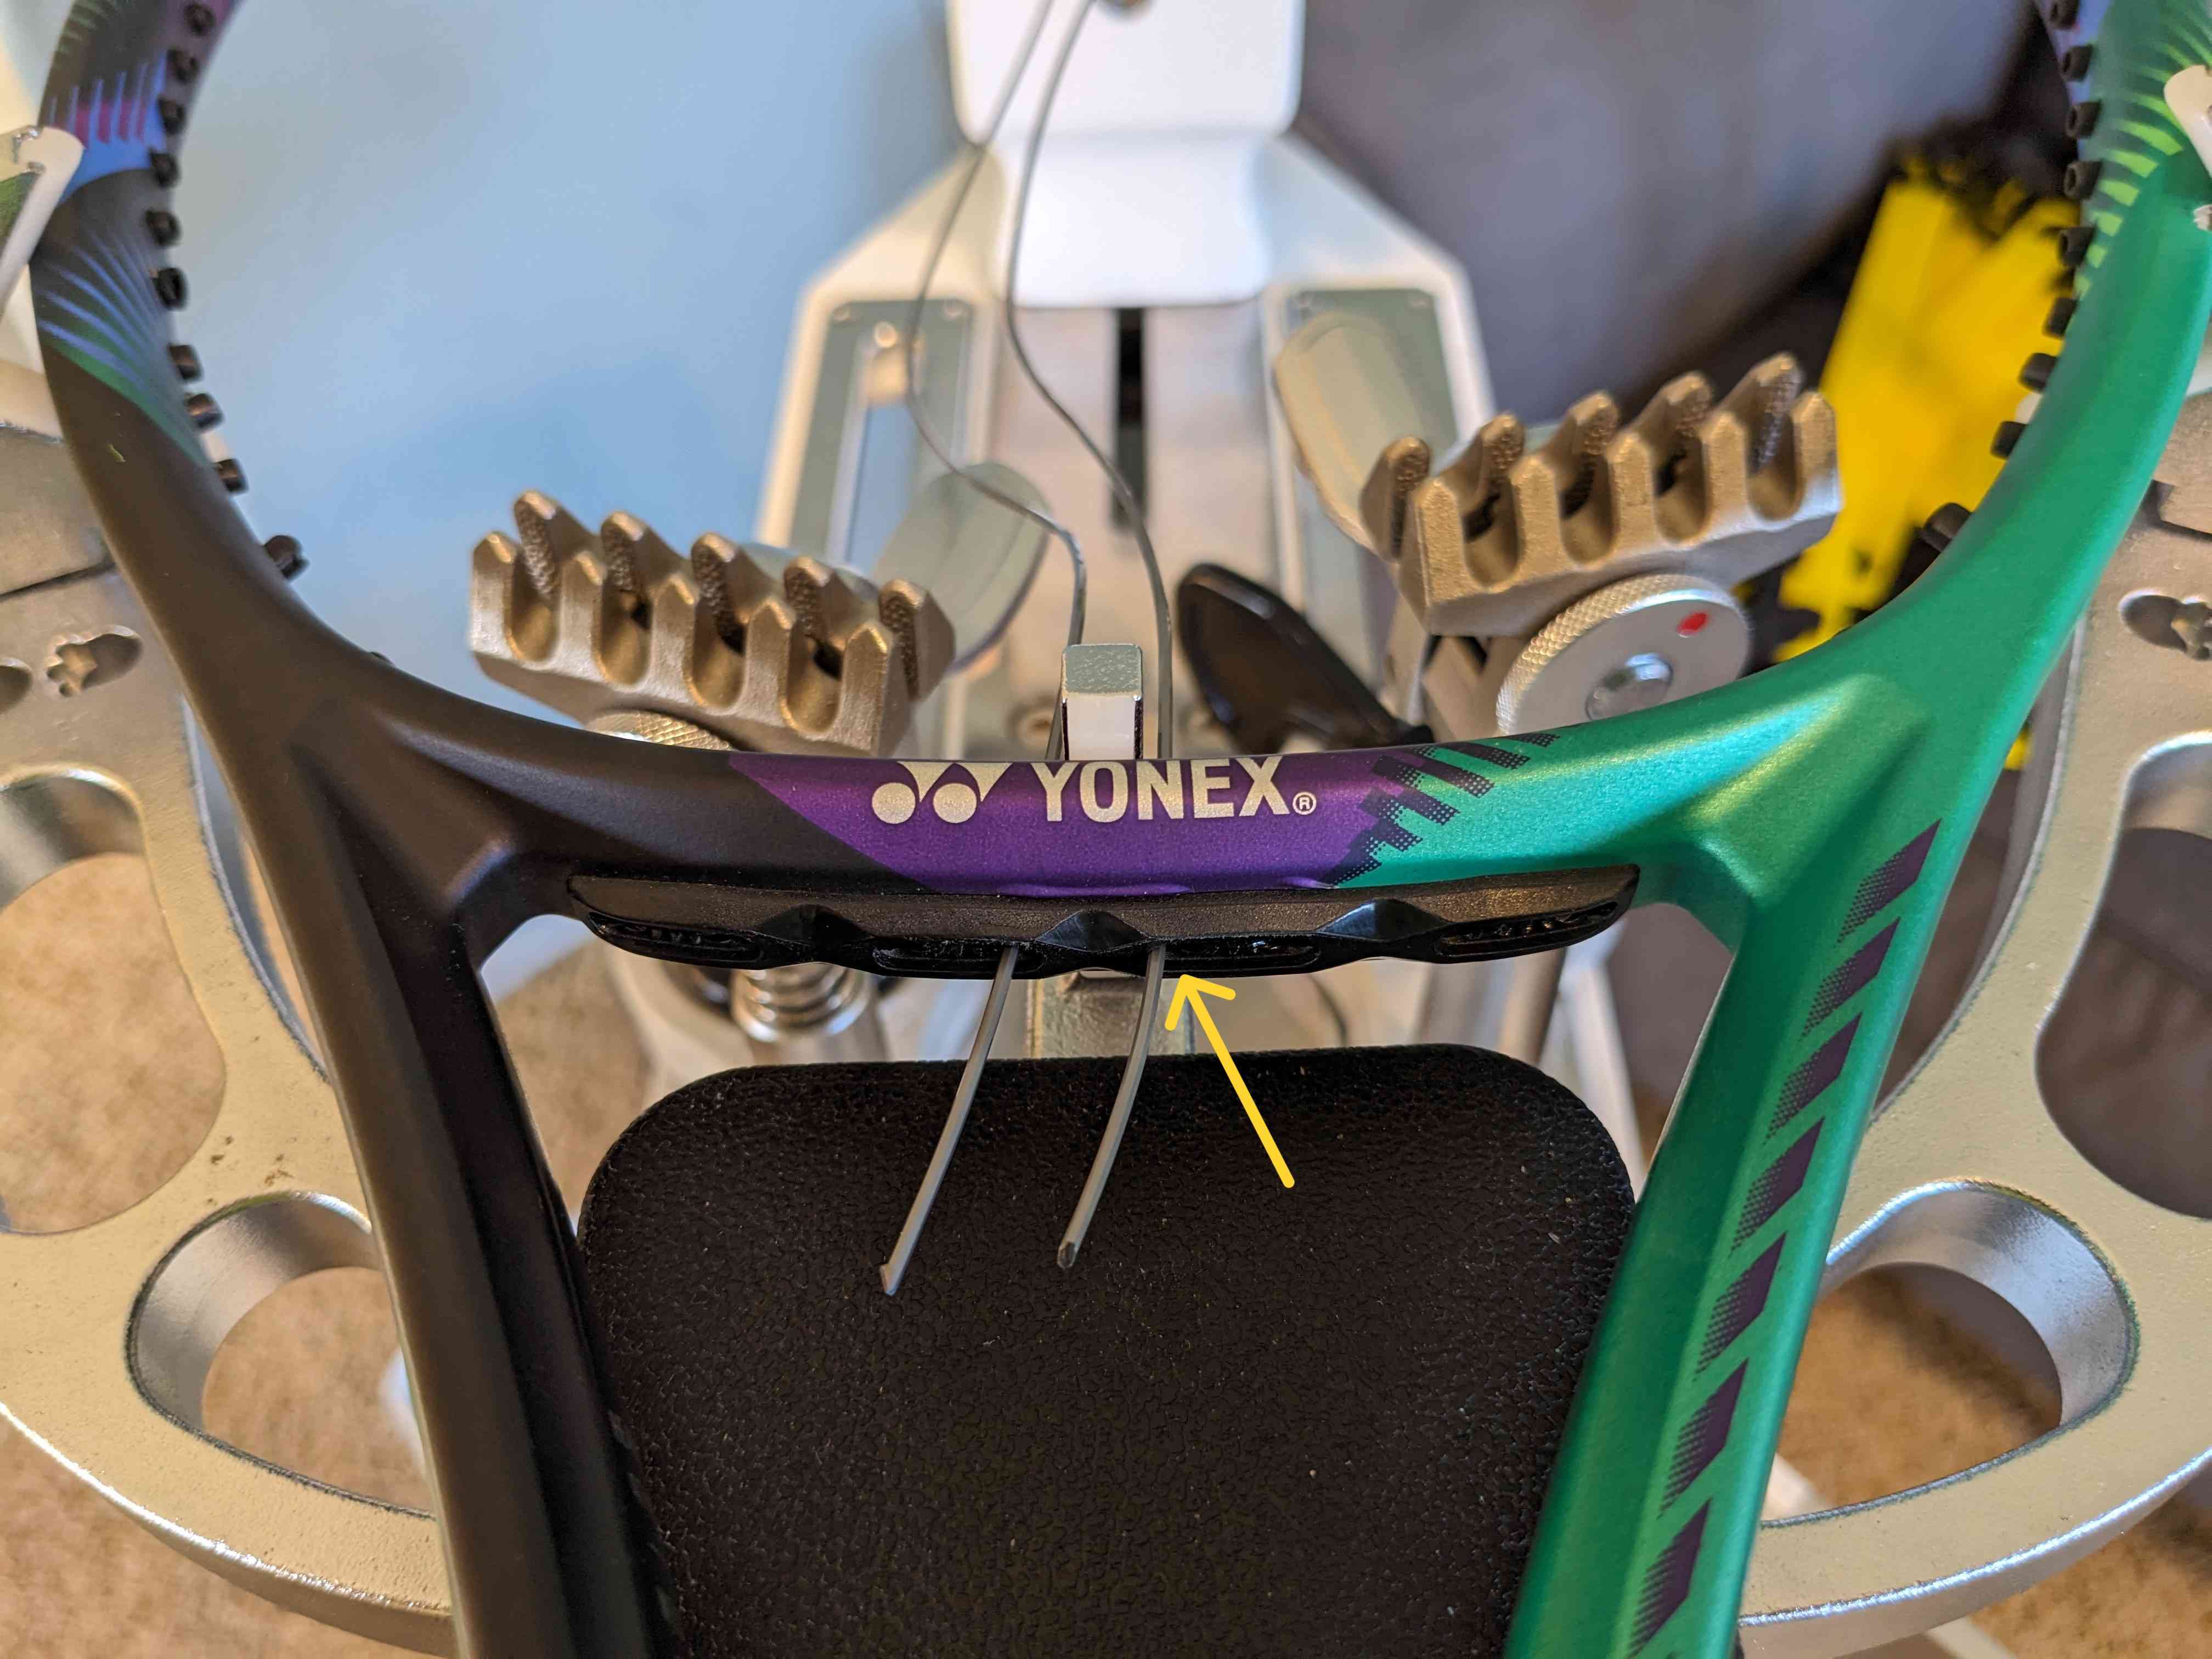
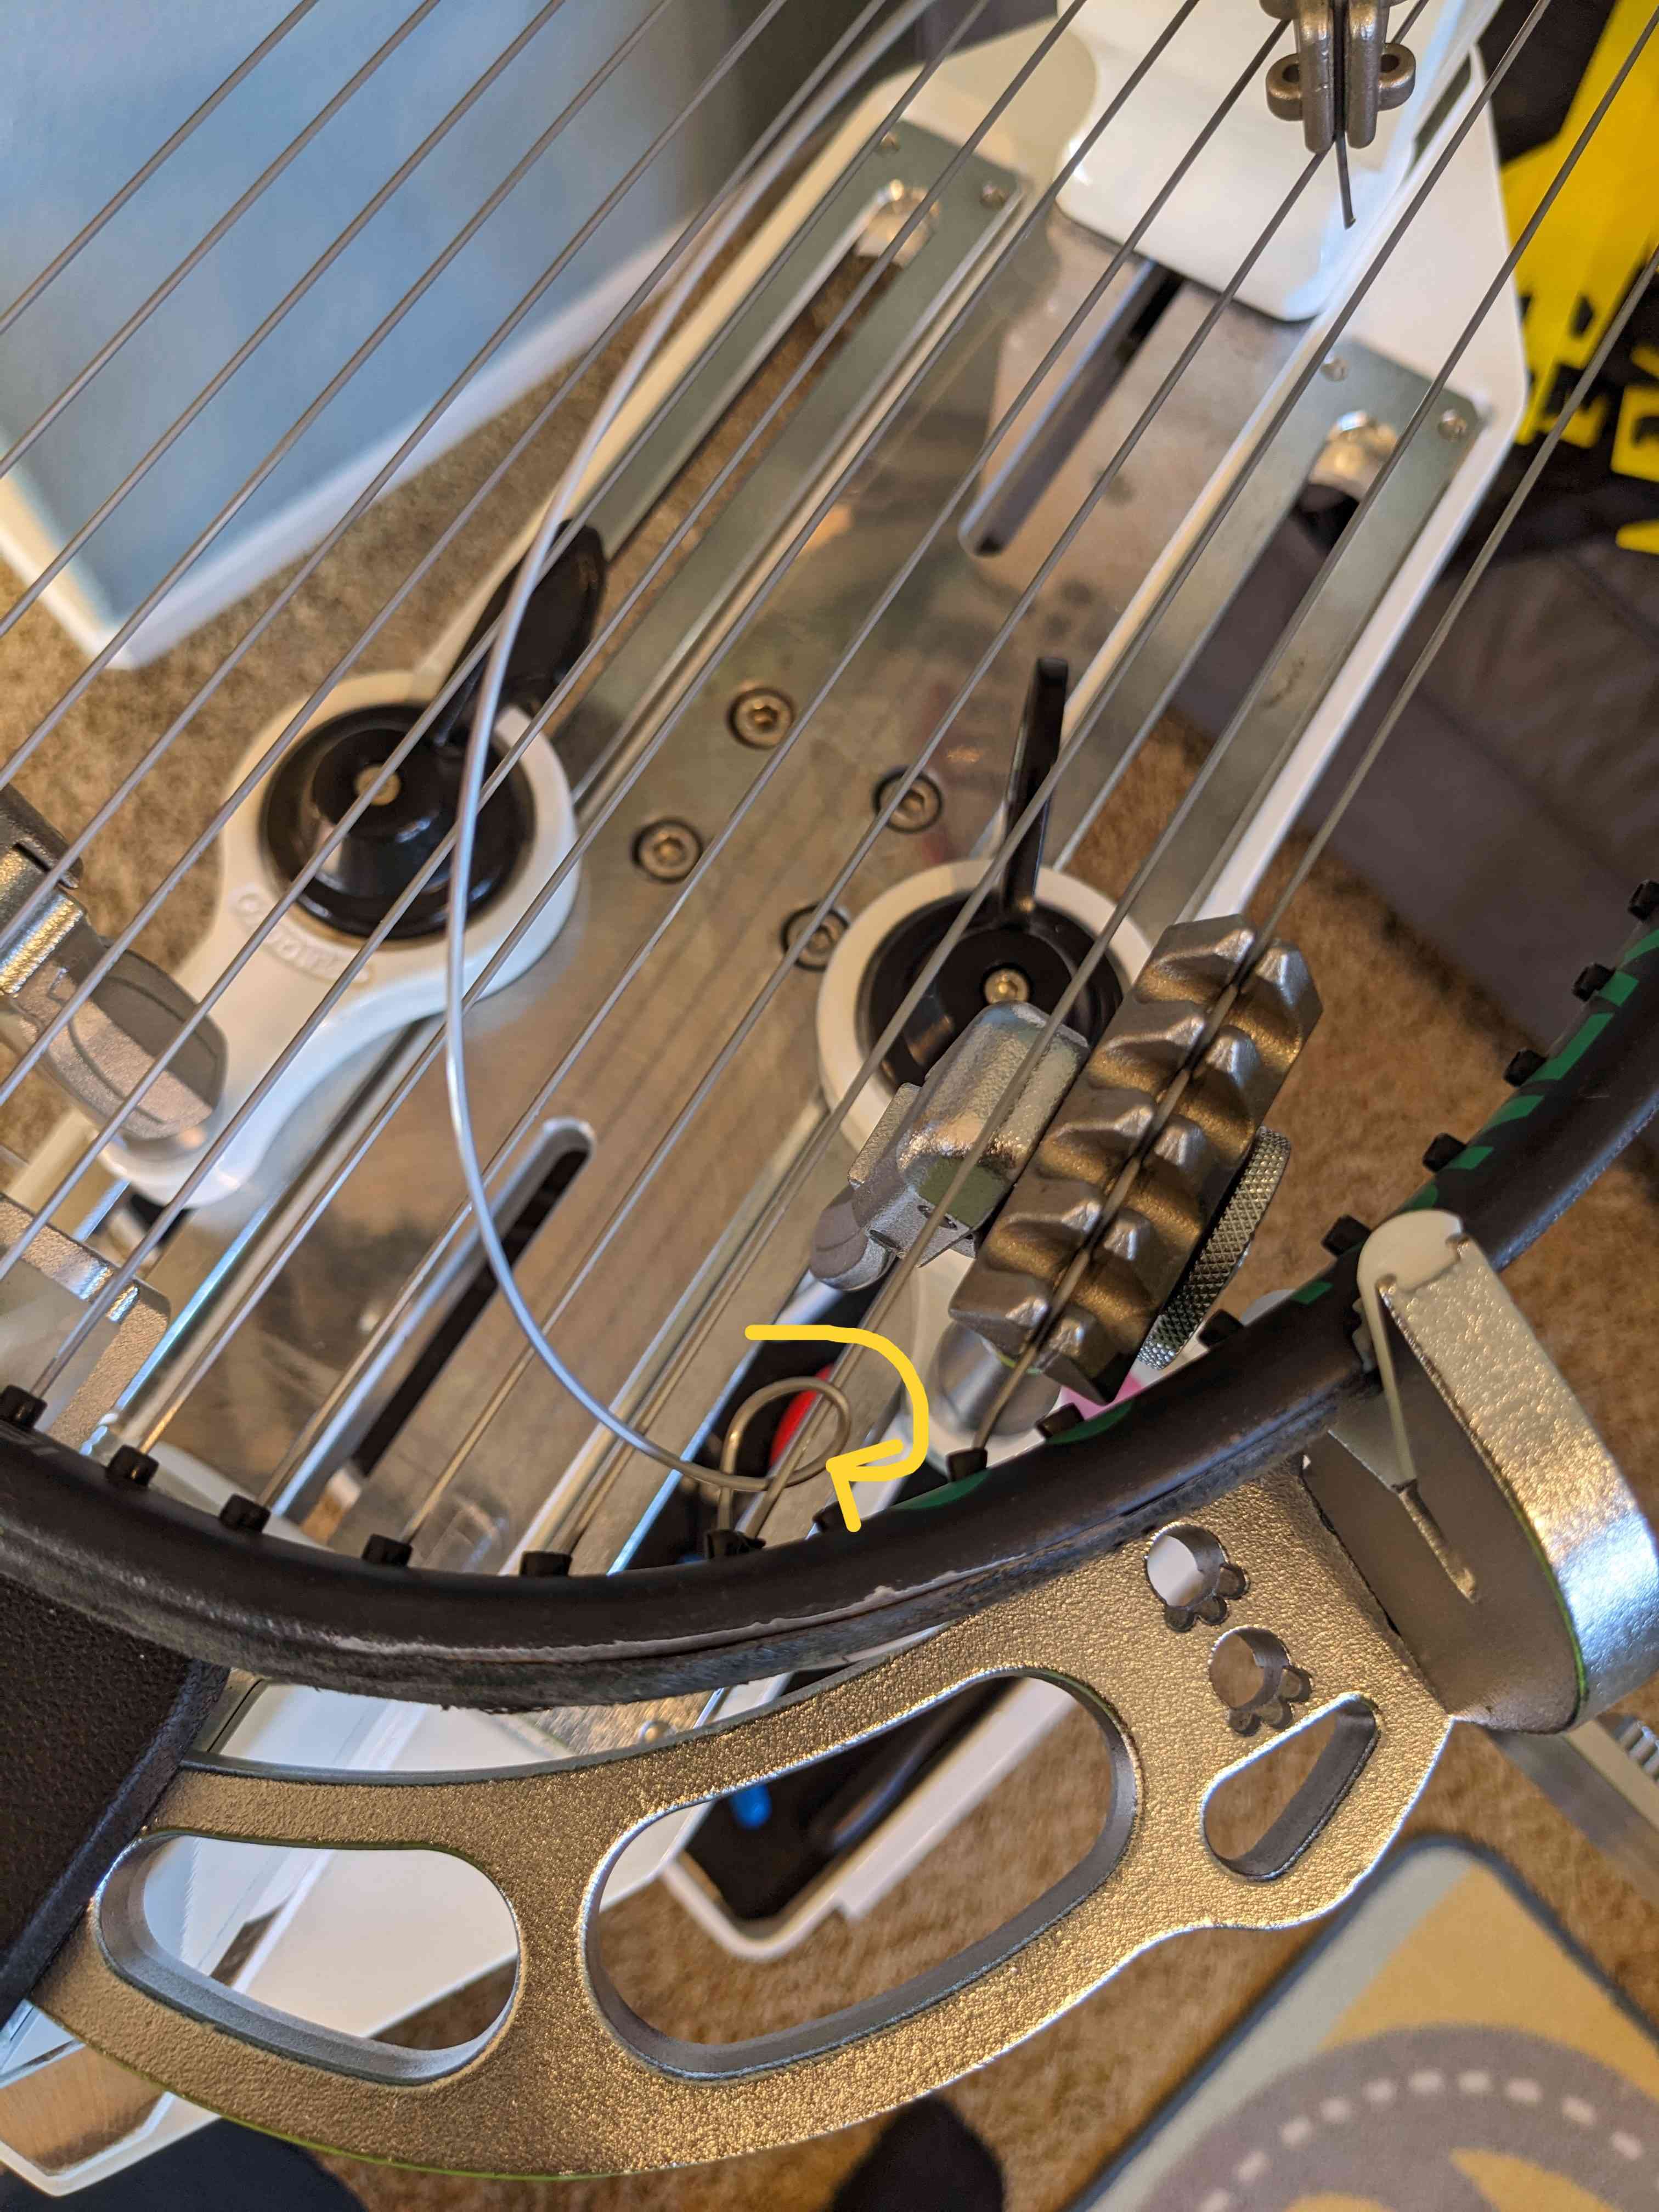
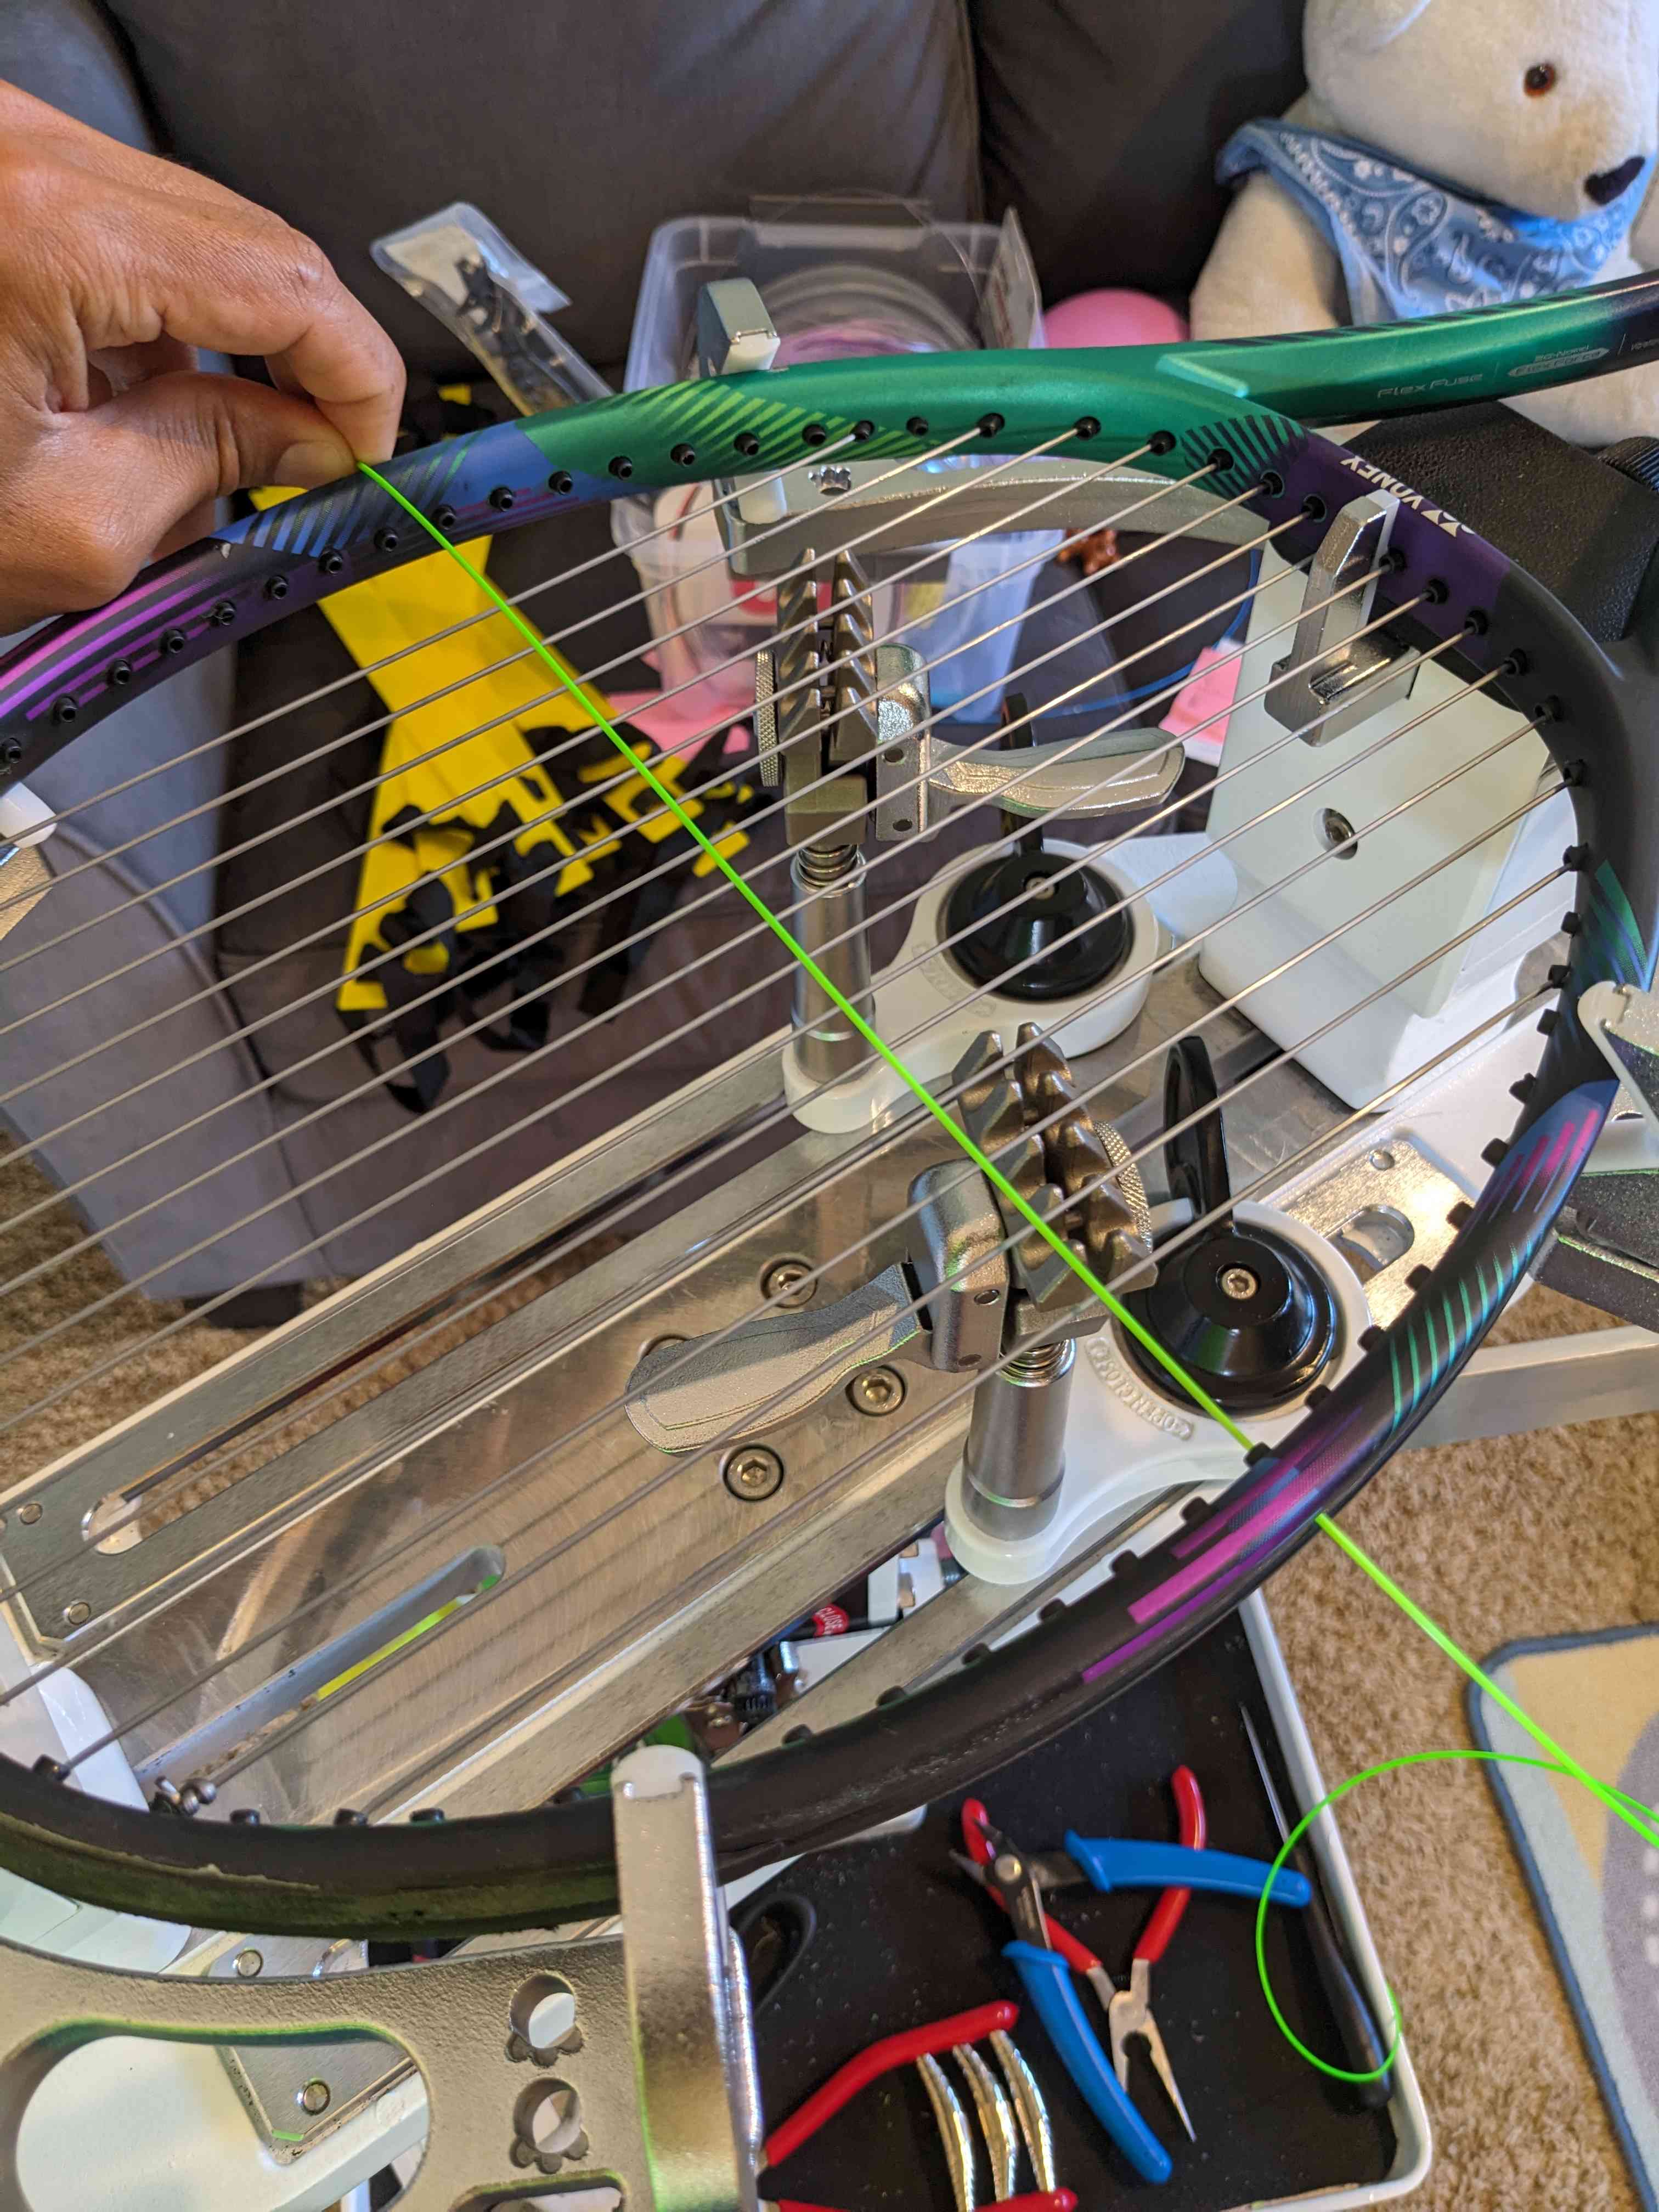
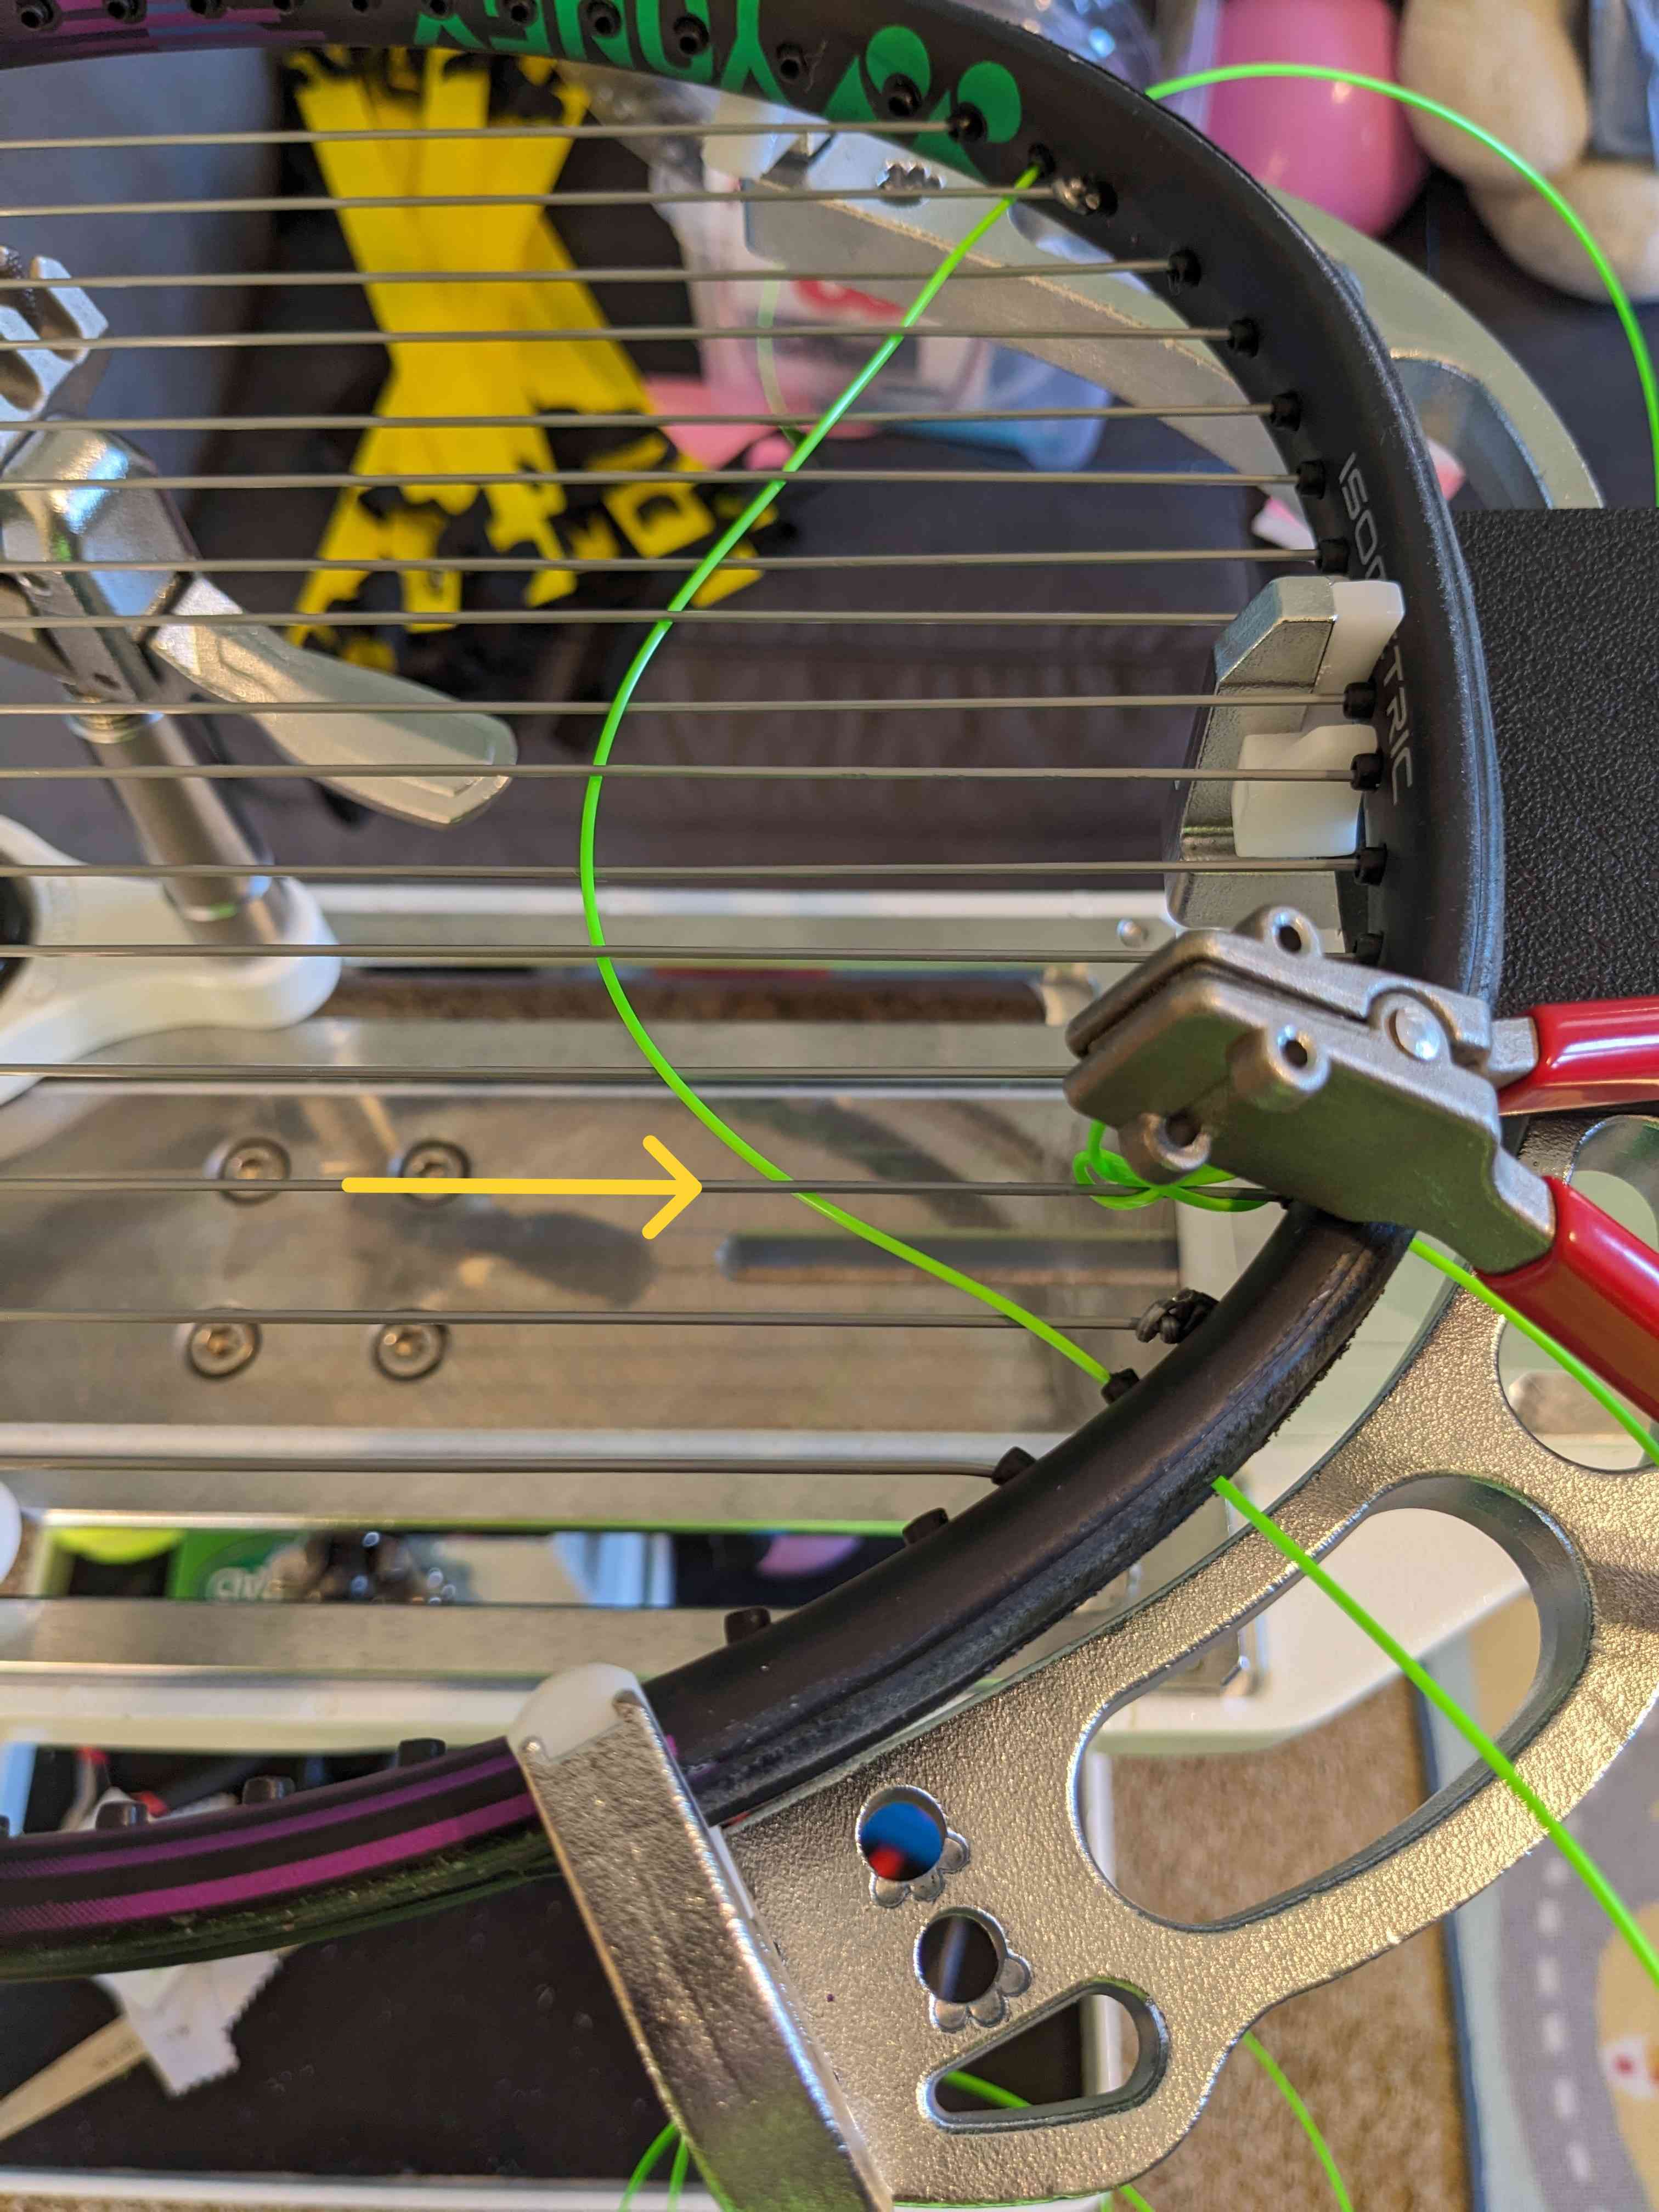
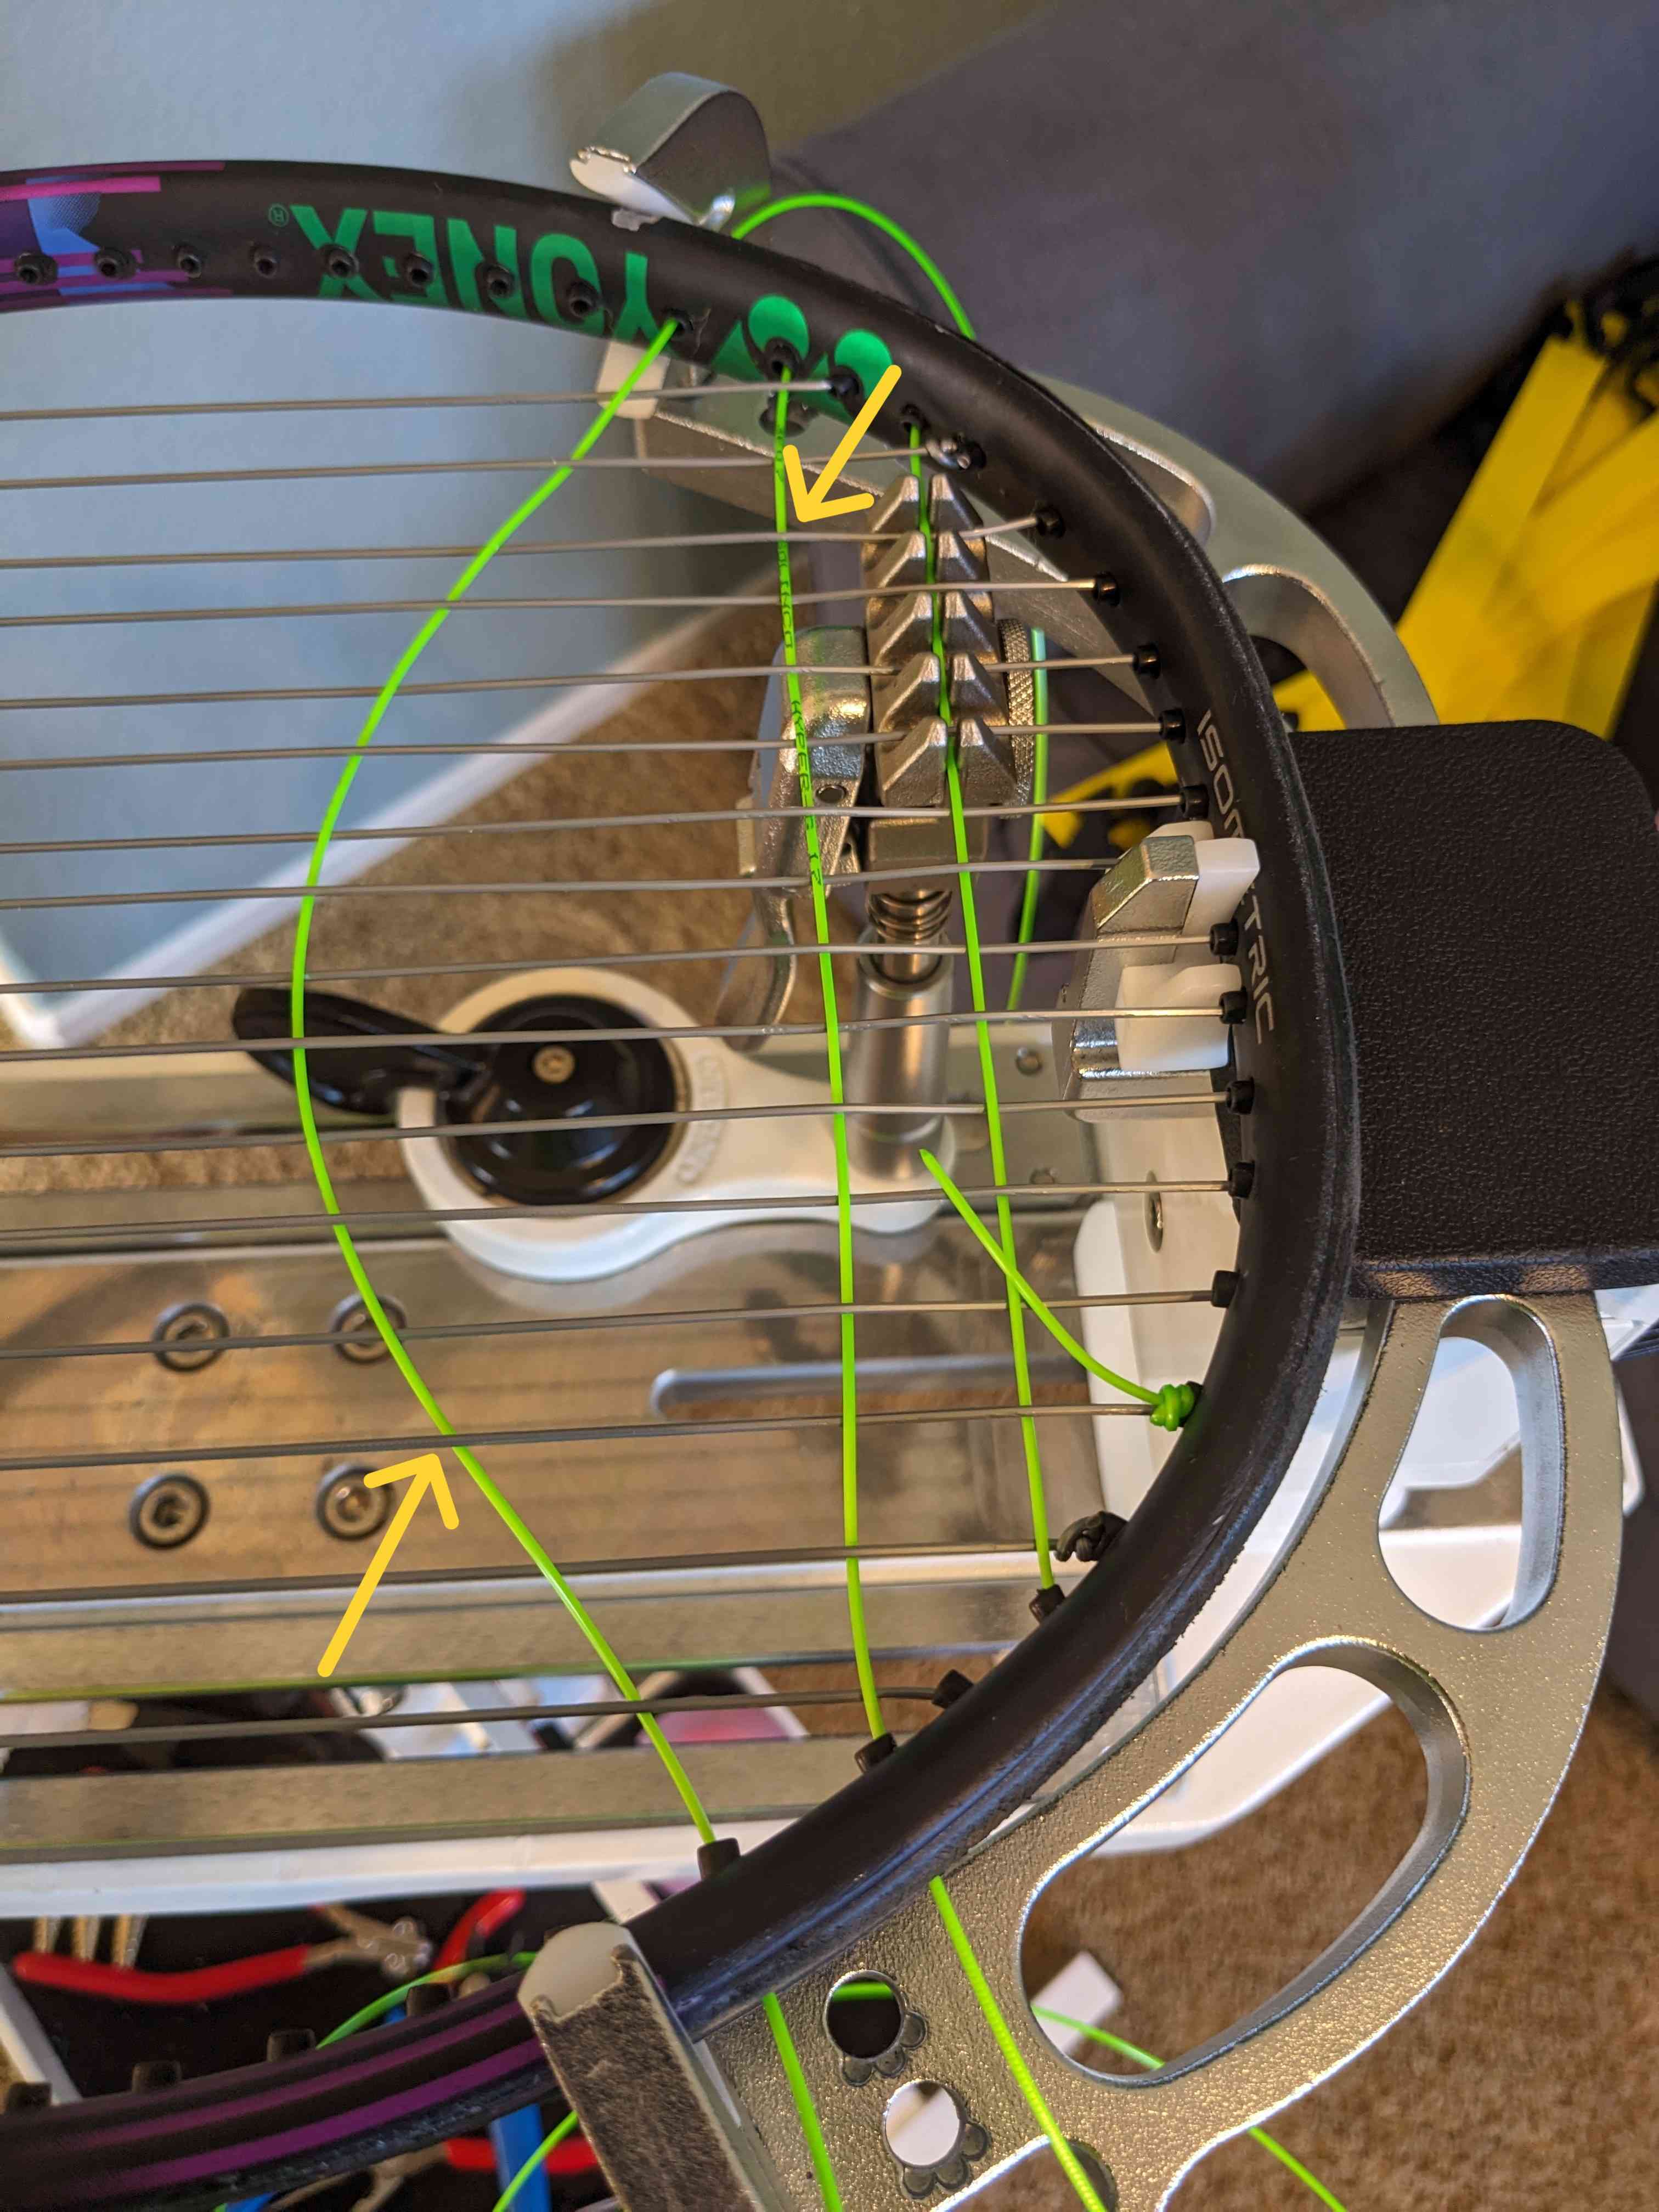
To save time, weave two crosses at a time, like in the picture below. Always go under the third (or odd-numbered) main, as indicated with the yellow arrow. Apply tension to one cross at a time.
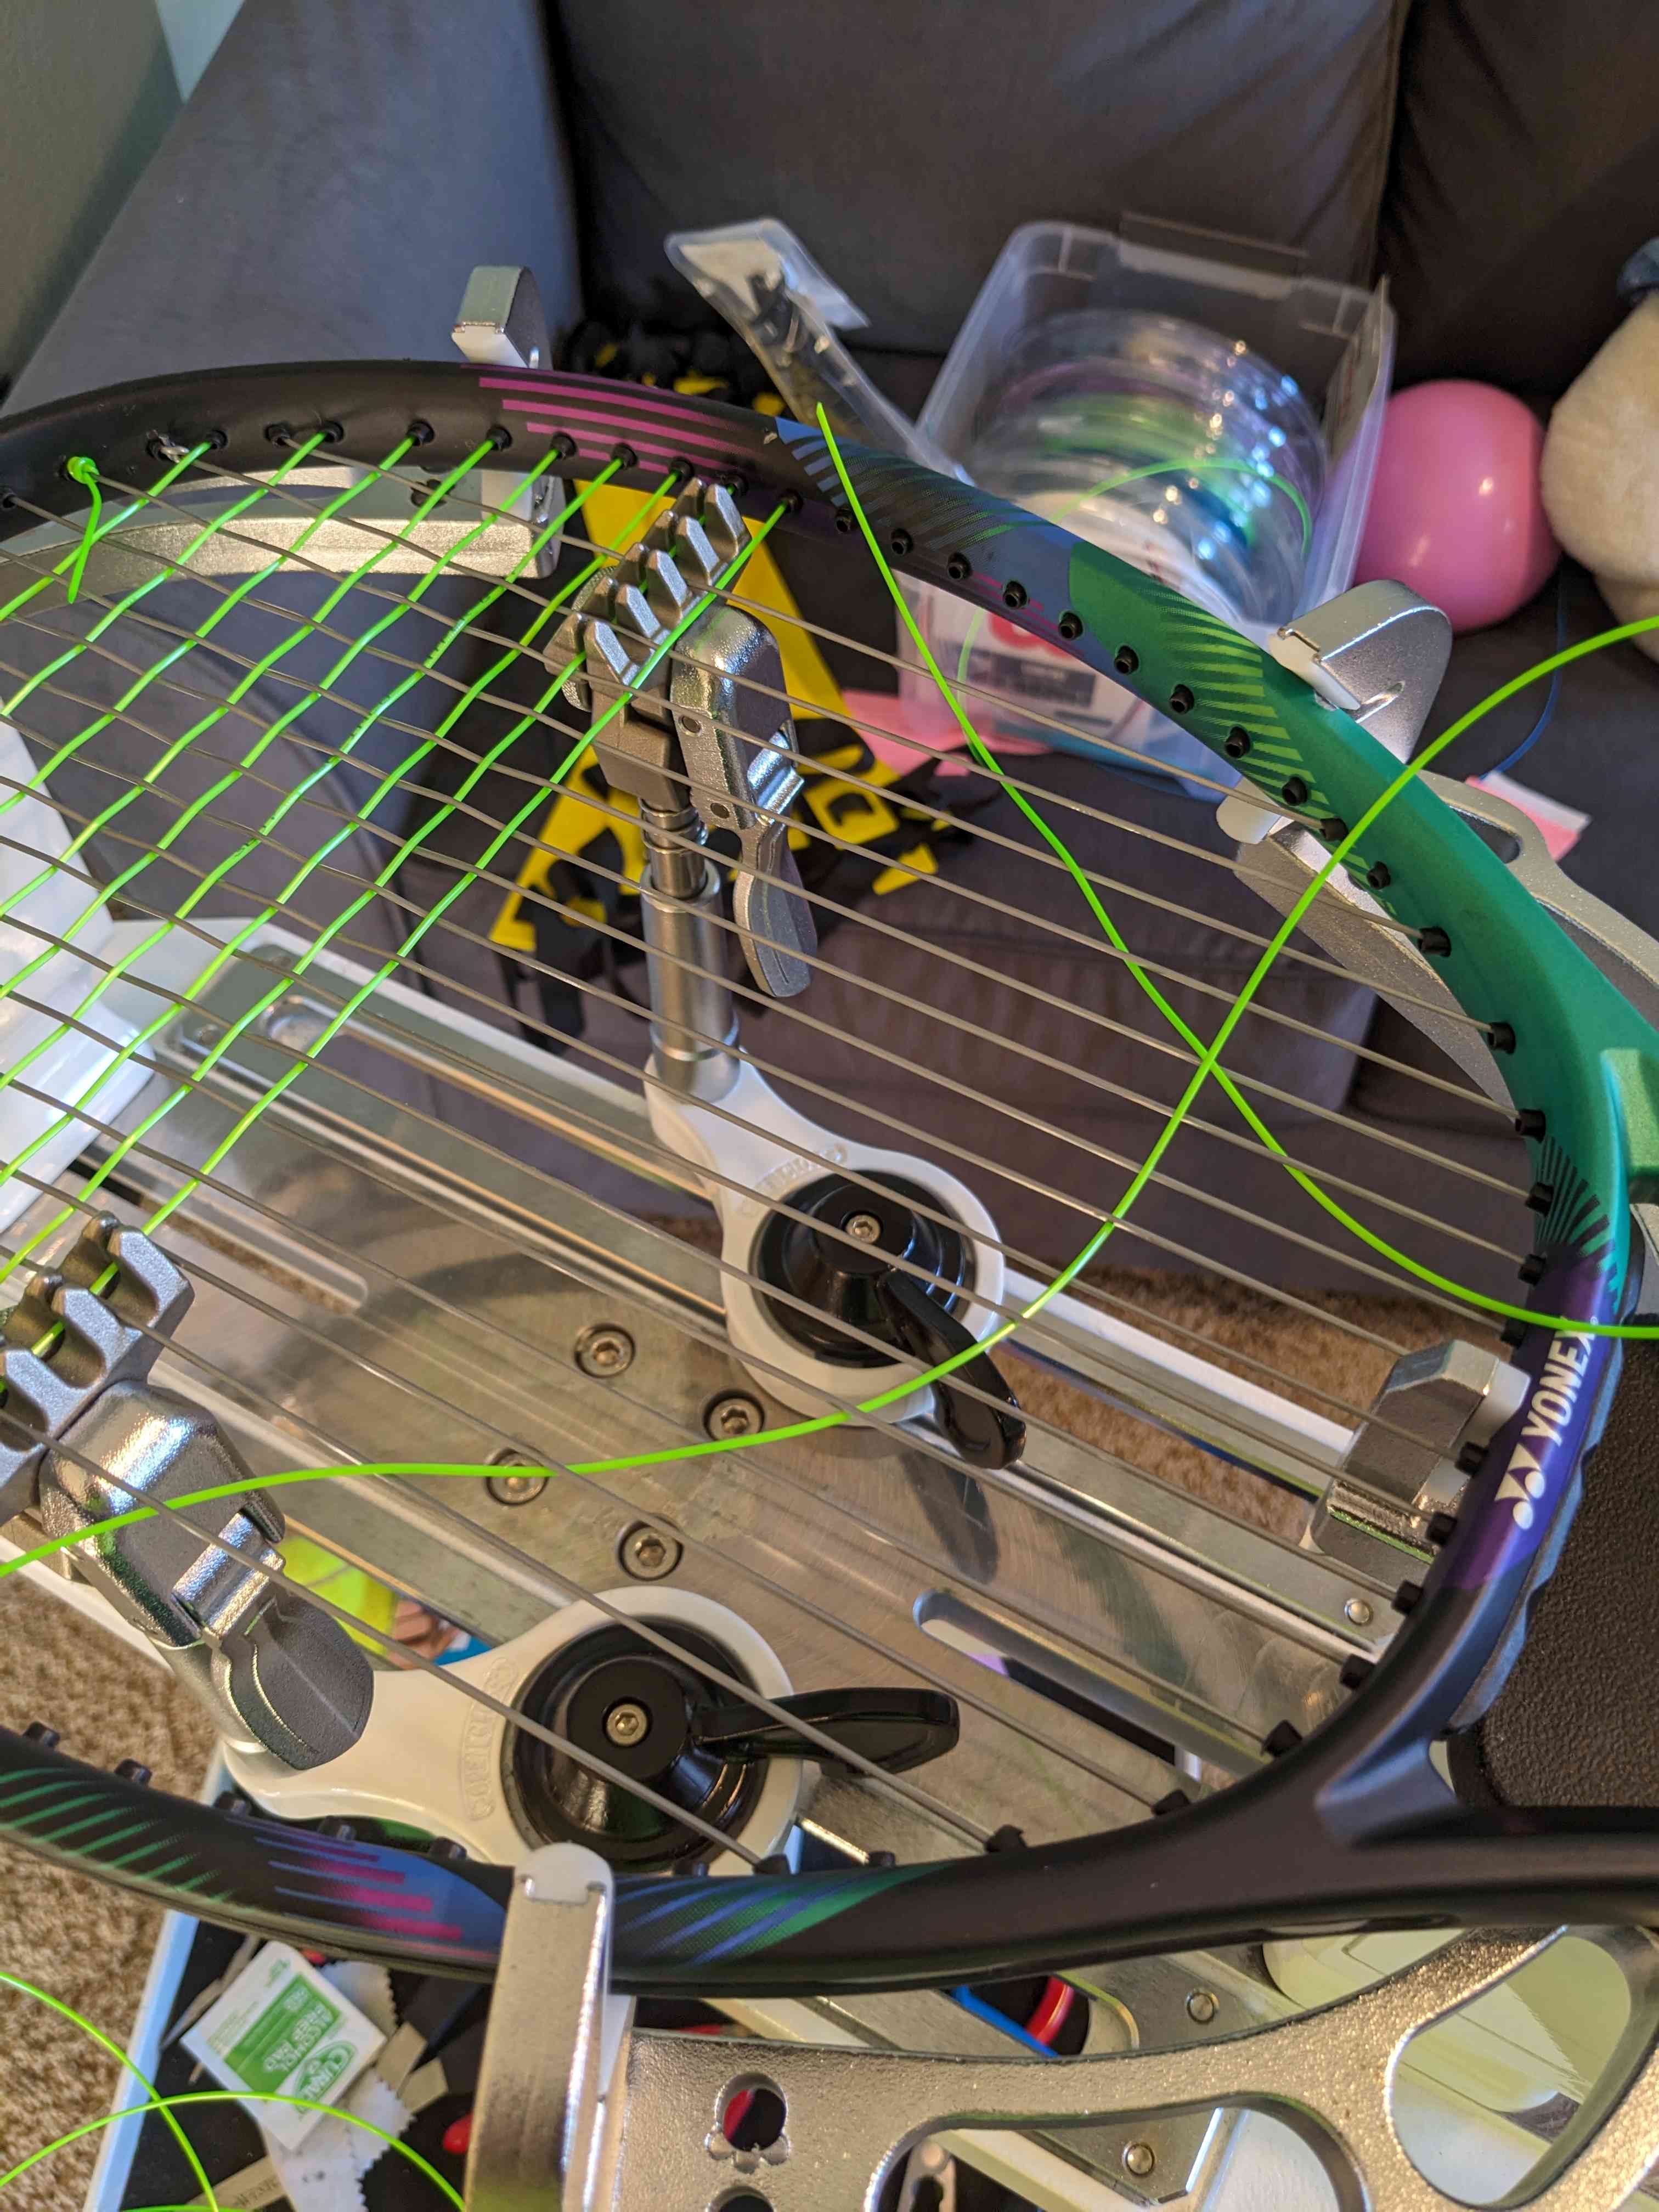
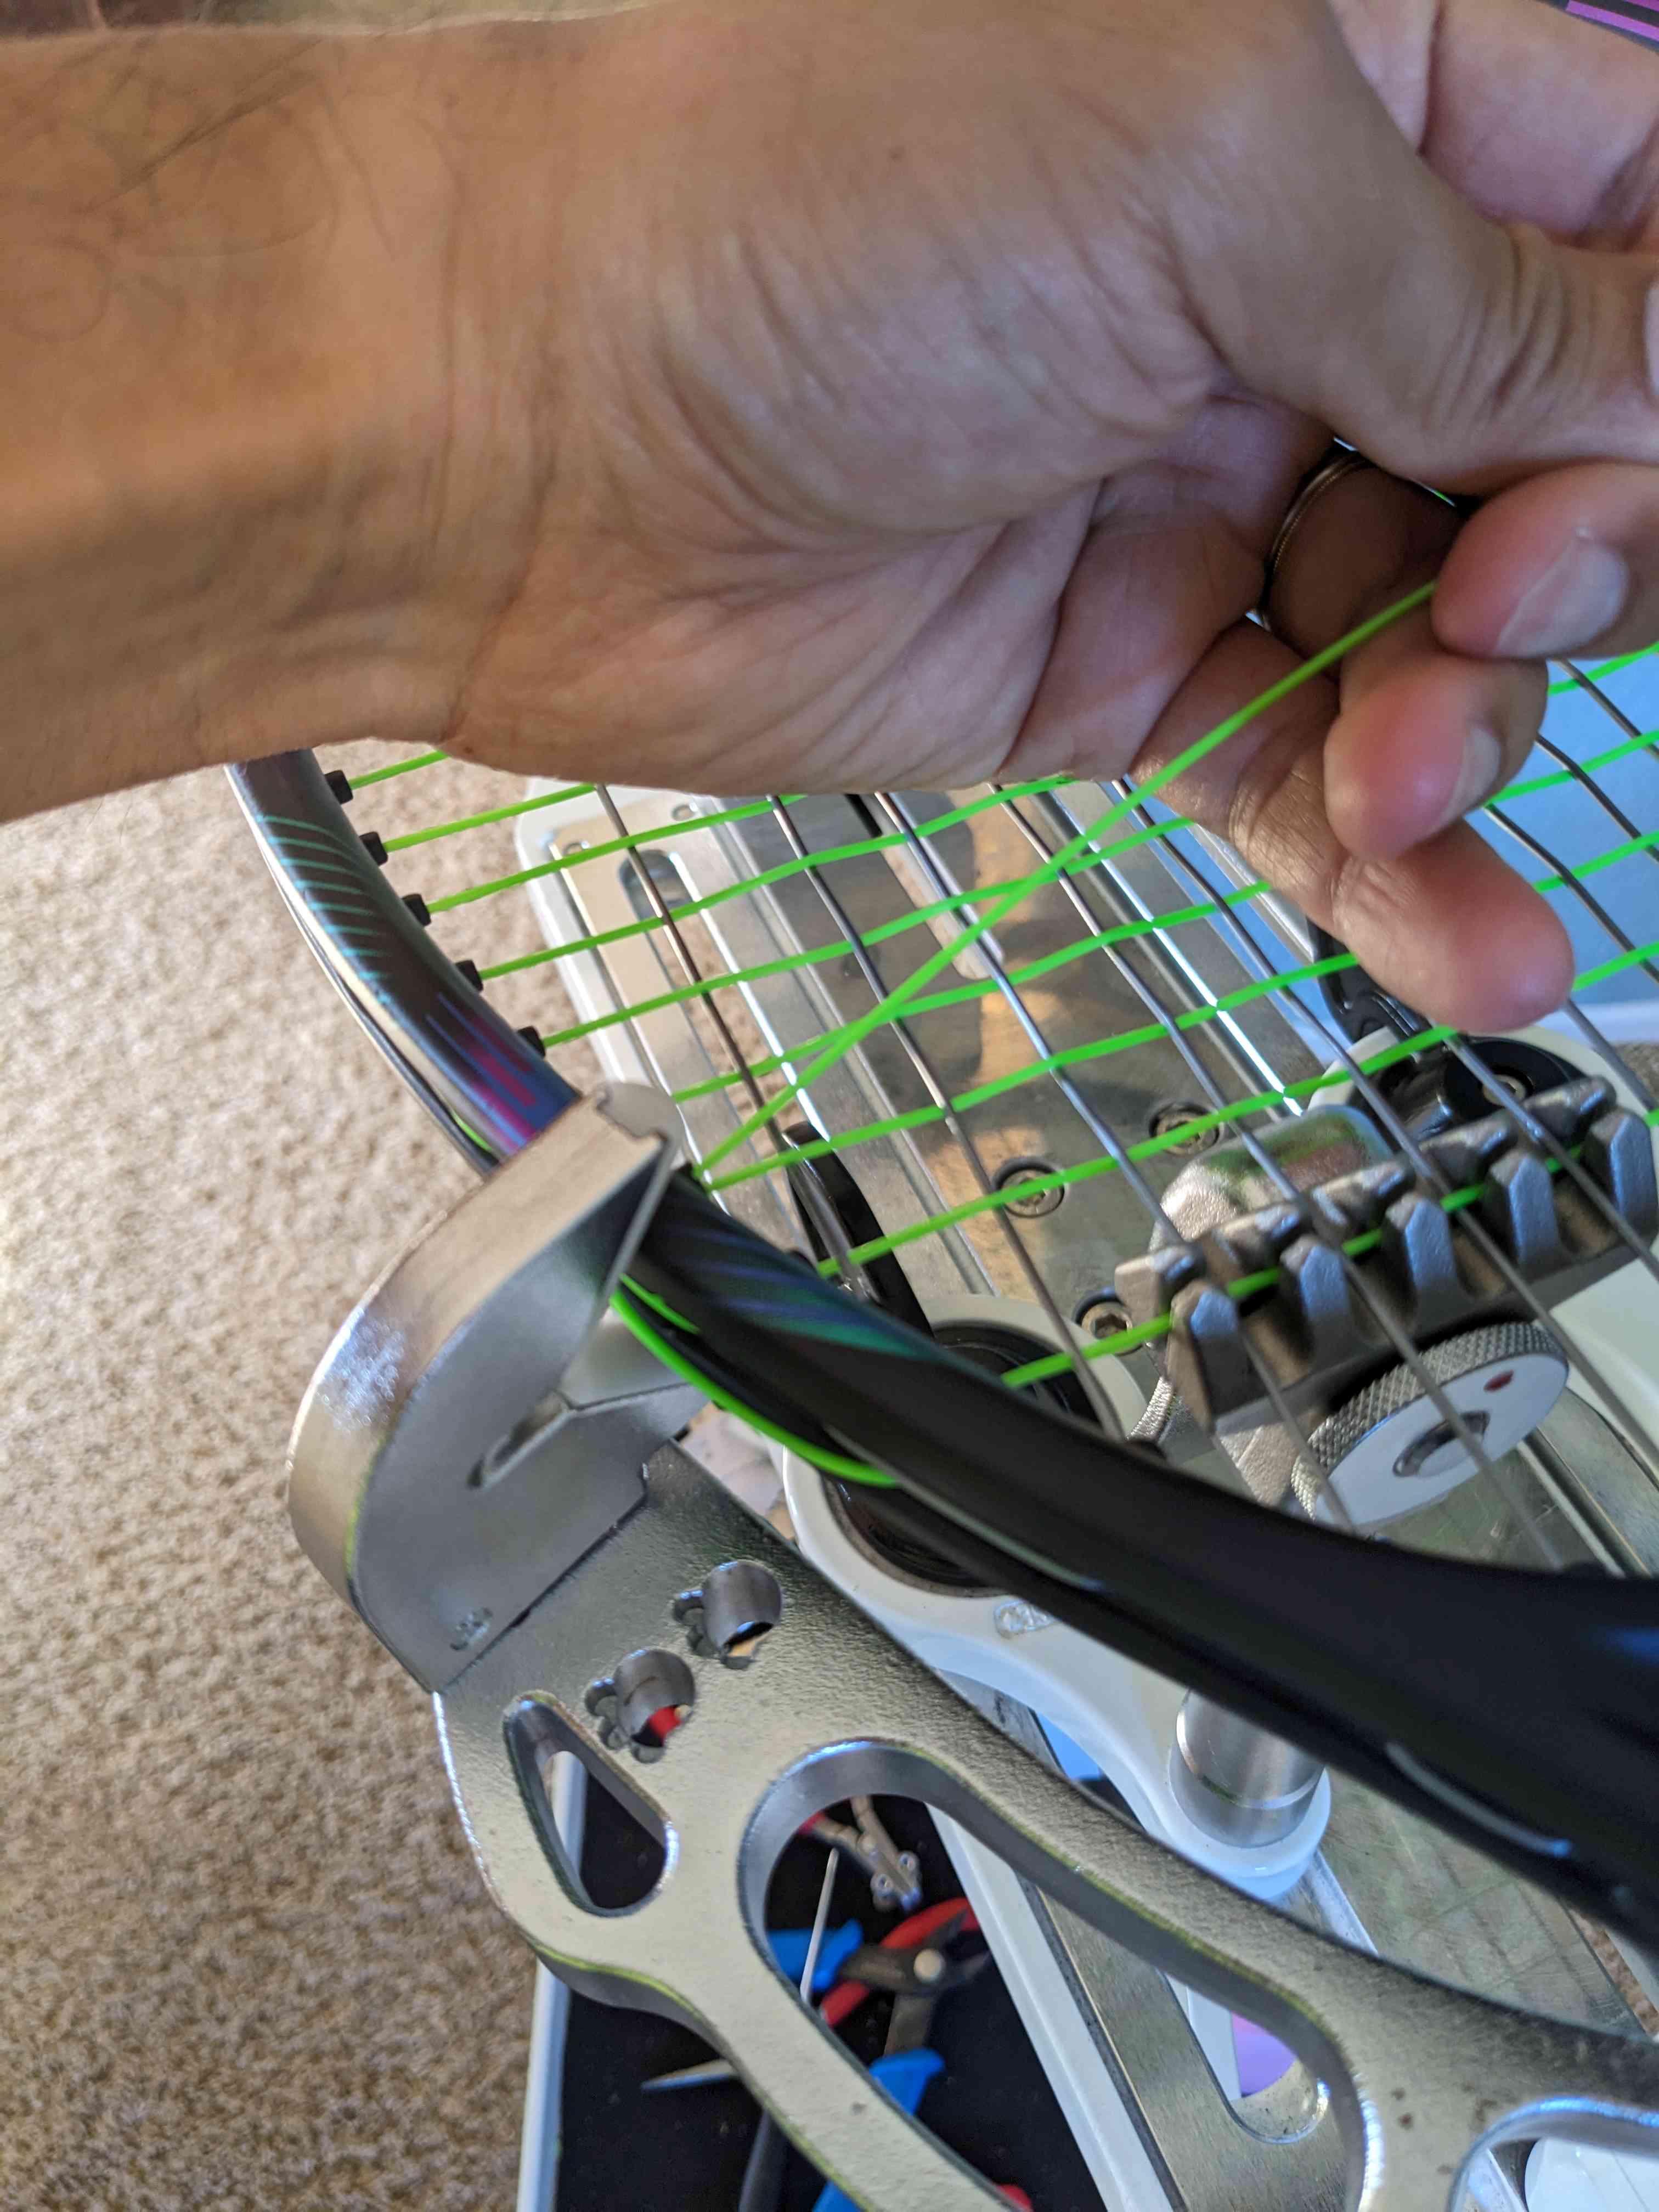
To weave the crosses quickly, guide the loose end with your middle fingers (one finger from above, one finger from below). It is easier to weave diagonally halfway, resetting in the middle, as in the following picture. (By weaving diagonally, you increase the distance between the mains, which creates more space. By resetting in the middle, you can reduce friction, which is less tiring.)
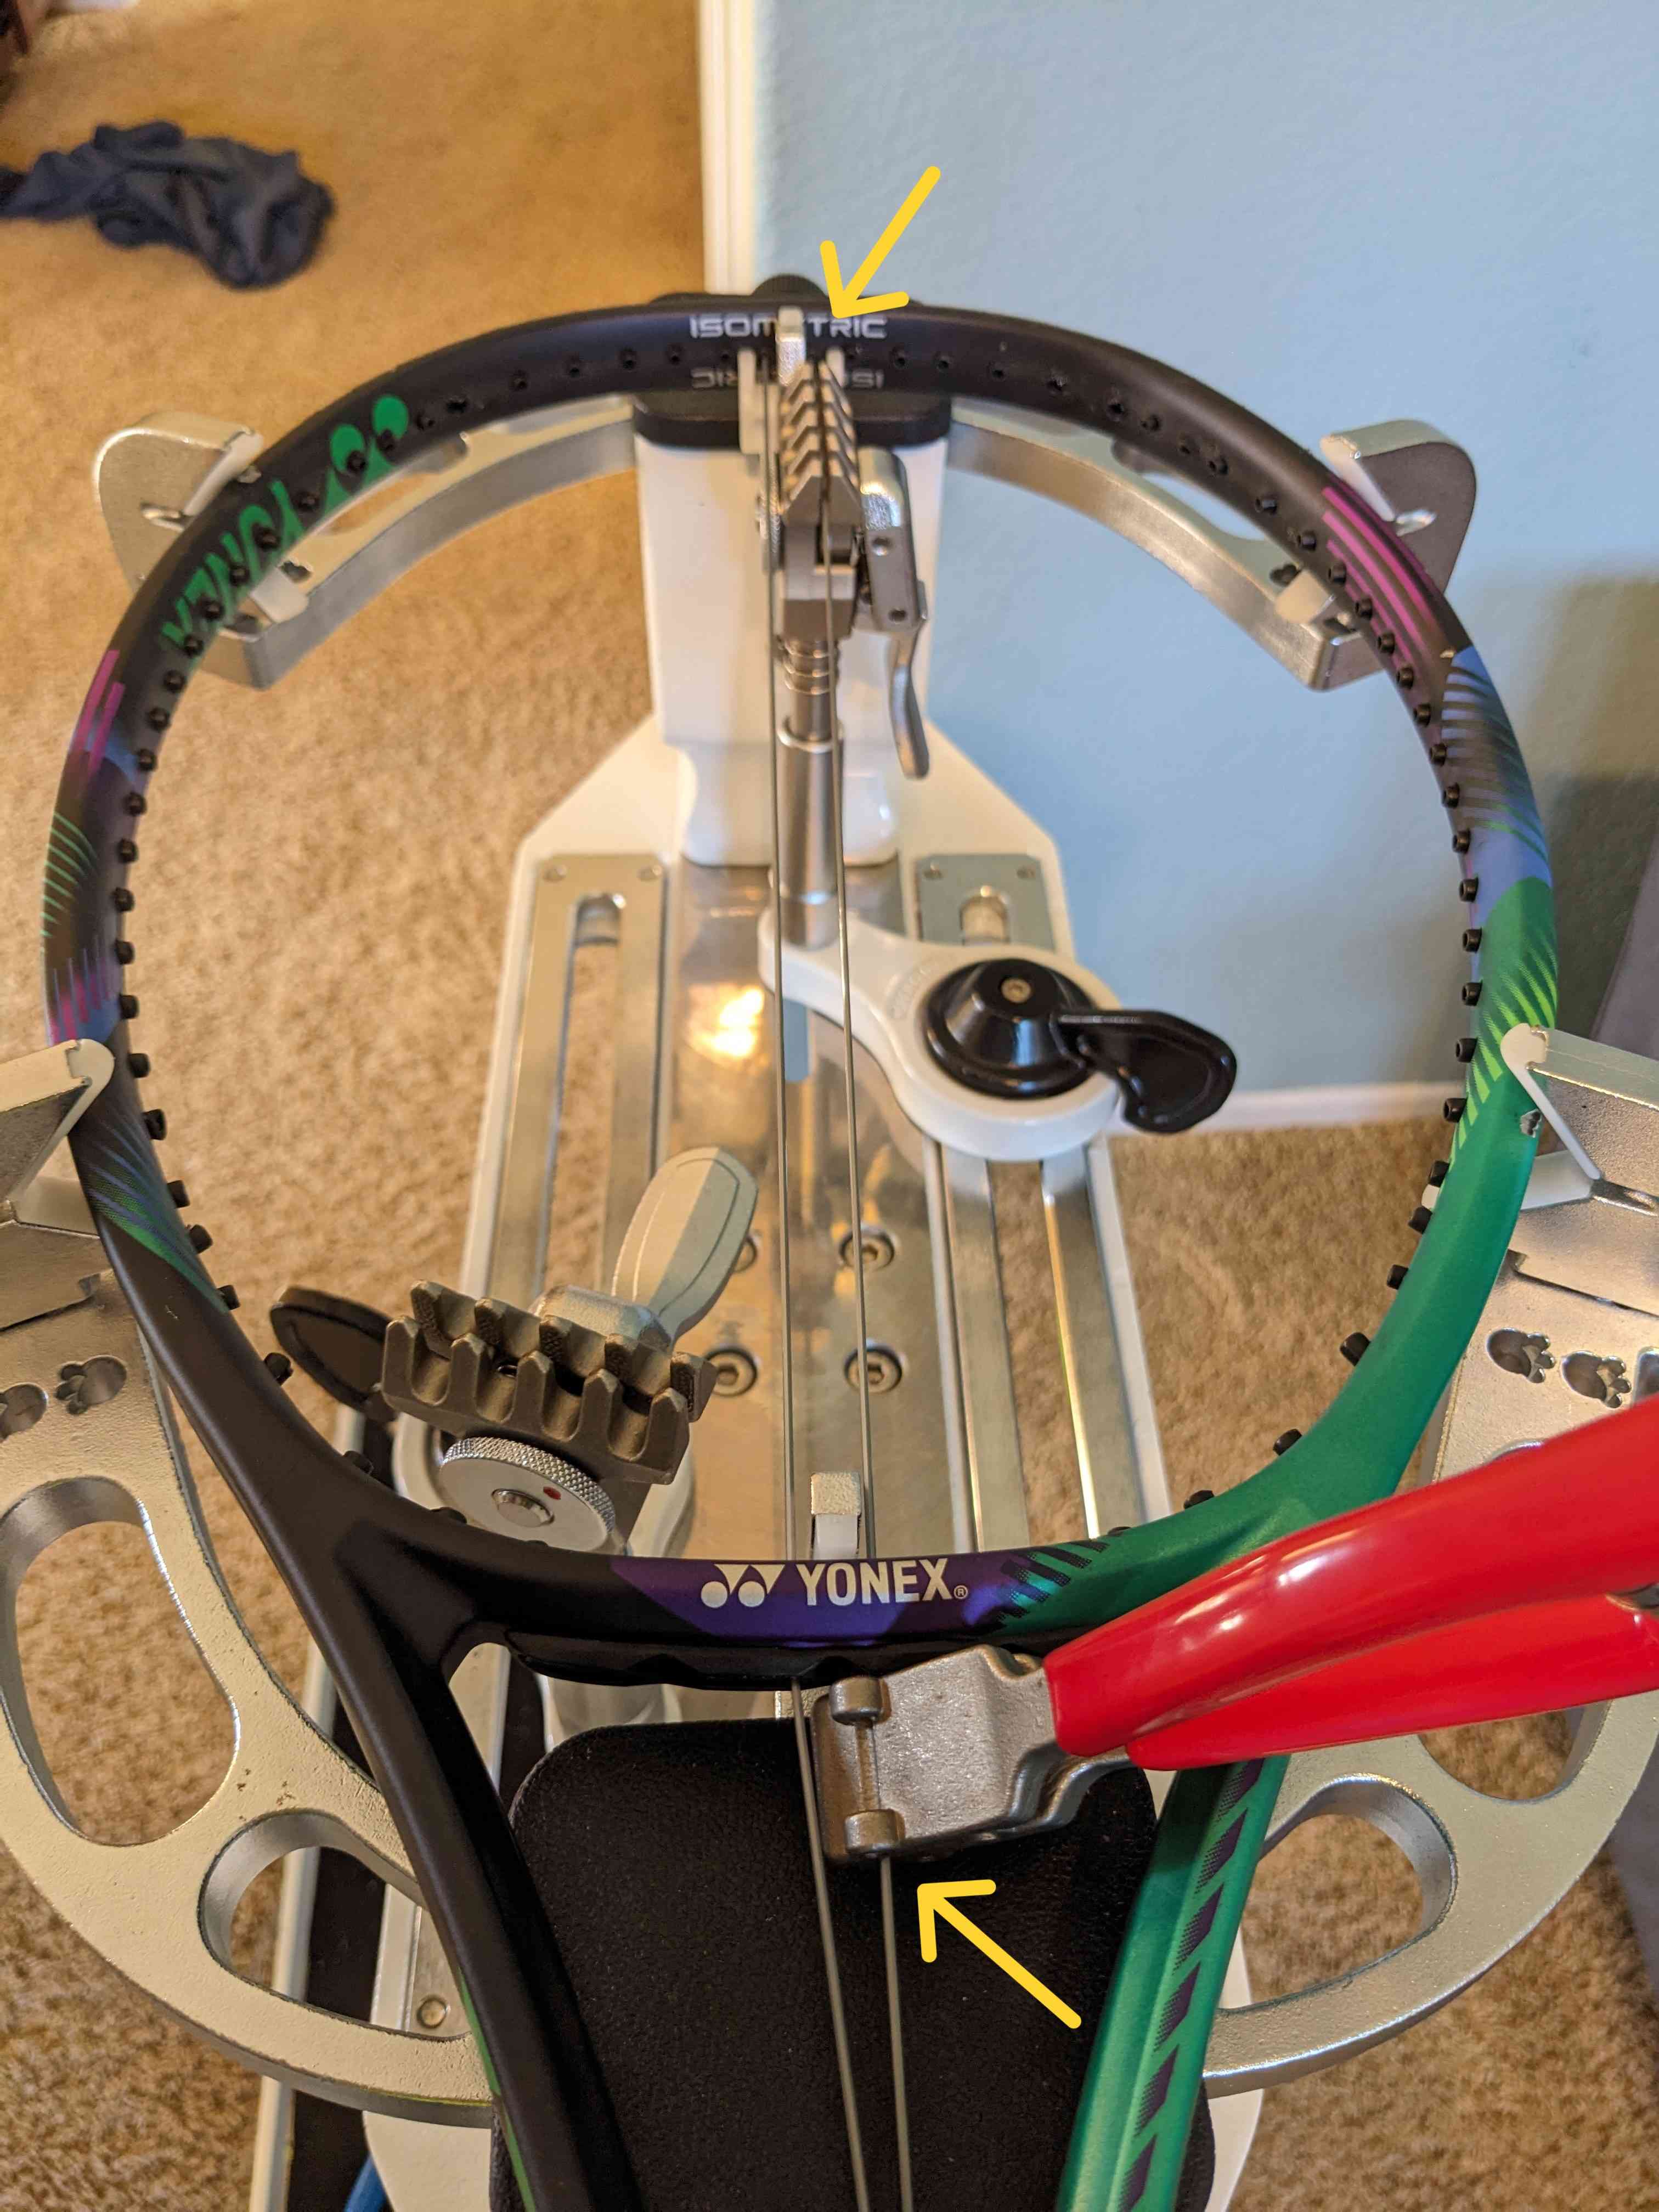
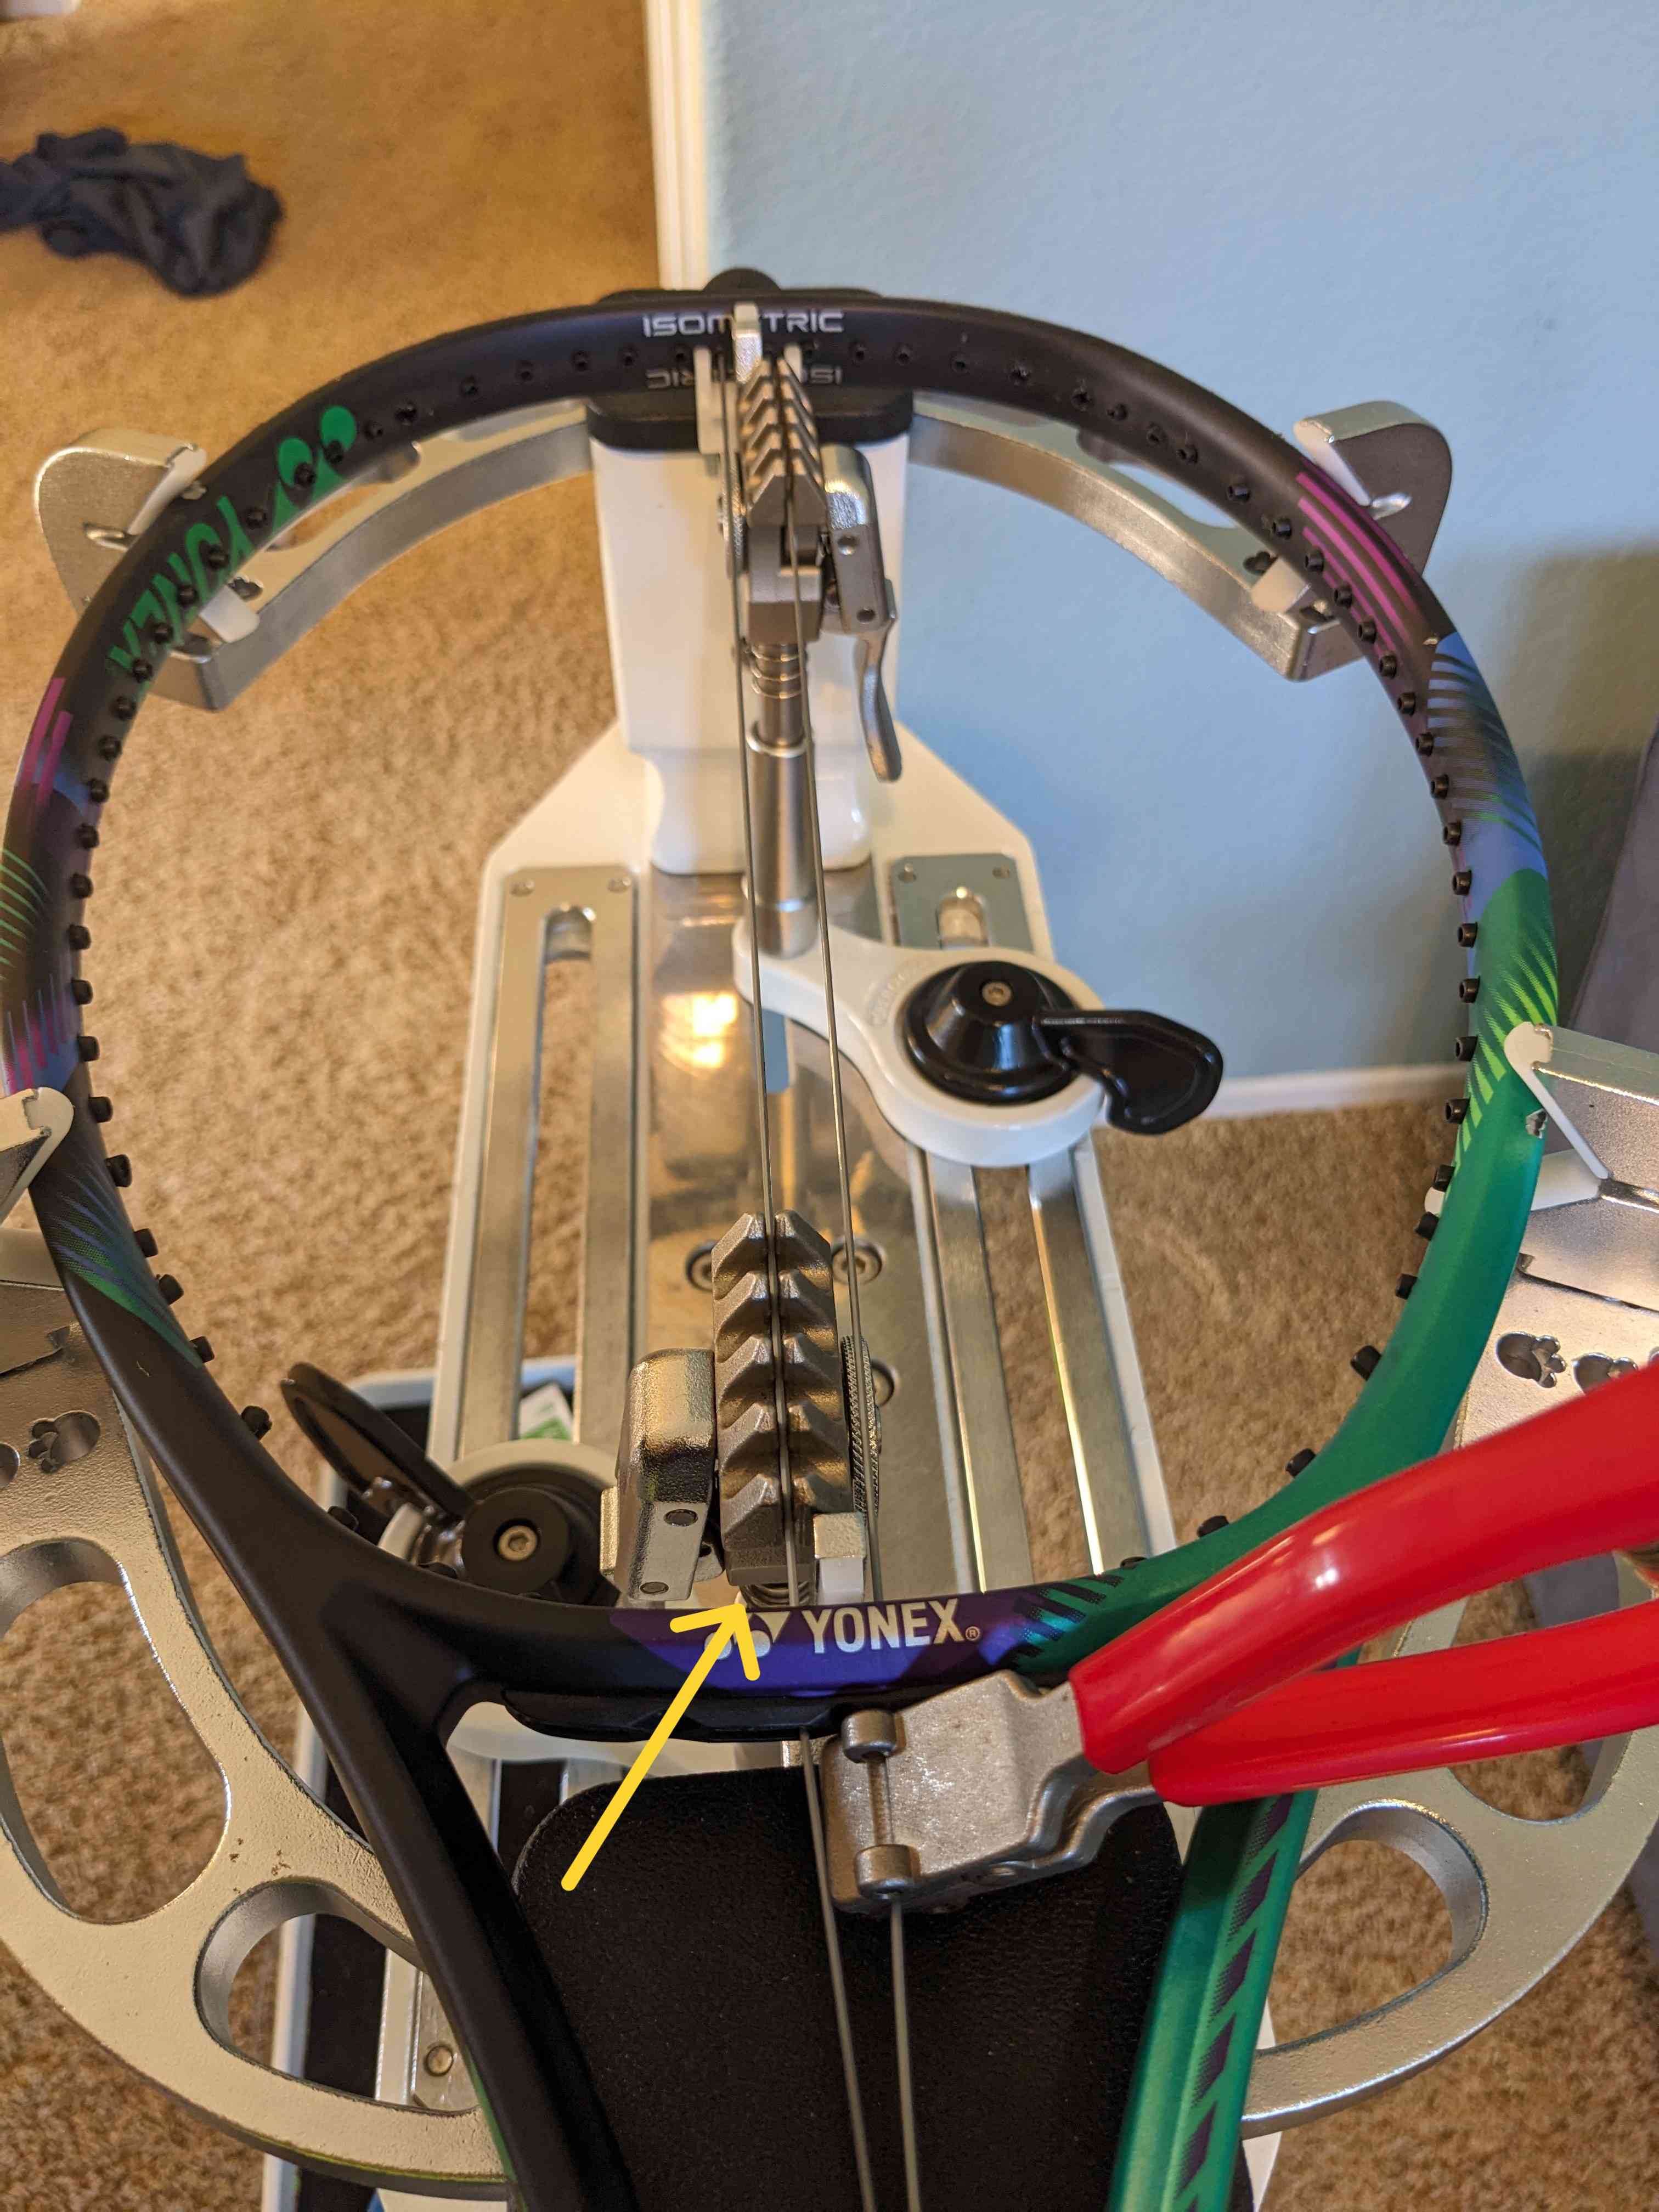
Towards the end, the mains are blocking the grommet in which the cross needs to be inserted. Use the awl to gently move the mains to create enough space for the cross to be inserted smoothly. To prevent strings from crossing each other in the grommet, if the cross is supposed to go above the main after entering the frame (like in the picture below), then go above the main in the grommet too.
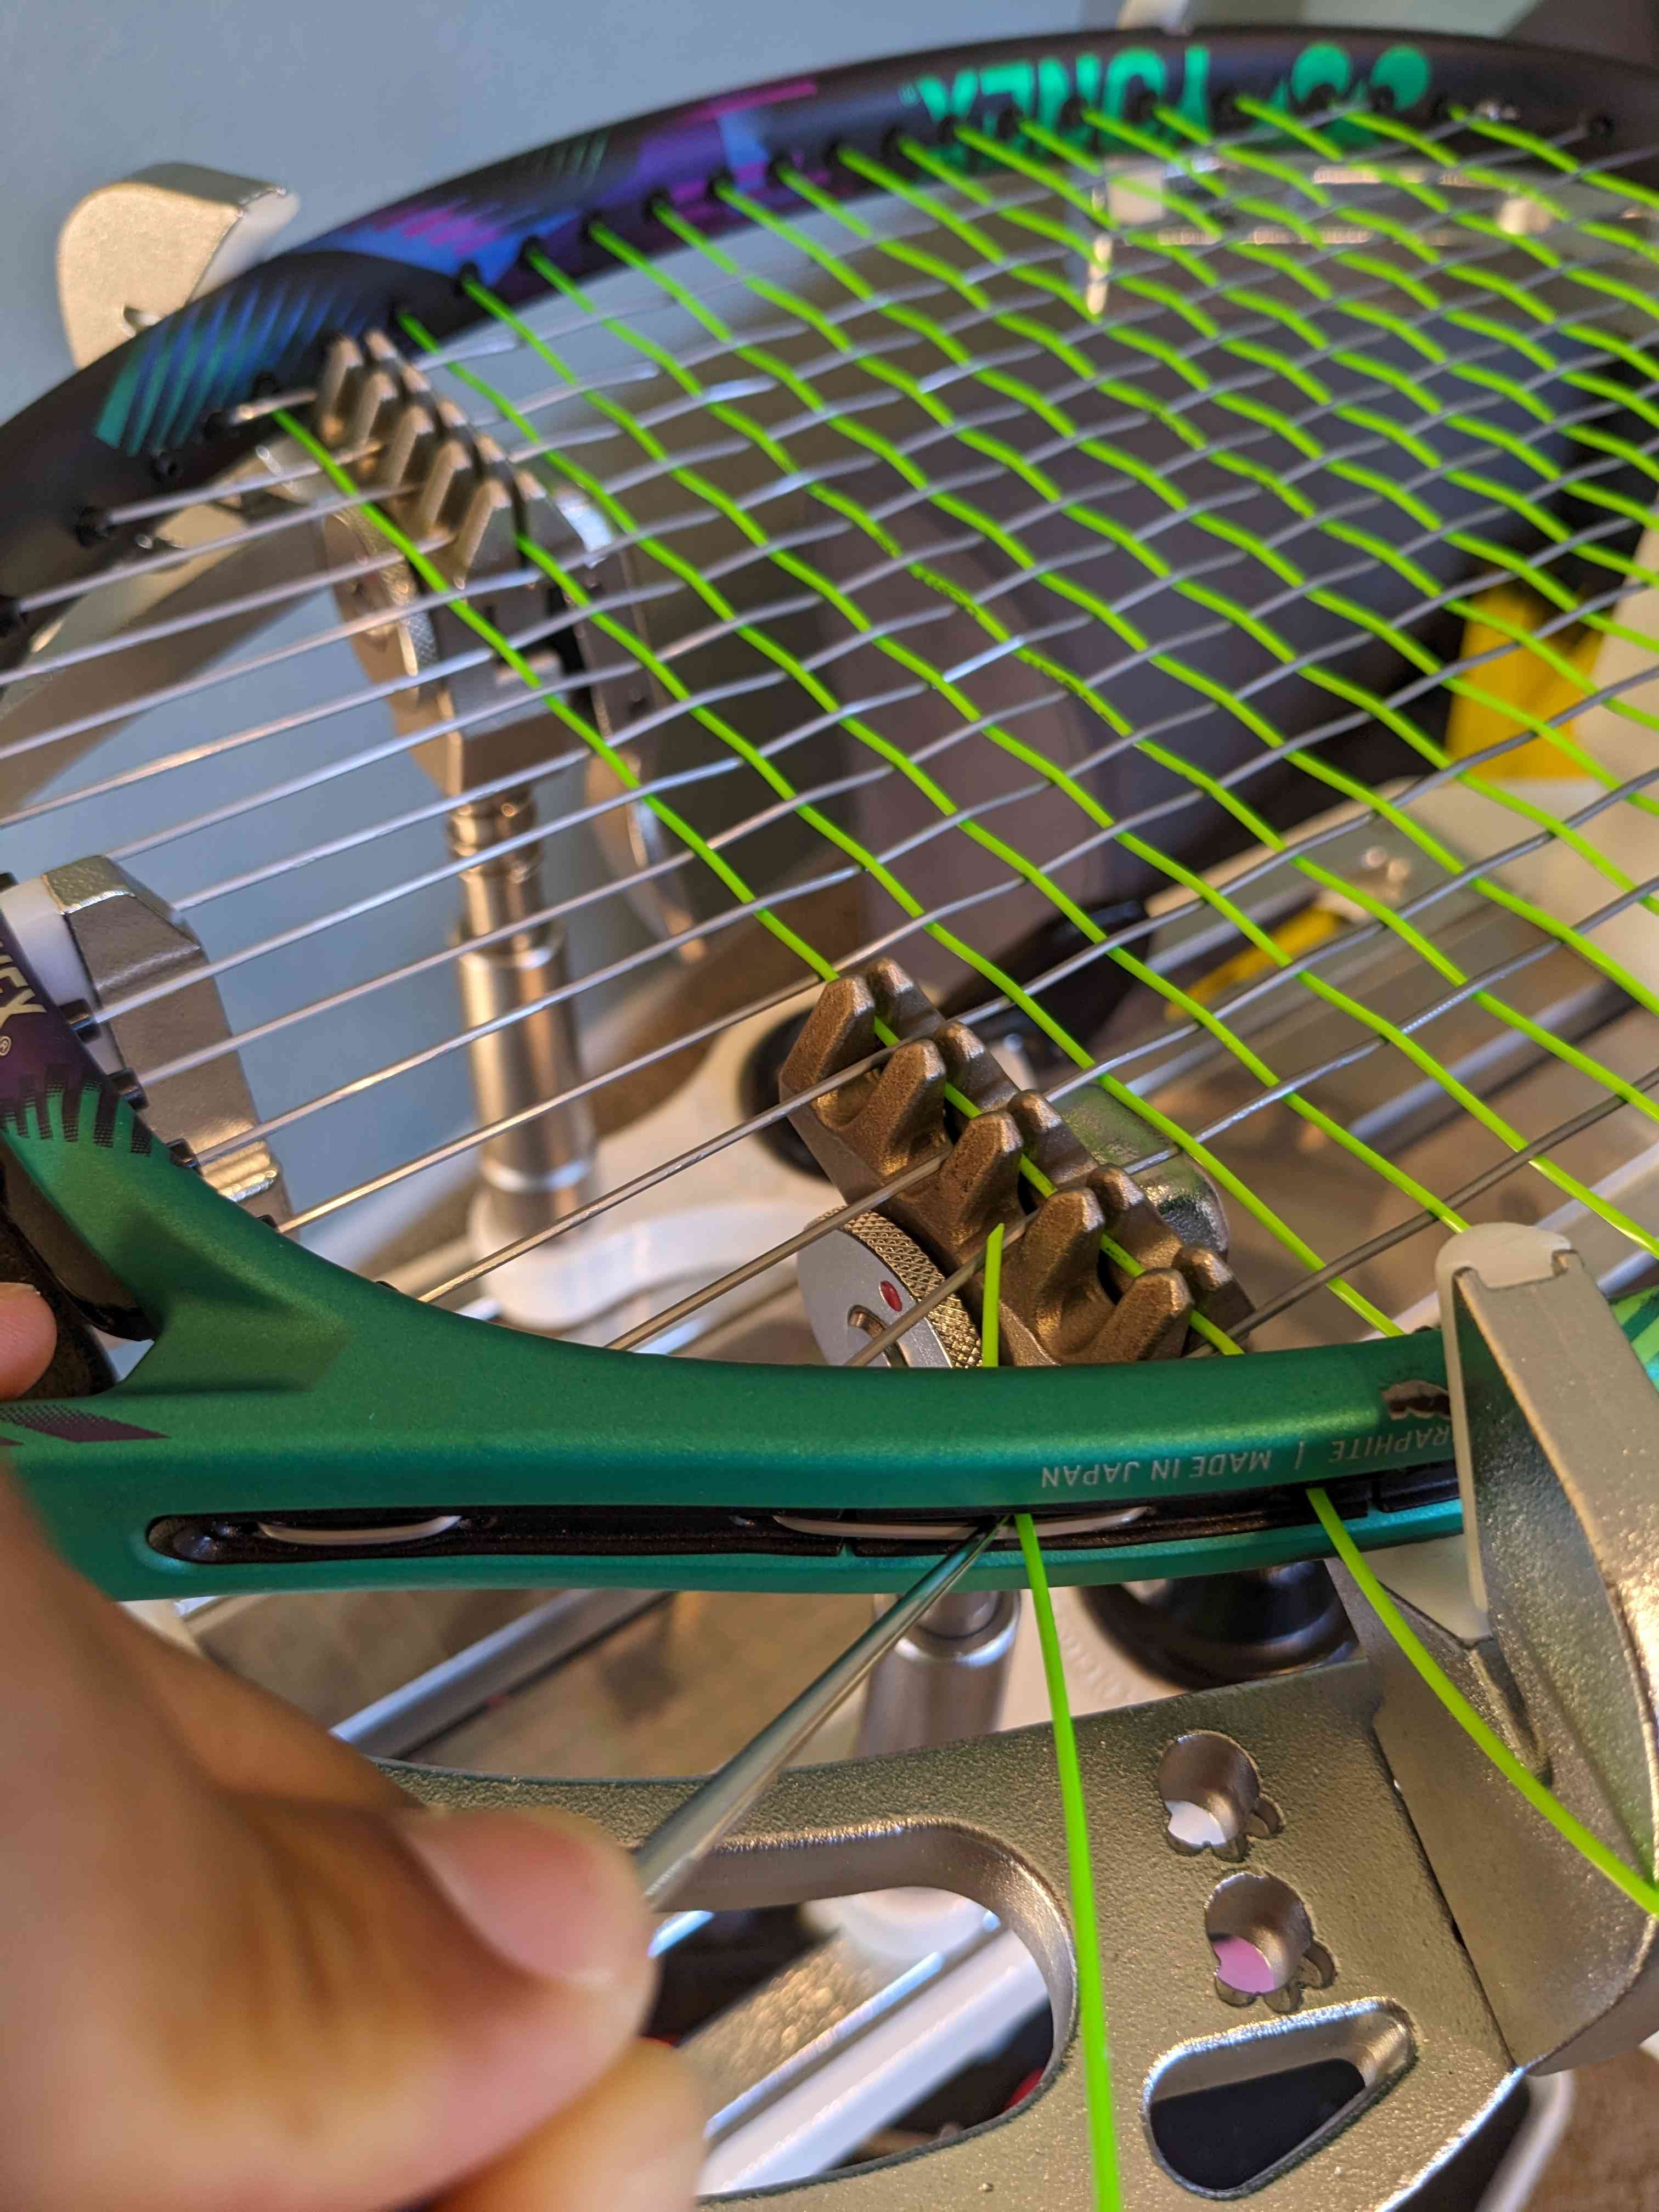
When exiting the frame in the opposite side, if you went above in the previous step, you need to go below.
Tie finishing knot
Identify the grommet to tie the finishing knot. Usually, it is not indicated, so find the grommet in which you can insert the cross smoothly.
Finally, tie a pro knot just as you did for finishing the mains.